How to Customize Thank You Page in Magento 2?
To become a successful e-commerce business, you need to take care of everything on the customer’s experience journey with your brand.
Even small aspects like a thank you page or a notice to announce order success are all parts of that journey. Obviously, at this point, you’ve already gained the trust of shoppers since they chose to buy your products. So, isn’t it nice to say thank you and show your appreciation?
In today’s blog, we’ll help you learn how to customize and display a thank you page on Magento 2 storefront easily. Let’s dive in!
How to Customize Thank You Page in Magento 2
Unfortunately, the Magento 2 default does not support creating thank you page. You need to be an expert developer to add a custom block on the order success page programmatically. However, this task requires a solid understanding of development. If you’re not an experienced developer, using the Thank You Page for Magento 2 extension would be a wiser choice.
- First, log in to your admin panel, go to
Mageplaza > Thank You Page > Configuration
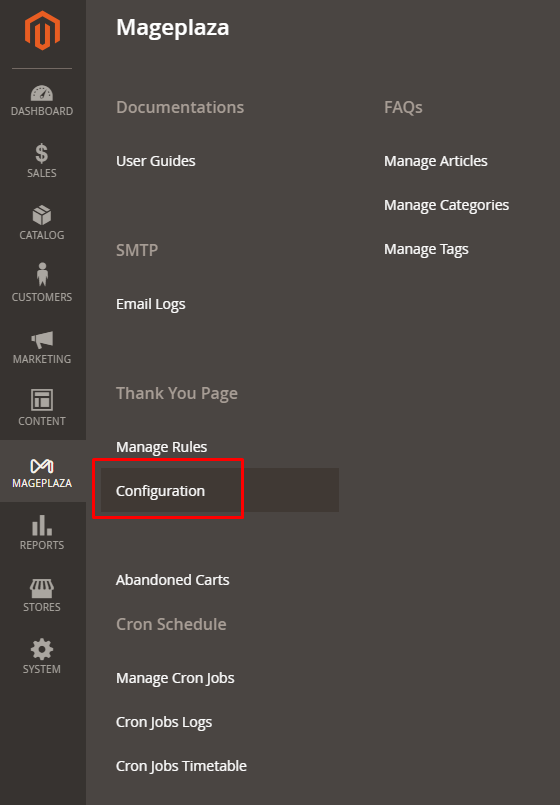
- Then, select
Yesin theEnablefield to activate the module

There are 2 types of Thank You pages: to show appreciation after customers place an order and when they subscribe newsletter. We’ll explore how to customize each case in detail.
Order Success Page
- At the Order Success Page section, select
Yesin theEnablefield

- Next, customize the page rule by navigating to
Mageplaza > Thank You Page > Manage Rules
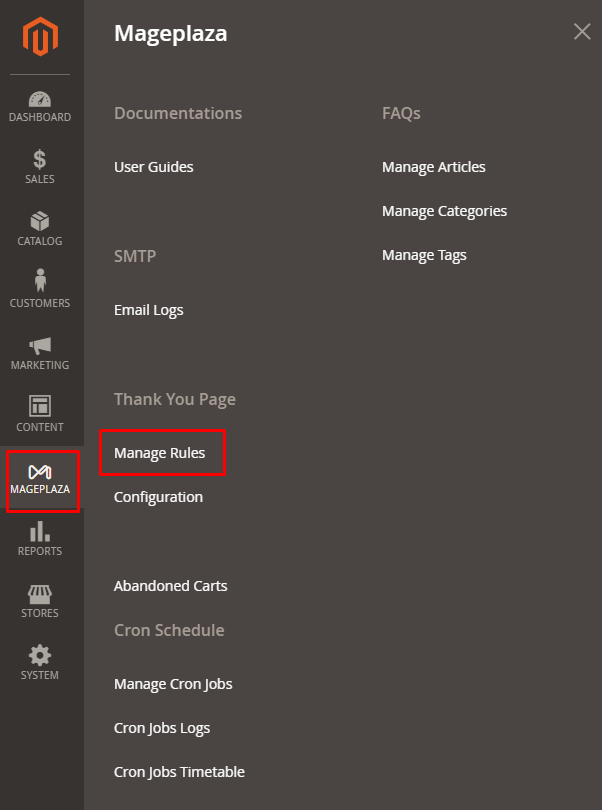
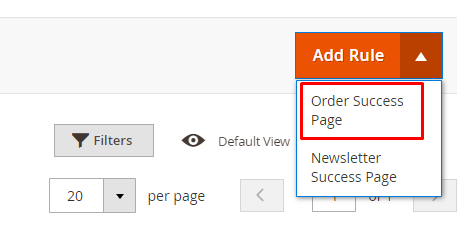
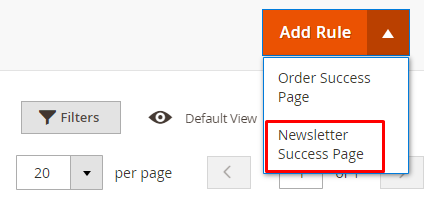
- Choose
Order Success Pagein theAdd Ruleaction like the image below.
Now, fill out the rule basic information
- Set the rule name
- Enable its status
- Choose the store views that you want to apply the template
- Select the group of customers that can see products applied to this rule
- Identify the rule priority (the smaller the number, the higher the priority)
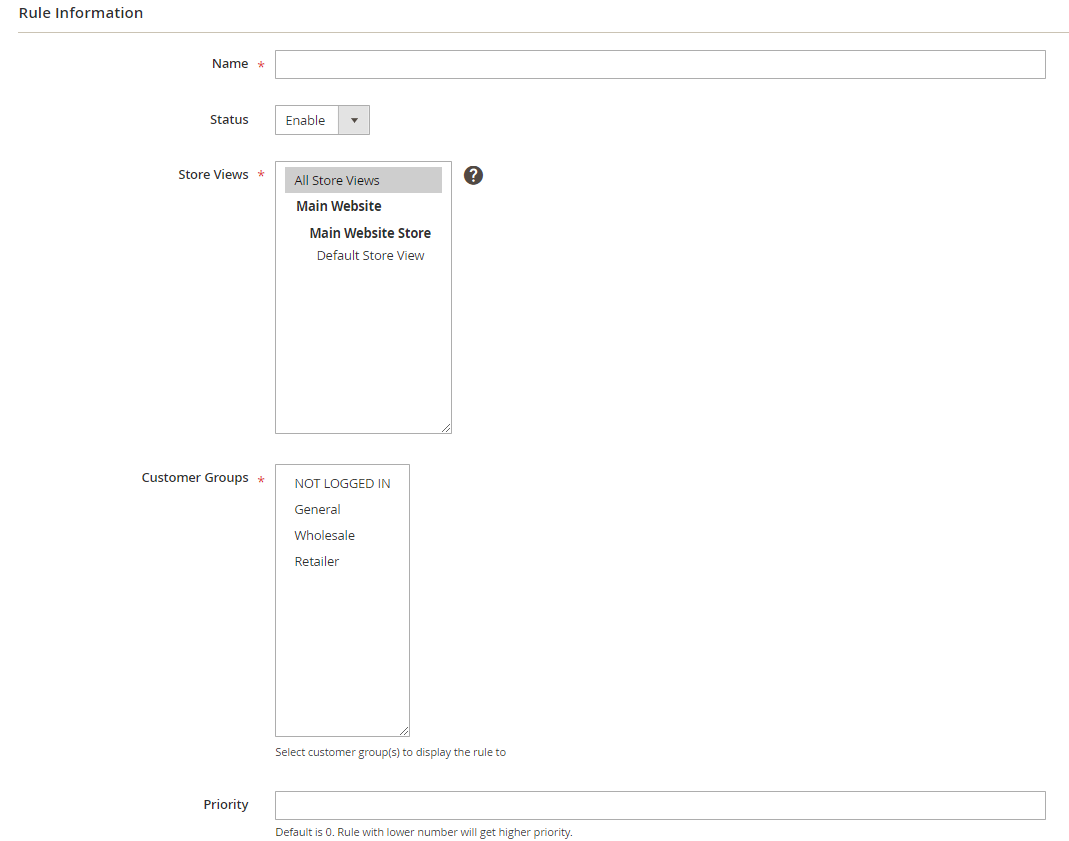
Set conditions for the rule
- Select the condition for the rule
- Example of conditions about cart: Total Items Quantity less than 10.
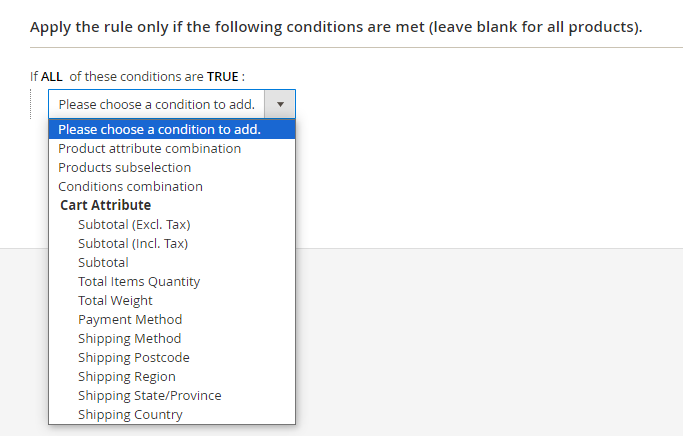
Finally, customize the thank you page layout in the Display section
-
Choose the style format: Simple or Complex
- Simple style:
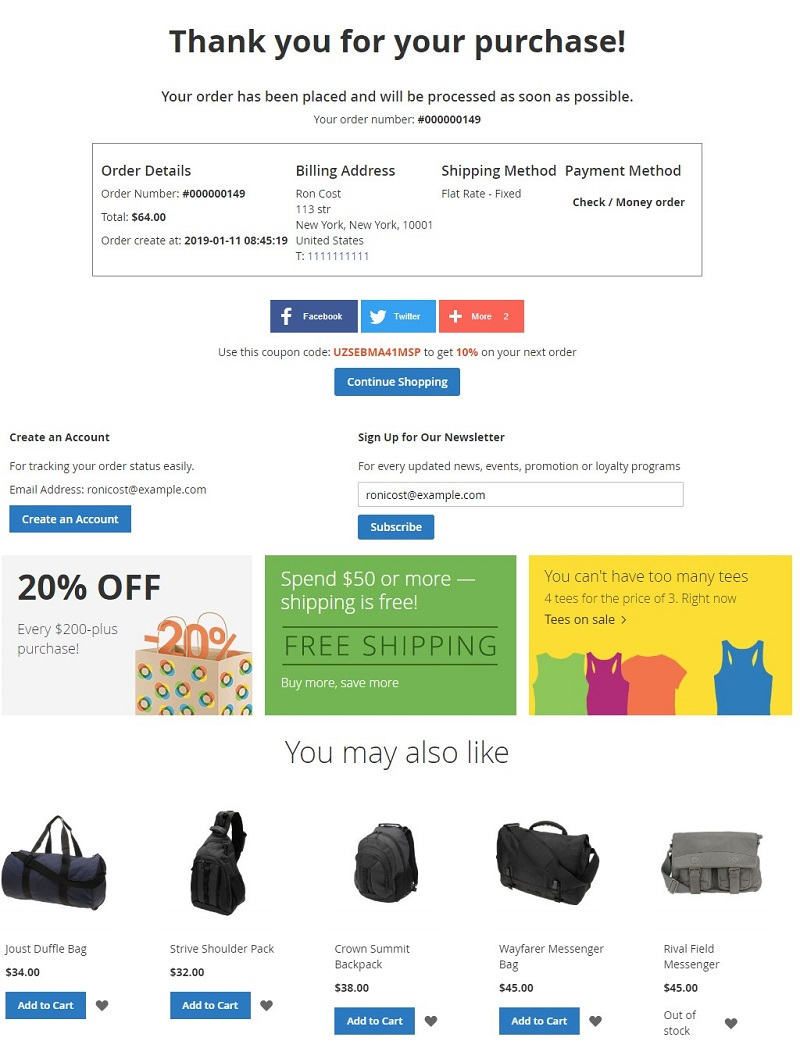
- Complex style:
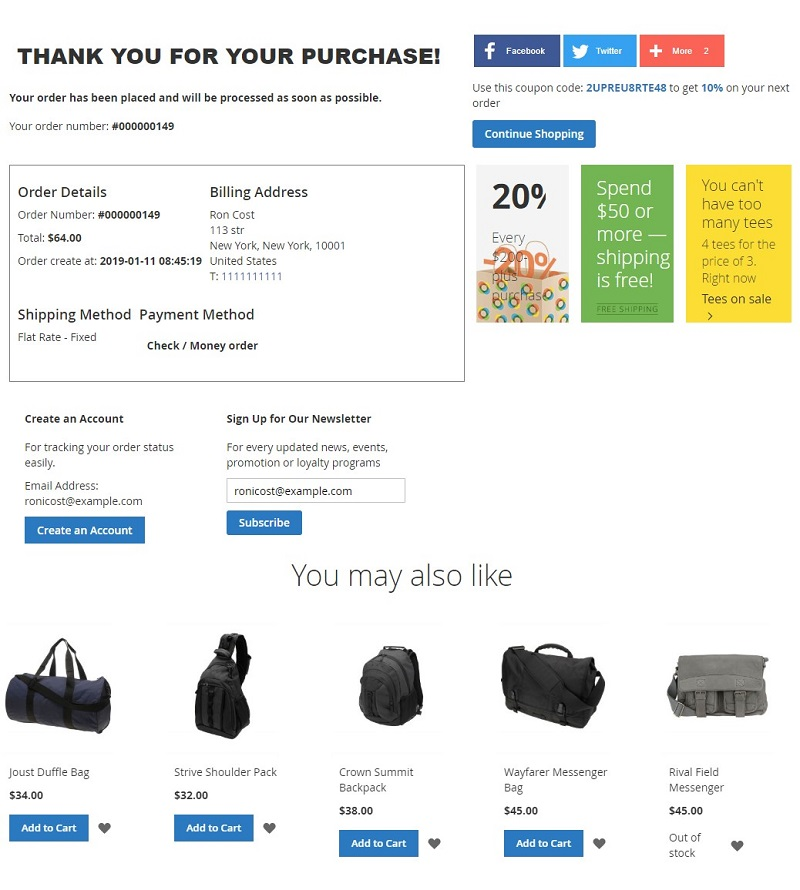
Now, it’s time to customize detailed parts of your thank you page! You can use the default configuration and edit things that you want to change, including: page title, sub-title, description, choose whether to show the Continue Shopping button, etc.
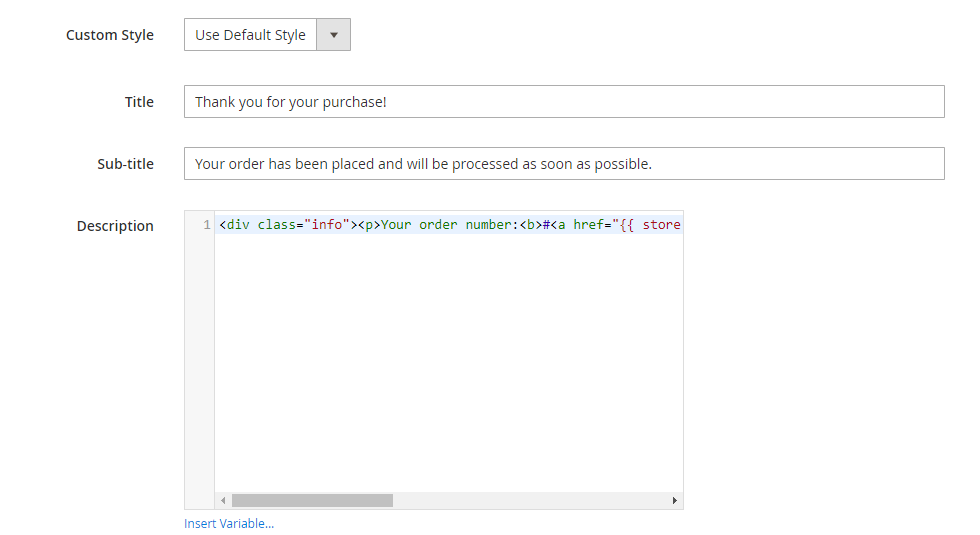
 Or, you can freely set up the page layout by choosing
 Edit Default Style
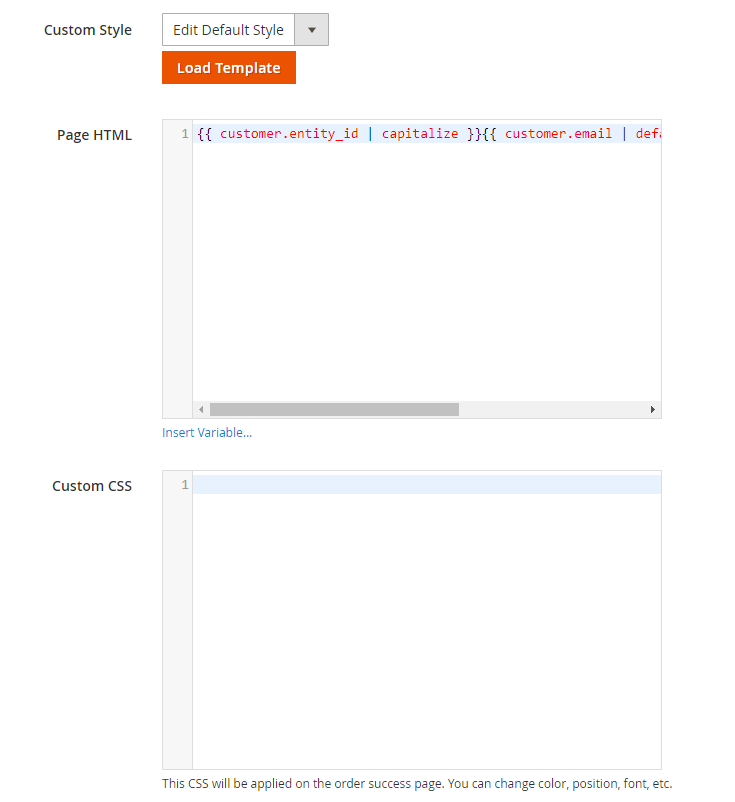
Newsletter Success Page
At the Newsletter Success Page section, select Yes in the Enable field
Route: Add the route for your Thank You Page or leave this field blank and the default route will be applied as subscribe


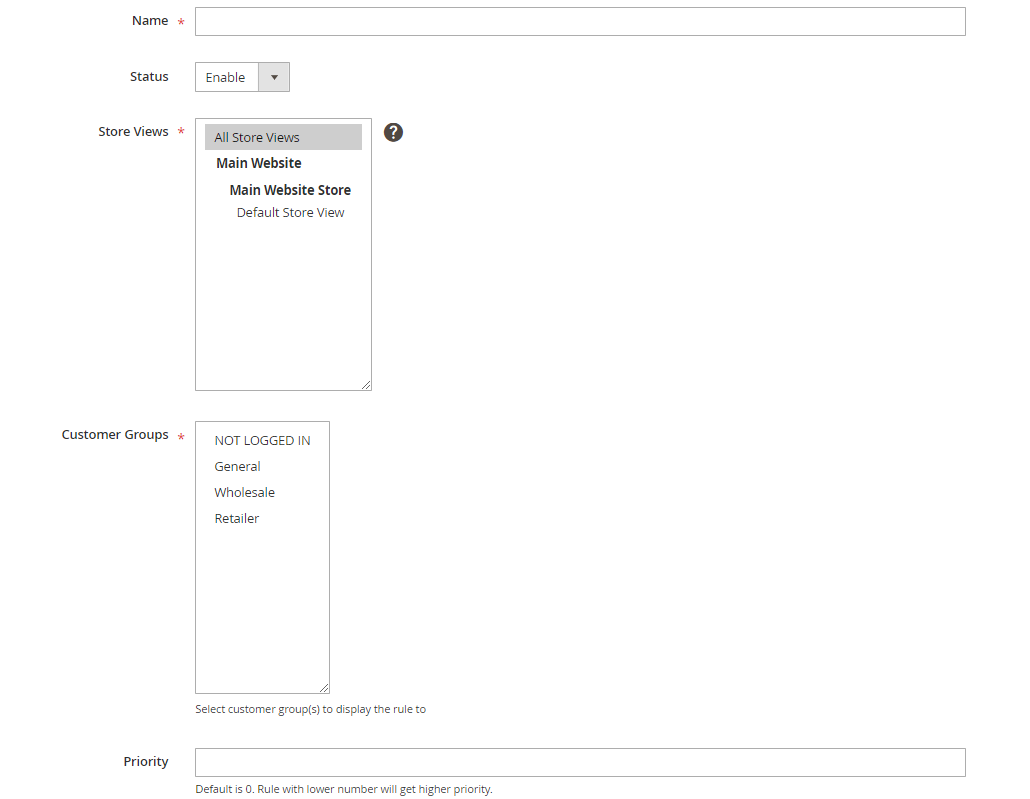
Now, fill out the rule basic information
- Provide template name
- Press
YesinEnableto use the template - Decide which store views you want to apply this template
- Choose the customer group to see products applied to this rule
- Identify the rule priority (the smaller the number, the higher the priority)
Next, customize its display
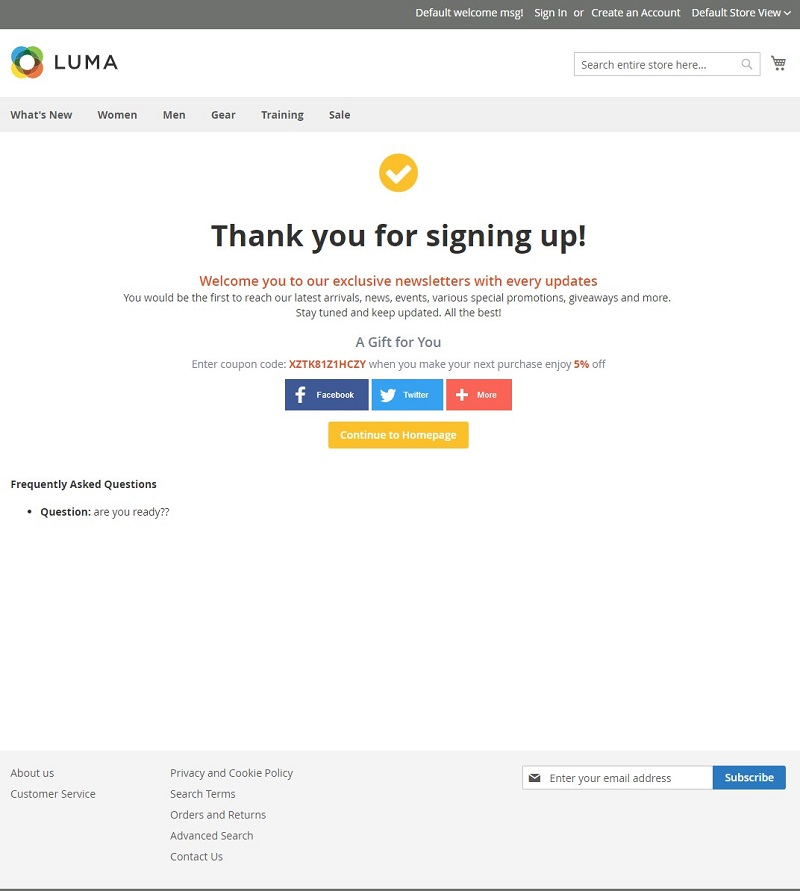
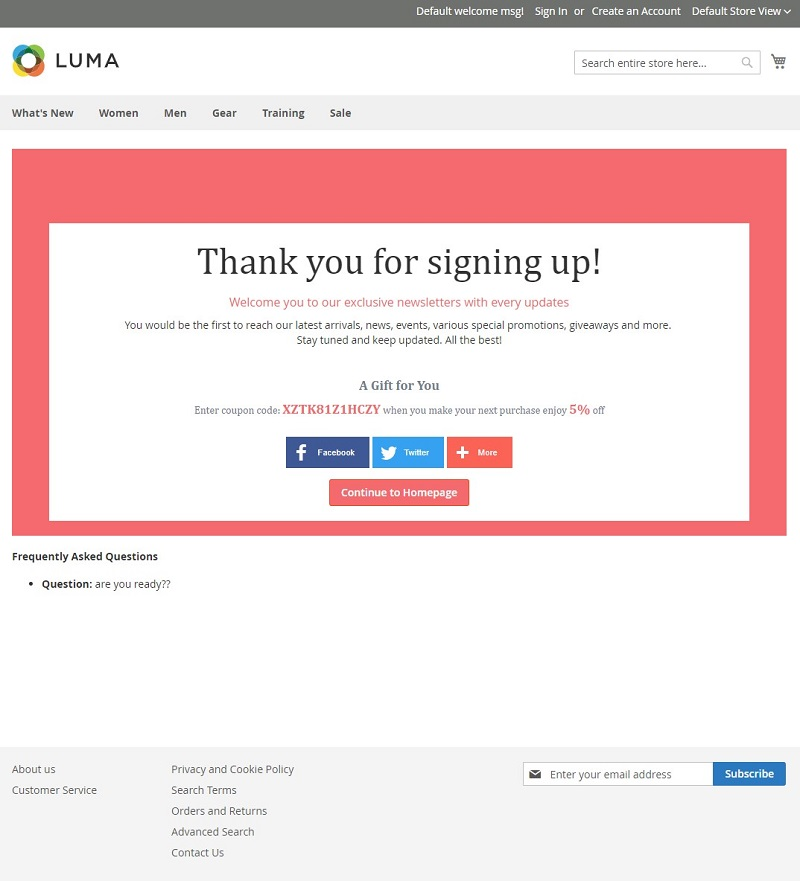
Choose among 3 premade styles
Style 1:
Style 2:
Style 3:
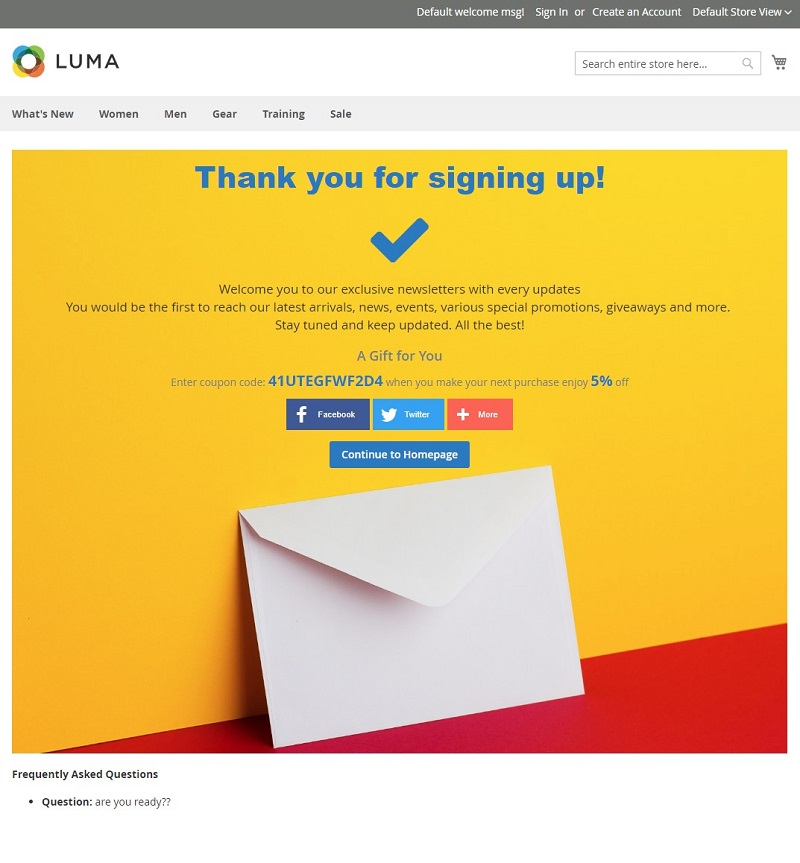
The rest are similar to creating an Order Success Page.
Wrap up
Mageplaza’s Thank You Page for Magento 2 extension helps online stores take complete control of how the order success and newsletter success pages look on the store frontend. While using the module, users can also facilitate displaying coupons, social sharing, FAQs, etc.
To learn more about this advanced tool, please visit Magento 2 Thank You Page and contact us if you have any questions.


![Top 20+ Must-have Shopify Apps for 2025 [Free & Paid] - Mageplaza](https://cdn2.mageplaza.com/media/blog/must-have-shopify-apps/top-must-have-shopify-apps.png)
![[2025 Updates] Top 10+ Upsell Apps for Shopify - Mageplaza](https://cdn2.mageplaza.com/media/blog/best-upsell-shopify-app/cover.png)