

Magento 2 Shopping Cart Configuration
Imagine your Magento 2 shopping cart as the heart of your online store – it’s where the magic of converting browsers into buyers happens. Just like a physical store’s checkout counter, your online cart is the final step before a purchase is finalized. However, unlike customers who buy in a traditional store, those who shop online are only one click away from abandoning their shopping cart and leaving your website. That’s why a well-configured shopping cart is absolutely essential.
Think of it this way: a cluttered, confusing, or slow cart is like a long line at the checkout counter. Customers get frustrated, and impatient, ultimately deciding it’s not worth the hassle. On the other hand, a streamlined, intuitive, and efficient cart makes the checkout process a breeze, encouraging customers to complete their purchases and return for more.

In this guide, we’ll walk you through the key configurations of the Magento 2 shopping cart to ensure it’s user-friendly, optimized, and drives conversions.
Understand The Magento 2 Shopping Cart
Your Magento 2 shopping cart is where customers collect the products they intend to purchase. It’s a critical part of the customer journey, so it needs to be easy to use and understand. Key elements include:
- Add to Cart: The process of adding items to the cart should be seamless.
- Cart Page: This page displays all items added to the cart, along with product details, quantity options, and often related products or upsells.
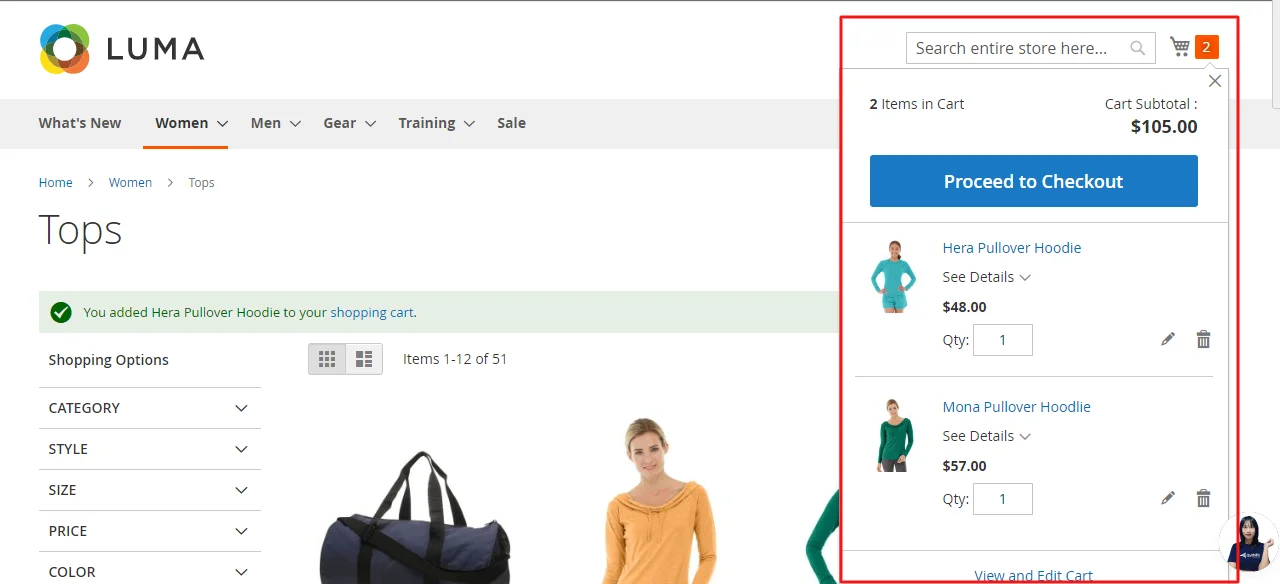
- Mini Cart: A compact version of the cart, typically located in the header, provides a quick overview of the cart’s contents.
- Checkout: The gateway from the cart to the final purchase, where customers enter their shipping and payment details.
1. Configuring The Redirect Link To Magento 2 Shopping Cart
Where Does the Cart Lead? You can determine where customers land after adding an item to their cart. By default, it redirects to the shopping cart page.
Customization Options:
- Stay Put: After adding an item, allow customers to remain on the current product page for further browsing.
- Direct to Cart: Send them directly to the shopping cart page for a faster checkout experience.
How To Set Up The Magento 2 Cart Redirect Link
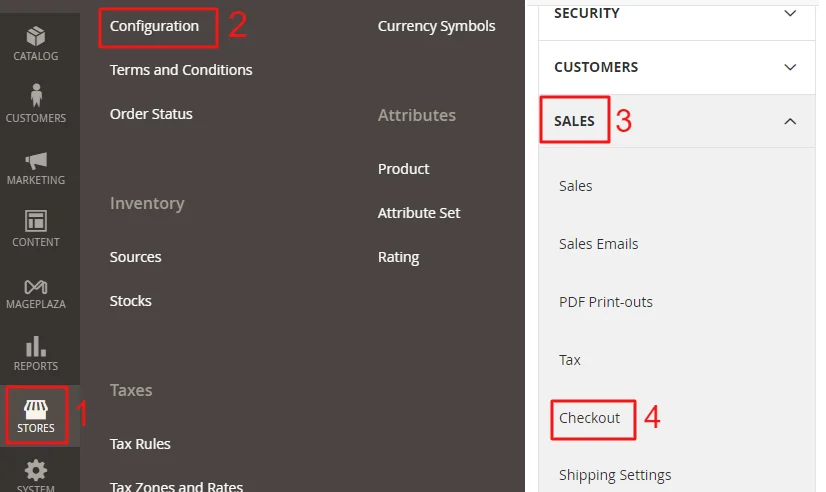
Step 1: Access your Magento 2 admin panel > Stores > Settings > Configuration > Sales > Checkout
Step 2: Expand the Shopping Cart section
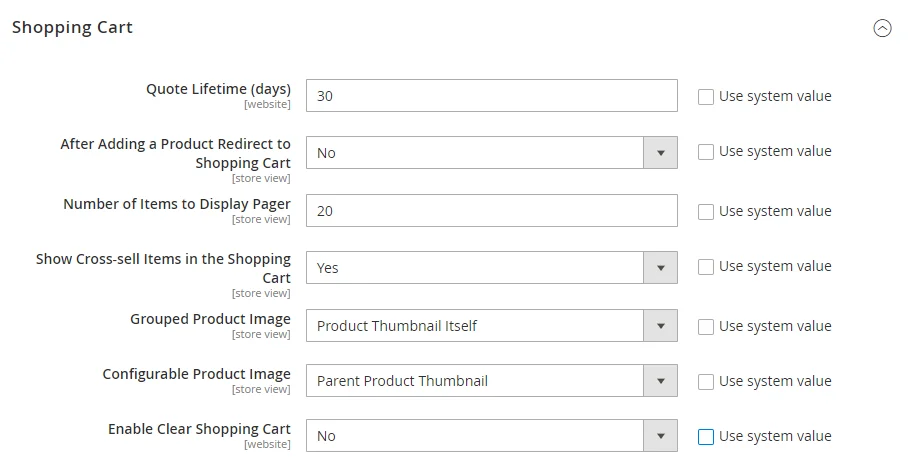 Step 3: Look for the After Adding a Product Redirect to Shopping Cart option. Choose one of the following options:
- No: This keeps users on the product page after adding an item to the cart.
- Yes: Redirects users to the shopping cart page immediately after adding a product.
Step 4: Click the Save Config button to apply your changes
2. Configuring The Mini Sidebar For Magento Cart
A Quick View for Busy Shoppers: The mini sidebar cart provides a compact view of items currently in the cart, accessible from any page.
Customizing the Mini Cart:
- Number of Items Displayed: Choose how many products appear in the sidebar.
- Show a Scrollbar? Set whether to display a scrollbar if the cart holds more items than allowed for display.
How To Set Up The Mini Cart In Magento 2
Step 1: Continue on the Checkout section like in step 1 above when setting the redirect feature. Scroll down and expand the Mini Cart section
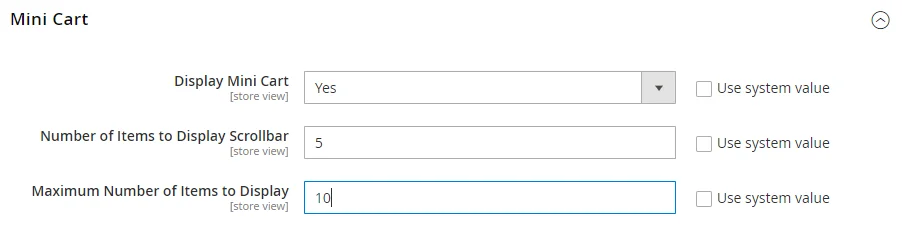
Step 2: Configure settings such as:
- Display Mini Cart: Choose whether to show just the number of items or also include the total price.
- Number of Items to Display Scrollbar: Specify the number of items that can be displayed in the sidebar. The scrollbar may not activate before the items are displayed.
- Maximum Number of Items to Display: Limit the number of items shown in the mini cart.
Step 3: Save Config.
3. Configuring The Magento 2 Cart Link
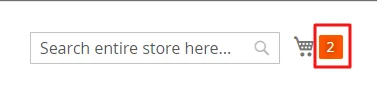
Easy Cart Access: The cart link allows customers to quickly access the contents of their shopping cart from any page.
Customization Options:
- Display item quantities: Displays the total number of products in the cart and the specific item amounts.
- Display number of items: Simply display the count of items in the cart, regardless of quantity.
Steps To Configure The Magento Cart Link
Step 1: Scroll up and expand the My Cart Link section above the Mini Cart settings.

Step 2: Choose how the cart summary is displayed in the link:
- Display Item Quantities: Total number of items with their quantities.
- Display Number of Items in Cart: Only the total number of unique items.
Step 3: After finishing adjusting, click Save Config.
4. Configuring The Gift Options For Magento 2 Cart
Gift Options in Magento 2: When customers shop online, they often want to send items as presents. Just like buying a gift conventionally, they may desire gift wrapping or attaching a small wishing card. Magento 2’s Gift Options feature caters to these needs. Here’s how it works:
- Gift Messages: Customers can add personalized gift messages to their orders and individual items. For example, they can express well wishes or include a special note.
- Gift Wrapping: Shoppers can choose gift-wrapping options for each item in their cart.
- Gift Receipts: You can include a gift receipt with the entire order.
- Printed Cards: Customers can add greeting cards to their orders.
Steps To Enable Gift Options
Step 1: Go to Stores > Settings > Configuration > Sales > Sales > Gift Options.

Step 2: To activate gift messaging, Set Allow Gift Messages on Order Level and Allow Gift Messages for Order Items to Yes.
Step 3: Further customize the gift options:
- Allow Gift Wrapping: Enable or disable gift wrapping.
- Gift Wrapping Price: Set a price for gift wrapping if applicable.
- Printed Card Price: Set a price for printed gift cards if offered.
Step 4: Save Config.
5. Configuring Persistent Magento 2 Shopping Cart
Remember the Cart: Enable the persistent shopping cart feature to have a customer’s cart contents saved for a specific timeframe, even if they close their browser. This helps them continue shopping later without losing their selections.
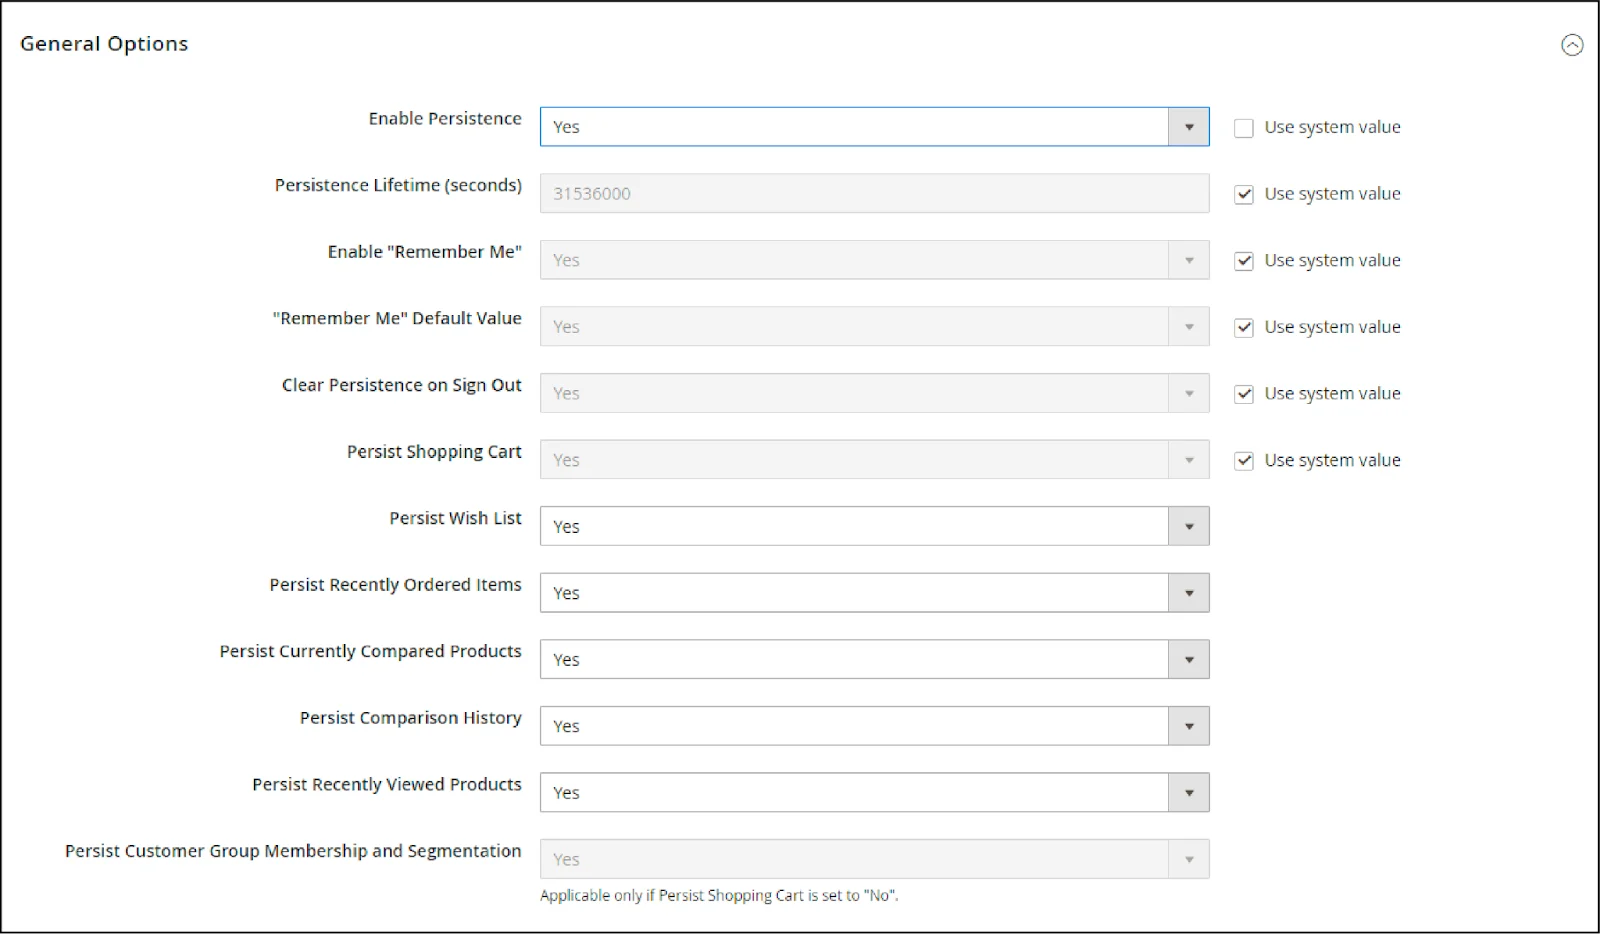
Customization Options:
- Enable Persistence: Choose Yes to activate the persistent cart feature.
- Persistence Lifetime: Set the duration (in seconds) for which the cart will be stored in the customer’s browser.
- Enable Remember Me: Allow customers to choose if they want their cart saved upon checkout for future visits.
Steps To Configure Persistent Magento 2 Shopping Cart
Step 1: Go to Stores > Settings > Configuration > Customers > Persistent Shopping Cart.
Step 2: Adjust settings:
1, Enable Remember Me:
- Yes: Displays the “Remember Me” checkbox on the login page, allowing customers to save cart information.
- **No: Persistence is enabled, but customers can’t choose to save their information.
2, Clear Persistence on Log Out:
- Yes: The cart is cleared when a logged-in customer logs out.
- No: The cart is saved even when a logged-in customer logs out.
3, Persist Shopping Cart:
- Yes: The cart is restored if a shopper logs in or creates a new account.
- No: The cart is not saved for guests after their session expires.
4, Persist Wish List, Recently Ordered Items, etc.: Set each option to Yes or No to control whether these elements are saved when the session ends.
Step 3: Click Save Config to apply your changes.
Wrap up
Always keep in mind that the evolution of the world of e-commerce is ongoing. Customer expectations shift, new technologies emerge, and your business itself grows and changes. That’s why optimizing your Magento 2 shopping cart isn’t a one-time task but an ongoing process.
Revisit your cart settings regularly. As you add new products, change your marketing strategies, or notice trends in customer behavior, you may need to adjust your configurations. Don’t be afraid to experiment and test different options to see what works best for your specific audience. Lastly, a well-configured shopping cart is just one part of a successful e-commerce strategy. Combine it with compelling product enhancement, clear calls to action, and excellent customer service to create a truly outstanding online store!

Jacker is the Chief Technology Officer (CTO) at Mageplaza, bringing over 10 years of experience in Magento, Shopify, and other eCommerce platforms. With deep technical expertise, he has led numerous successful projects, optimizing and scaling online stores for global brands. Beyond his work in eCommerce development, he is passionate about running and swimming.
Related Post

Review 74 Mageplaza extension updates from April 2025, highlighting Magento 2.4.8 compatibility, Hyvä theme support, and enhanced functionalities.

Social Media Marketing: Your Ultimate Guide to Skyrocketing Engagement - Mageplaza
Discover a step-by-step framework for effective social media marketing. Learn how to optimize content, run ads, track KPIs, and future-proof your strategy across all major platforms.
The Ultimate Guide to Managing Your E-Commerce Website for Maximum Sales - Mageplaza
Discover simple tips to manage your eCommerce website, boost sales, and grow your online business effortlessly. Learn now!
Review 74 Mageplaza extension updates from April 2025, highlighting Magento 2.4.8 compatibility, Hyvä theme support, and enhanced functionalities.
Social Media Marketing: Your Ultimate Guide to Skyrocketing Engagement - Mageplaza
Discover a step-by-step framework for effective social media marketing. Learn how to optimize content, run ads, track KPIs, and future-proof your strategy across all major platforms.
The Ultimate Guide to Managing Your E-Commerce Website for Maximum Sales - Mageplaza
Discover simple tips to manage your eCommerce website, boost sales, and grow your online business effortlessly. Learn now!