Magento 2 Marketing Menu: Tips to Take Full Advantage of Magento Default
Learning the Magento 2 Marketing Menu can improve your e-commerce plan, generating more customers and higher revenues. From promotions and SEO to consumer segmentation, Magento 2 Marketing Menu has several tools meant to maximize your marketing efforts. This article will provide professional advice to help you properly use it like a pro.
Magento 2 Marketing Menu: An Overview
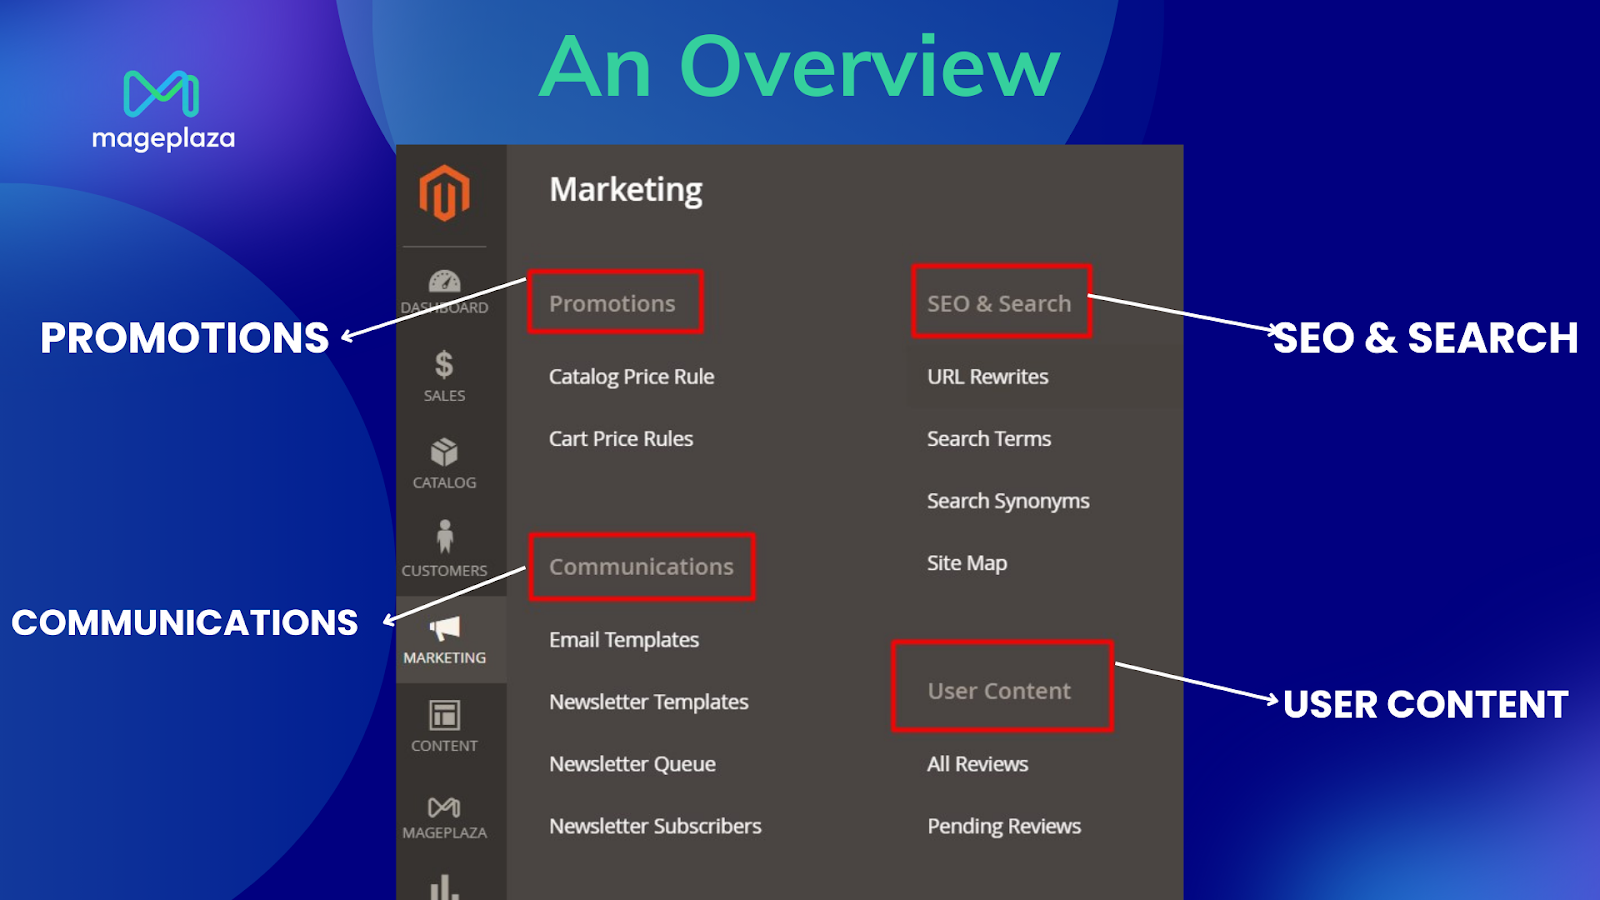
The Magento 2 Marketing Menu is divided into four key sections:
1. Promotions: This section allows you to set up various promotions by defining conditions to automatically apply discounts to multiple products and order amounts. You can create Catalog Price Rules, Cart Price Rules, Related Product Rules, and Gift Card promotions.
2. Communications: Here, you can maintain customer contact through transactional emails, newsletters, RSS feeds, and more. This section guides you on creating brand-reflective emails using pre-defined variables and markup tags.
3. SEO & Search: Effective SEO is crucial for attracting significant sales. Magento offers SEO best practices and insights into customer search terms, helping you make your products easier to find.
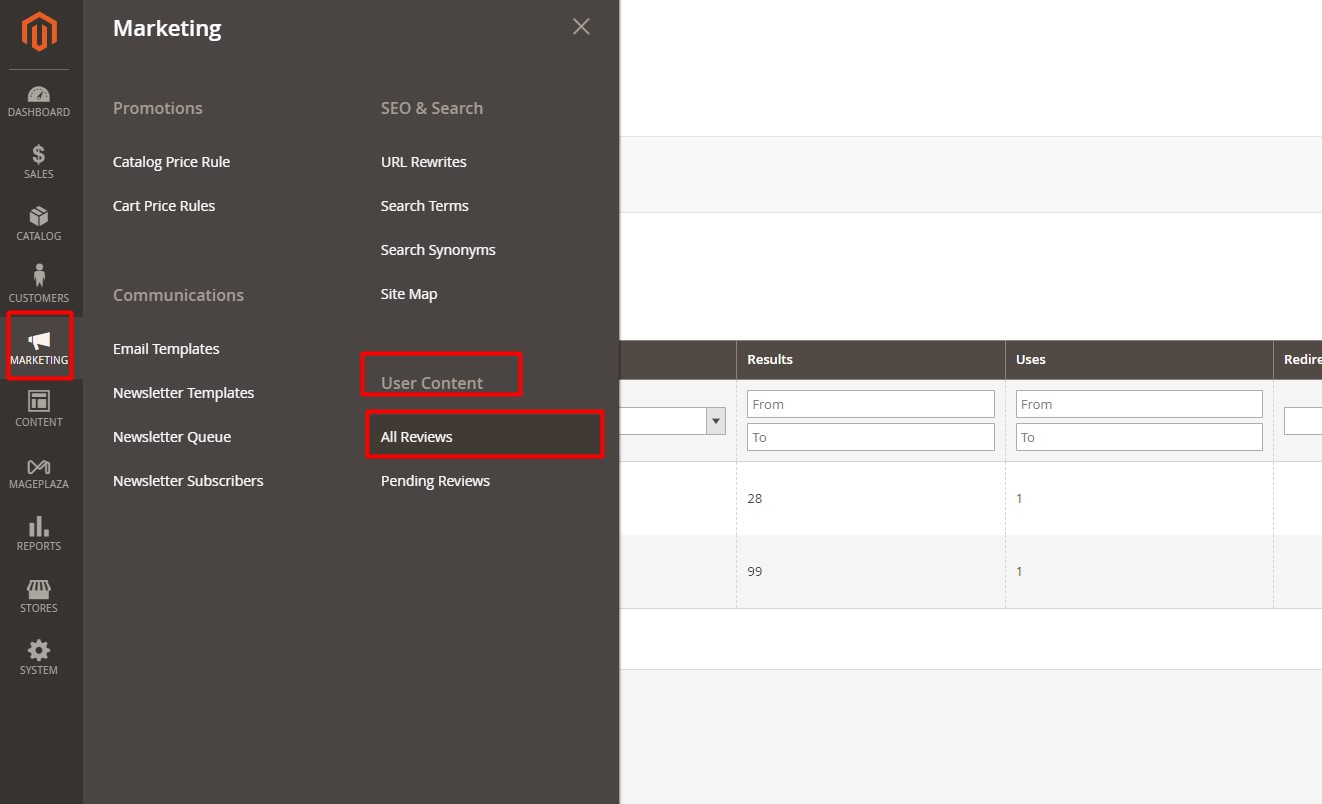
4. User Content: This section records all customer reviews, allowing you to preview, approve, or disapprove them, and showcase them on product pages. Reviews build social proof and improve your site’s credibility with search engines like Google. Understand the importance of user content in Magento 2.
About The Promotions of Magento 2 Marketing Menu
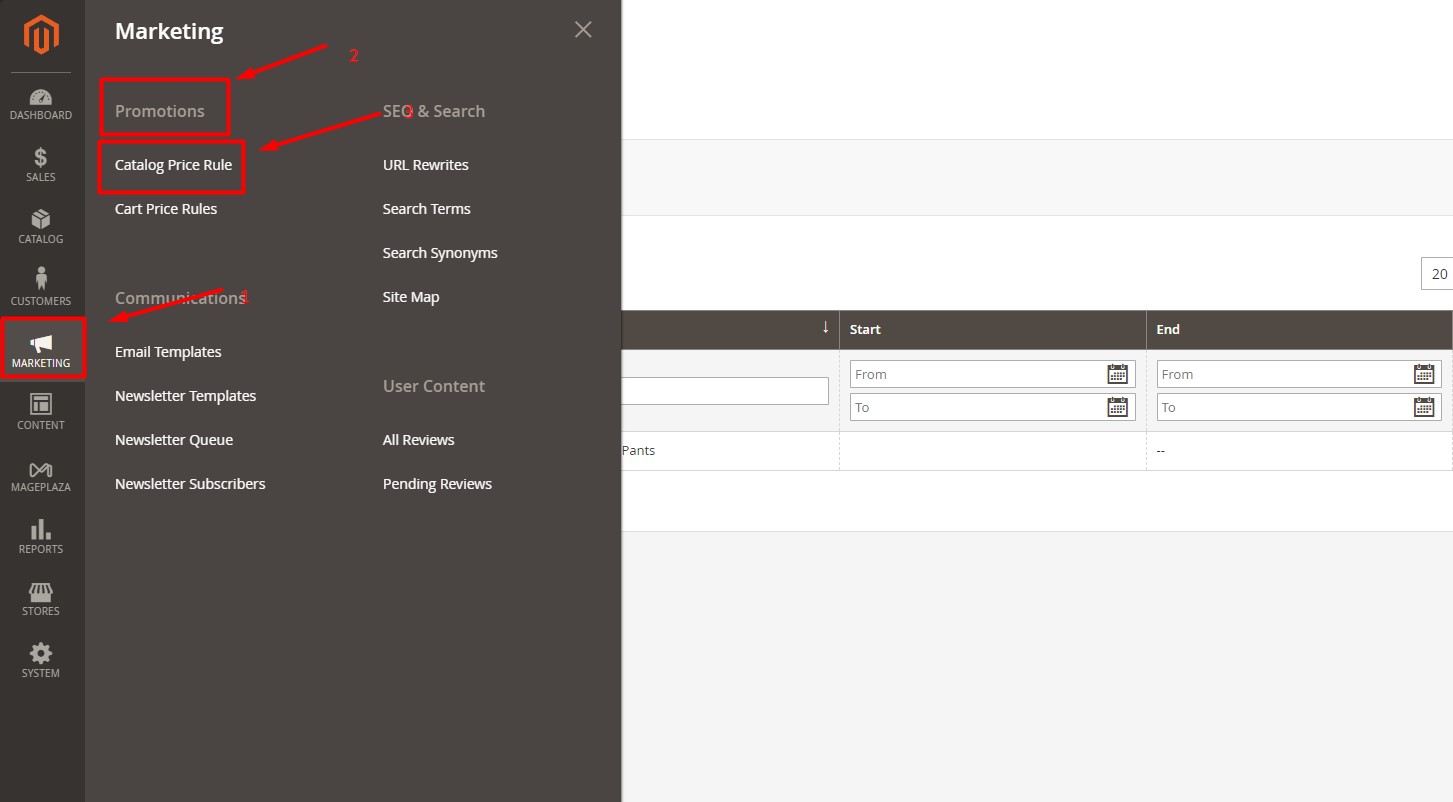
Magento 2 offers robust promotional tools to enhance your sales strategies. Instead of setting special prices for products individually during sales seasons, you can usecatalog price rules to apply discounts across your entire product range efficiently. Here’s a step-by-step to setting up promotions using the Magento 2 Marketing Menu.
Setting Up Catalog Price Rules
Step 1. Navigate to Marketing > Promotions > Catalog Price Rules > Add New Rule:
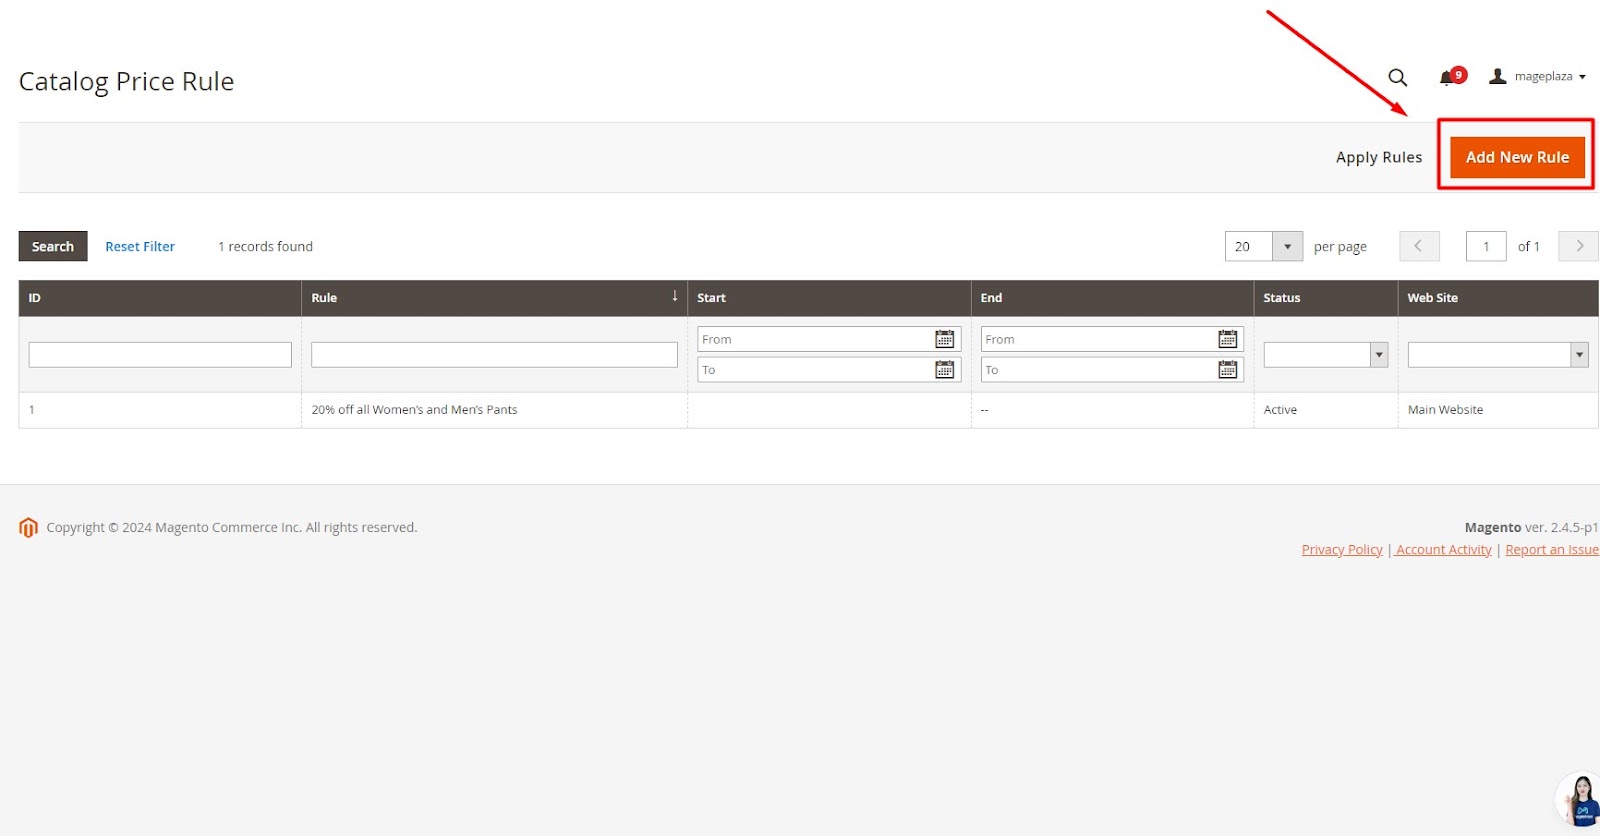
Step 2. Set Your Rule Information and Conditions:
Scroll down to the Rule Information section and start by entering the rule information such as name, description, active status, etc.
Next, move to the Conditions sections. Set rules for specific products based on existing attribute values or leave conditions blank to apply the rule to all products.

Step 3. Define Your Actions:

Choose how the discount should be applied:
- Apply as a percentage of the original price.
- Apply as a fixed amount.
- Adjust the final price to a percentage.
- Adjust the final price to a discount value.
- Enter the discount amount.
To avoid multiple discounts on the same product, you should set “Discard subsequent rules” to Yes.
Step 4. Save, Check and Apply the Rule:
Ensure to test the rules thoroughly in advance to verify they work as intended.

Setting Up Cart Price Rules
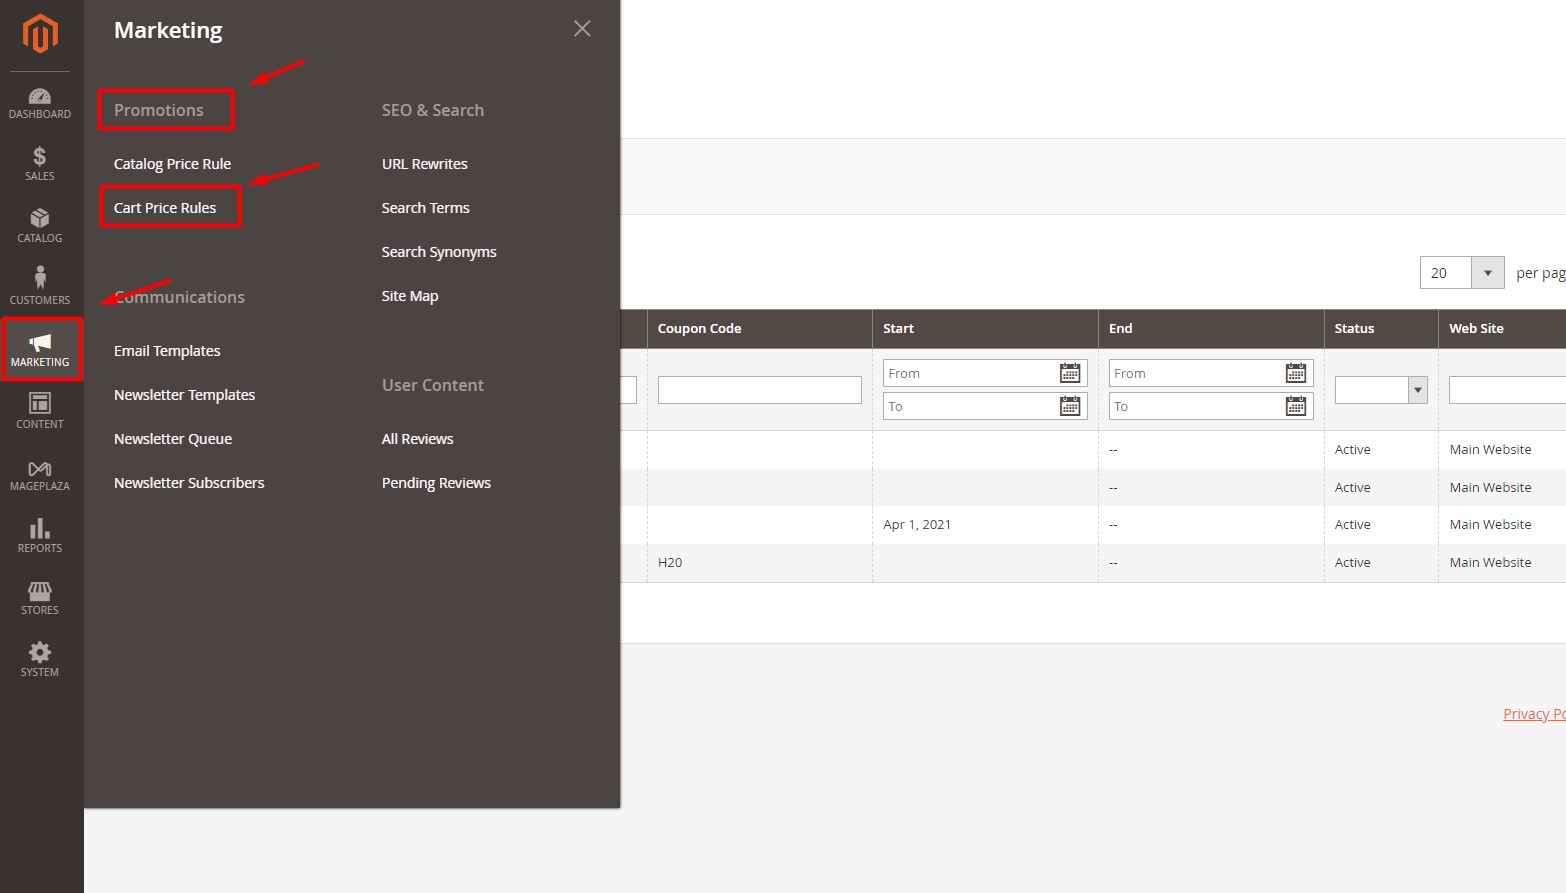
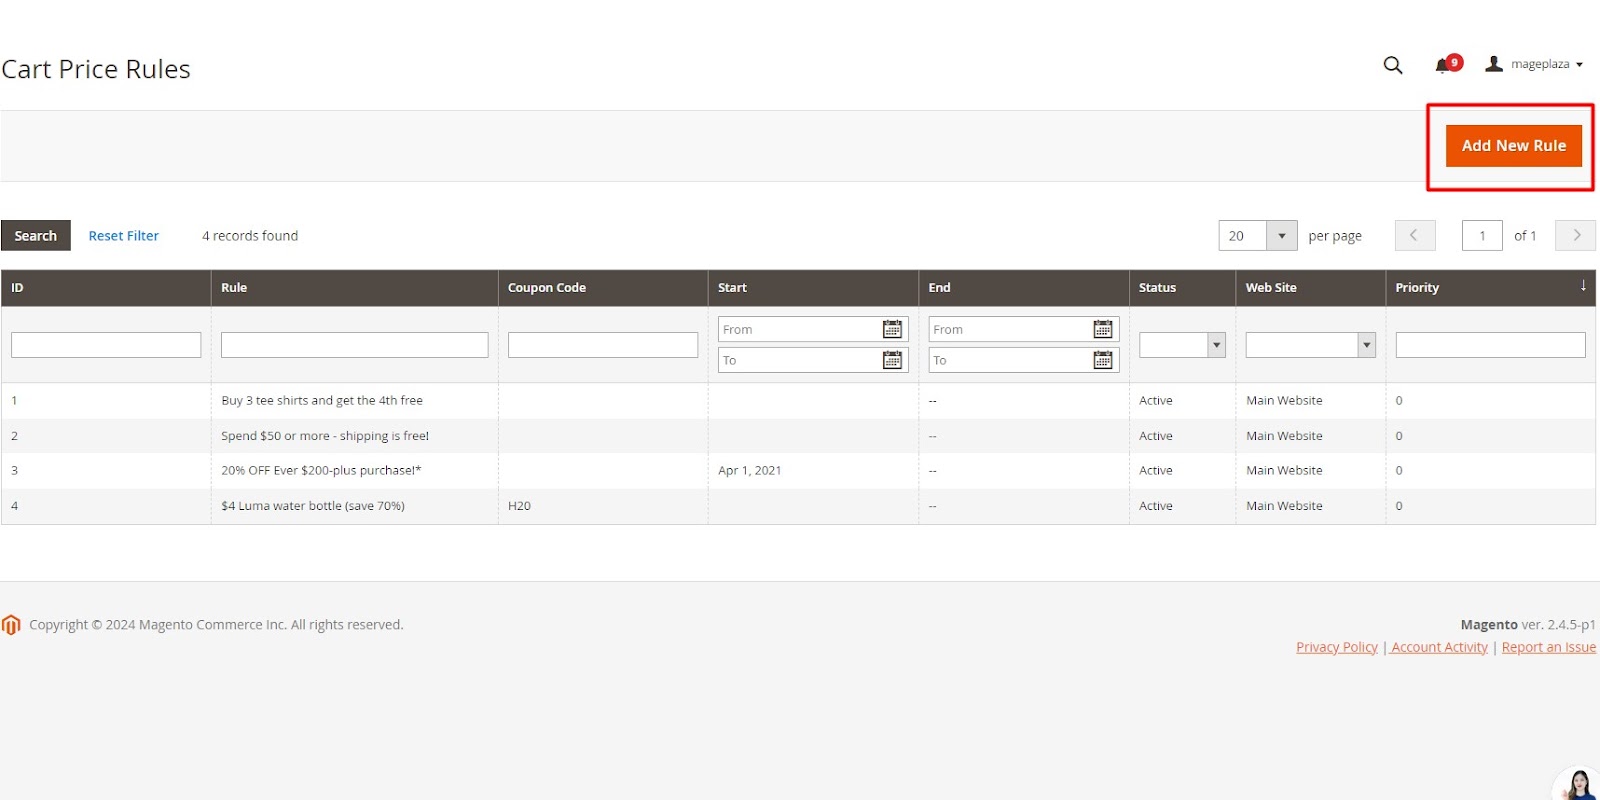
Step 1. Navigate to Marketing > Promotions > Cart Price Rules > Add New Rule:
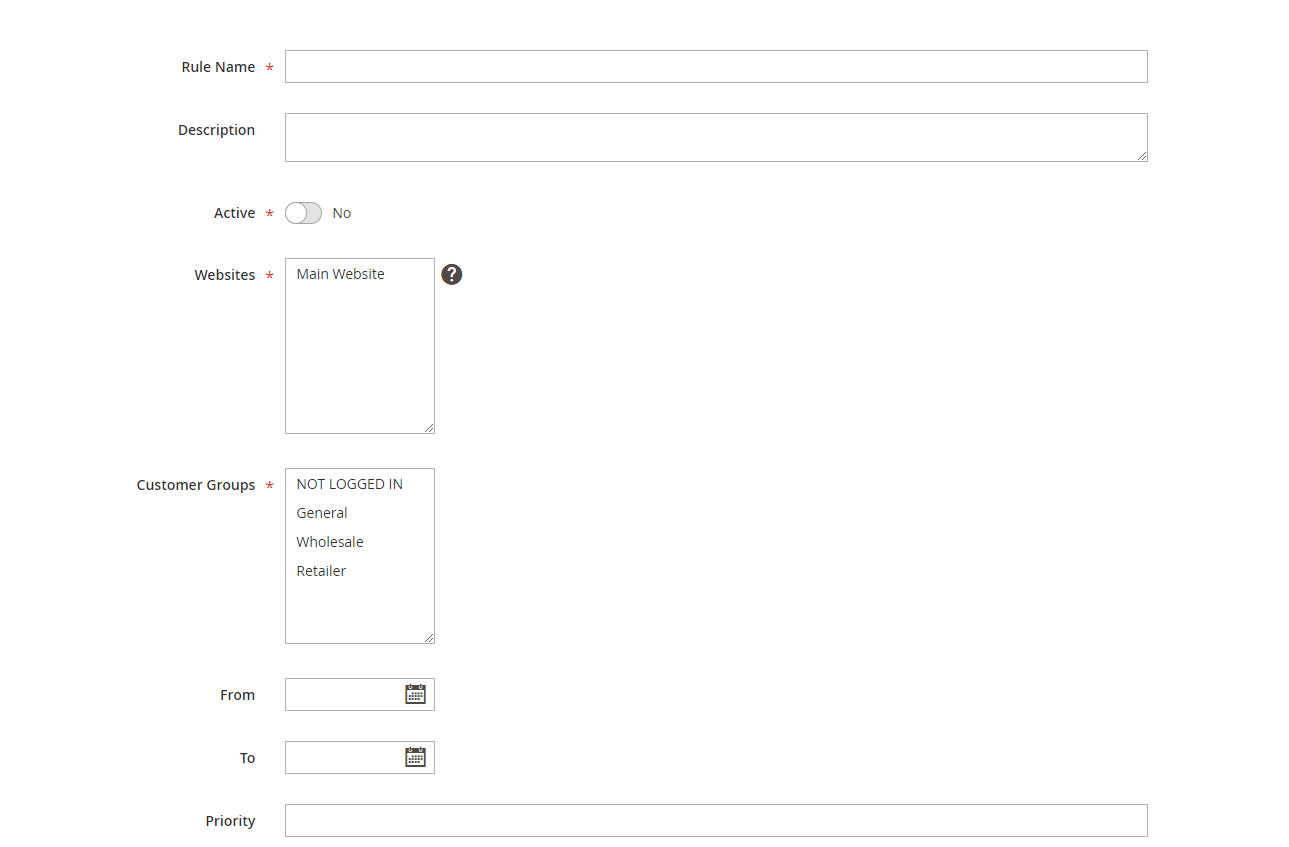
Step 2. Describe Your Rule Information and Conditions:
Like setting up catalog price rules, you will enter the rule information such as name, description, and coupon code at first.
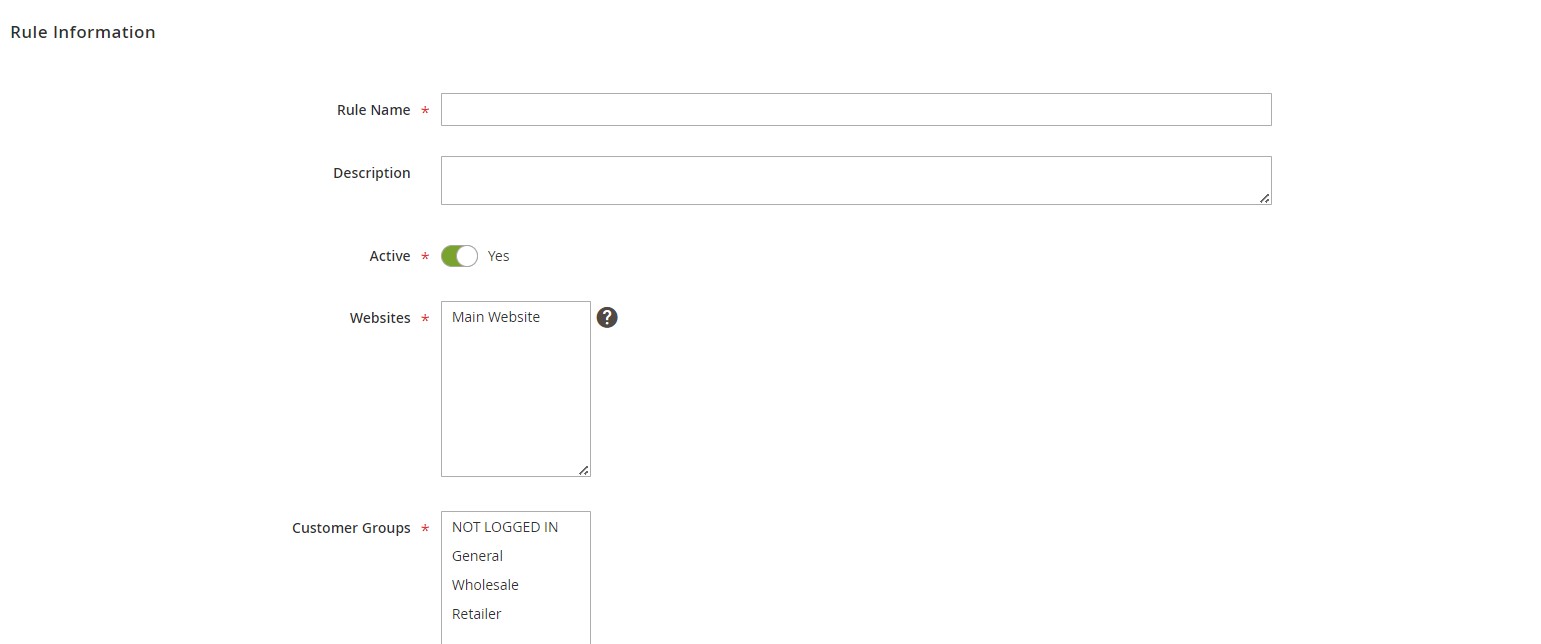 Define rule information and conditions for when the rule should be applied (e.g., minimum purchase amount).

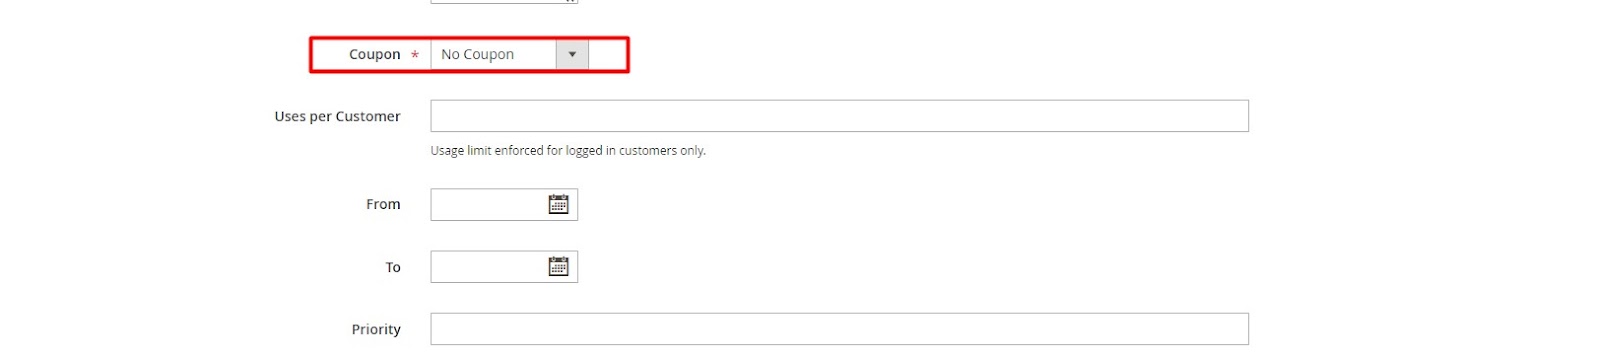
Step 3. Define the Coupon (Optional):
At Rule Information section, you can set Coupon to Specific Coupon and define the coupon conditions, or set it to No Coupon if not needed.
Step 4. Define Actions:
-
Choose how to apply the discount:
-
Percent of product price discount.
-
Fixed amount discount.
-
Fixed amount discount for the whole cart.
Buy X get Y free.
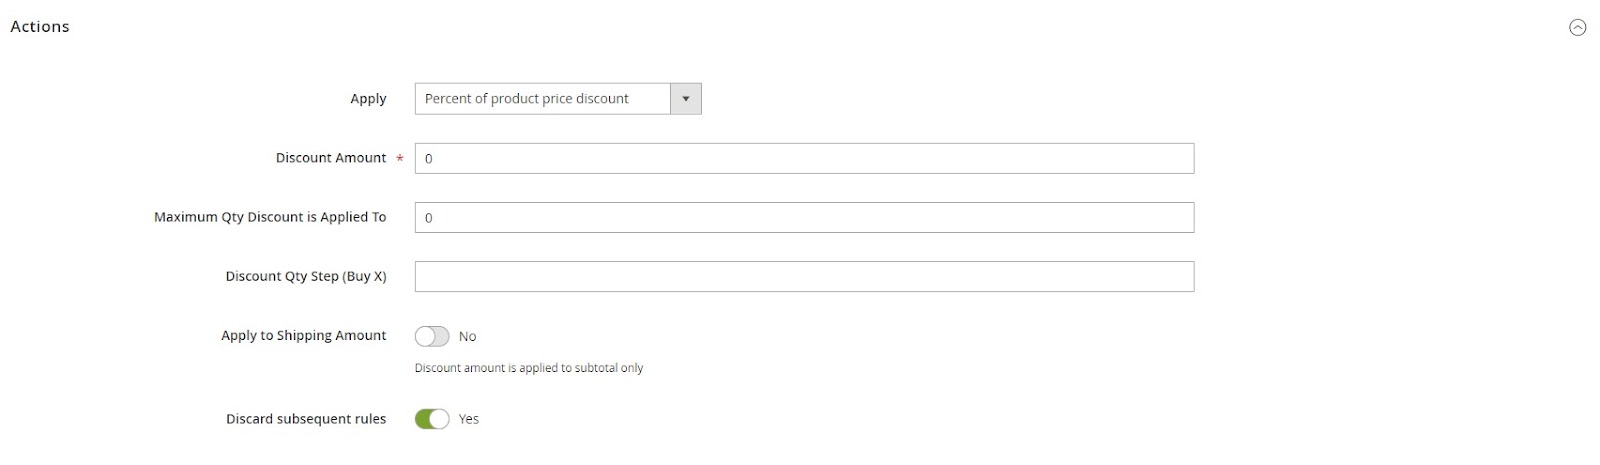
Enter the discount amount.
Optional settings:
-
For “Buy X get Y Free”, define the Discount Qty Step (Buy X).
-
Set Maximum Qty Discount is Applied To.
-
Set Apply to Shipping Amount to Yes or No.
-
Offer Free Shipping for items meeting the conditions.

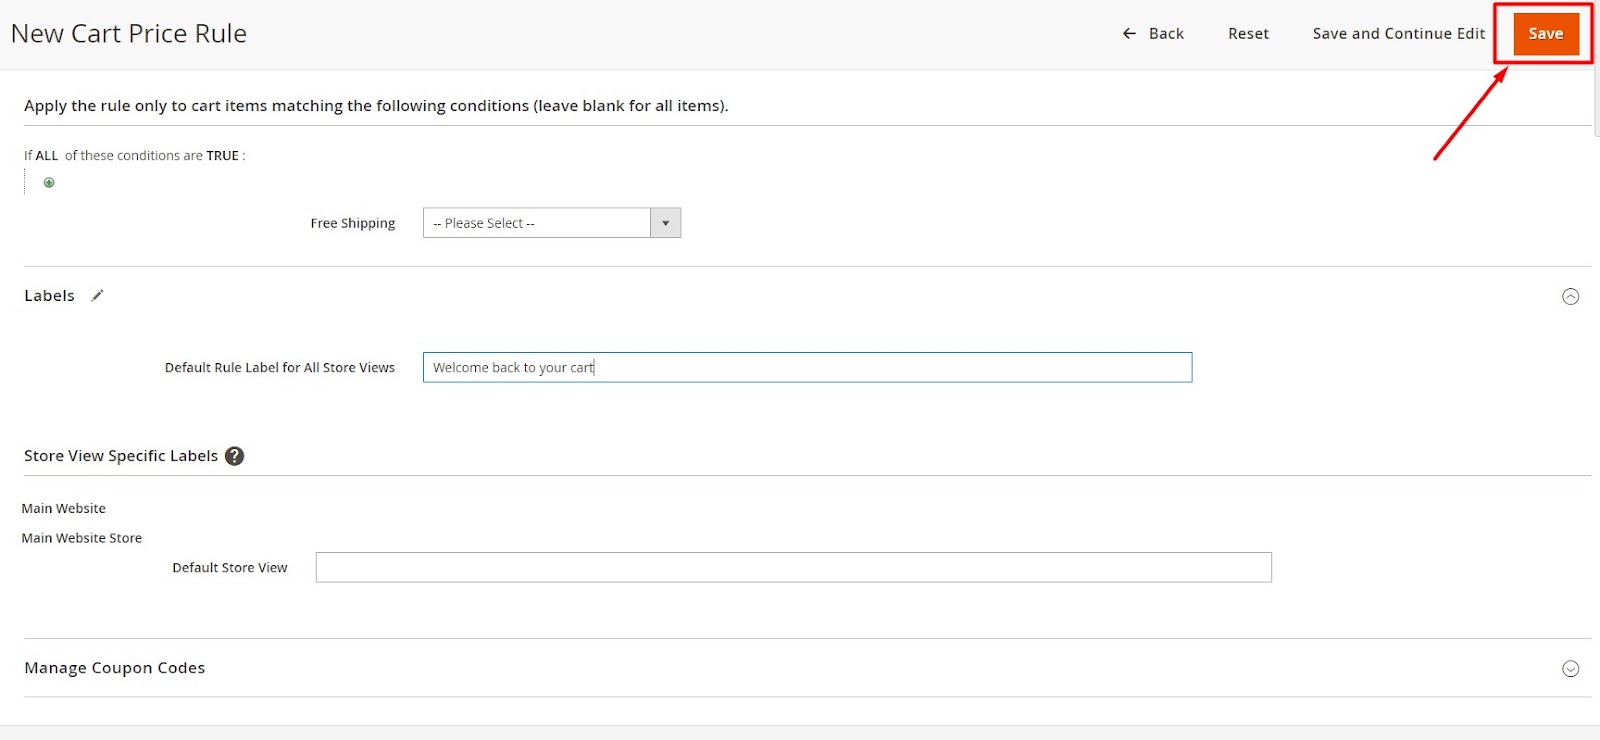
Step 5. Tailor the Label for the Cart Price Rule:
Specify a clear label for the discount, such as “Welcome back to your cart!” for a BACKTOCART coupon code.

Step 6. Save and Apply the Rule:
Click “Save” in the upper right corner of the screen. The you should test the rules thoroughly to ensure they function correctly.
About Communications of Magento 2 Marketing Menu
Maintaining loyalty in the always changing realm of e-commerce depends on regular engagement with customers. This detailed instruction will enable you to properly use the communication tools of Magento 2:
Email Templates
1. Understand the Importance
Regular communication, especially after sales, helps convert one-time buyers into repeat customers. This engagement is key to building long-term relationships.
2. Access Email Templates
Magento 2 offers customizable email templates for various transactional events. These include order confirmations, invoices, shipments, and account notifications.
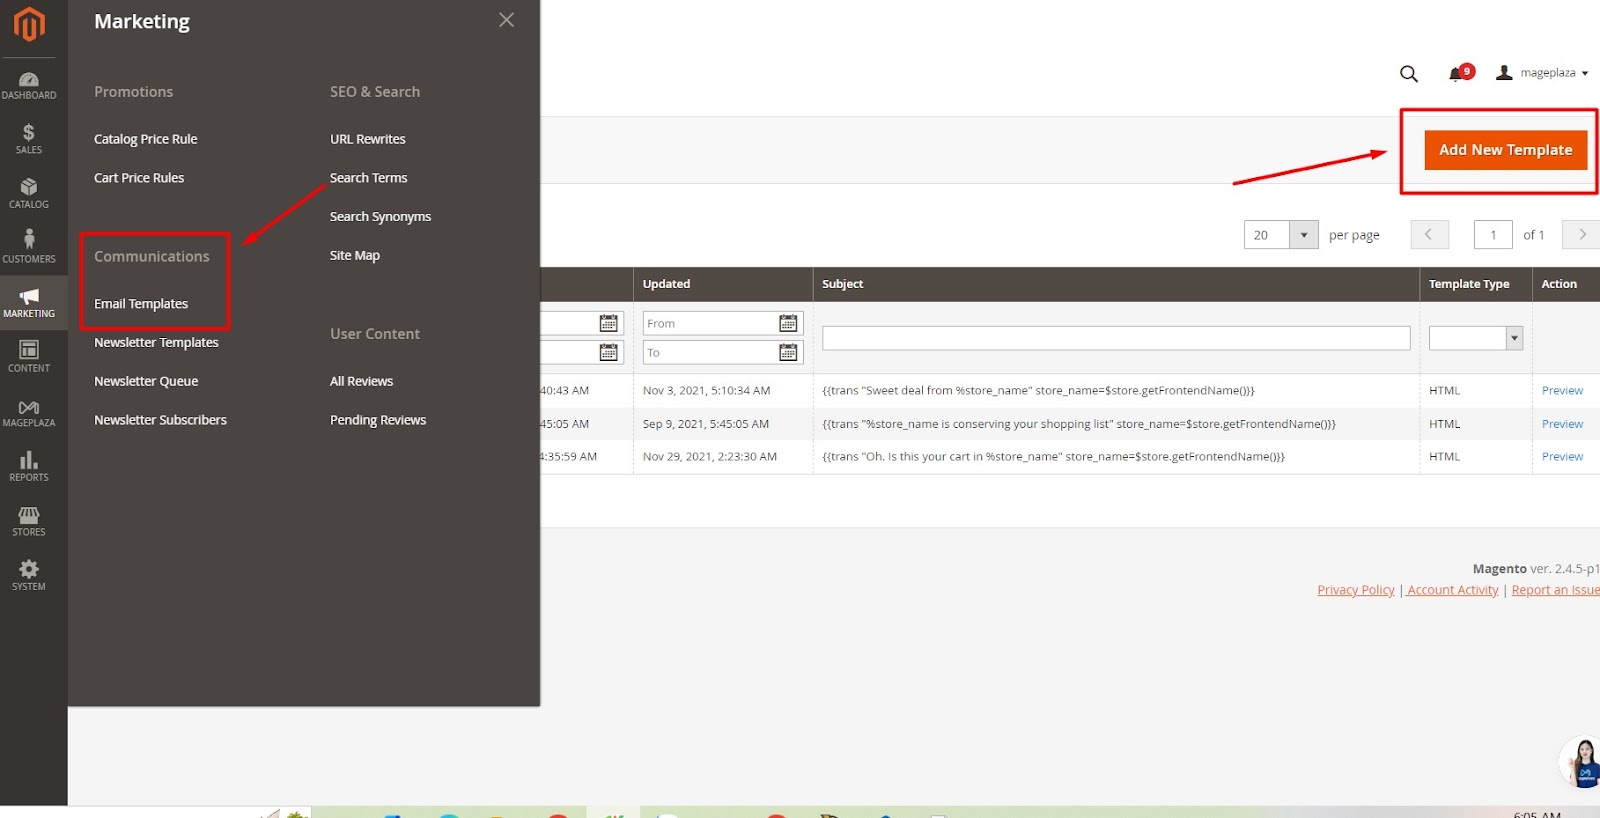
3. Navigate to the Email Templates section
Go to Marketing > Communications > Email Templates
Click on Add New Template to start creating or customizing your email.
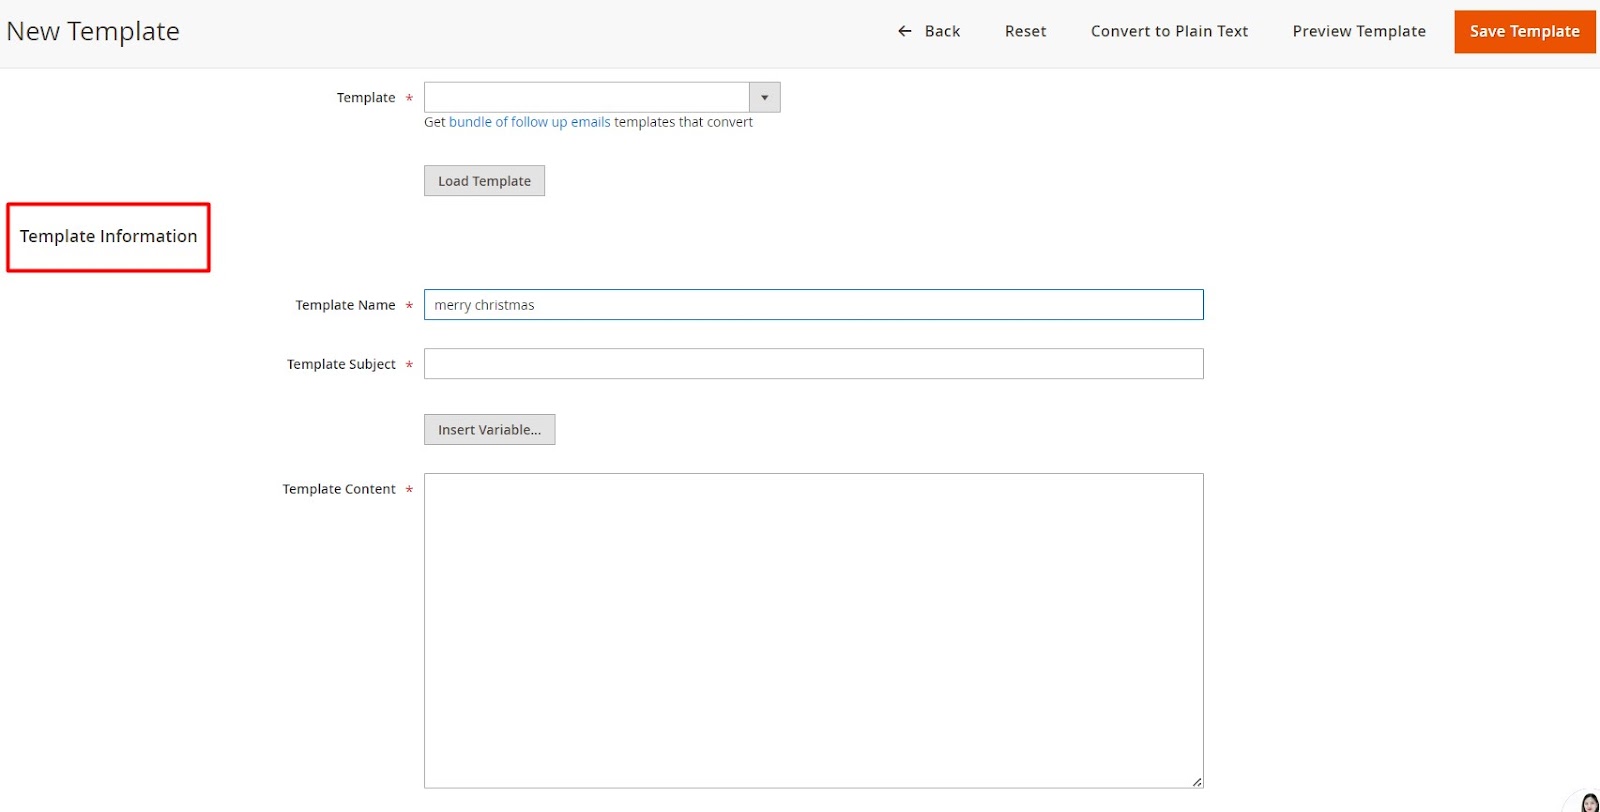
 4. Customize Your Templates
Magento 2 provides a set of responsive email templates by default. These can be modified to align with your brand’s voice and marketing goals. You can adjust the layout, content, and automated messages as needed at Template Information.
 5. Save and Test
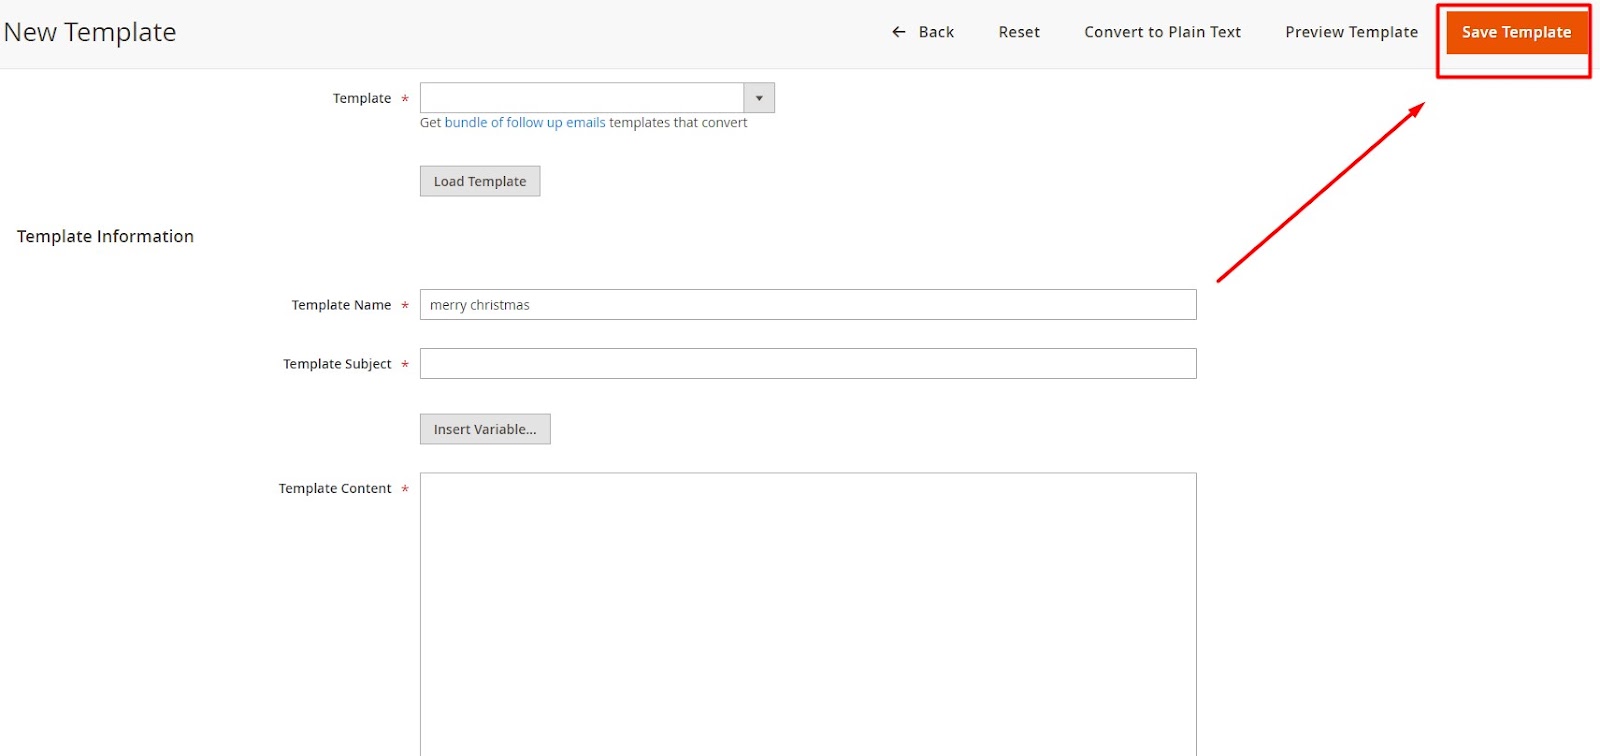
Once you’ve customized your Email templates, click Save Templates and test the emails to ensure they display correctly and convey your intended message effectively.
Newsletter
A well-crafted newsletter is a vital marketing tool for engaging your customers and encouraging them to revisit your e-commerce site. With Magento 2, you can streamline the process of creating and managing newsletters to keep your audience informed and interested. Follow these steps to leverage this powerful feature effectively:
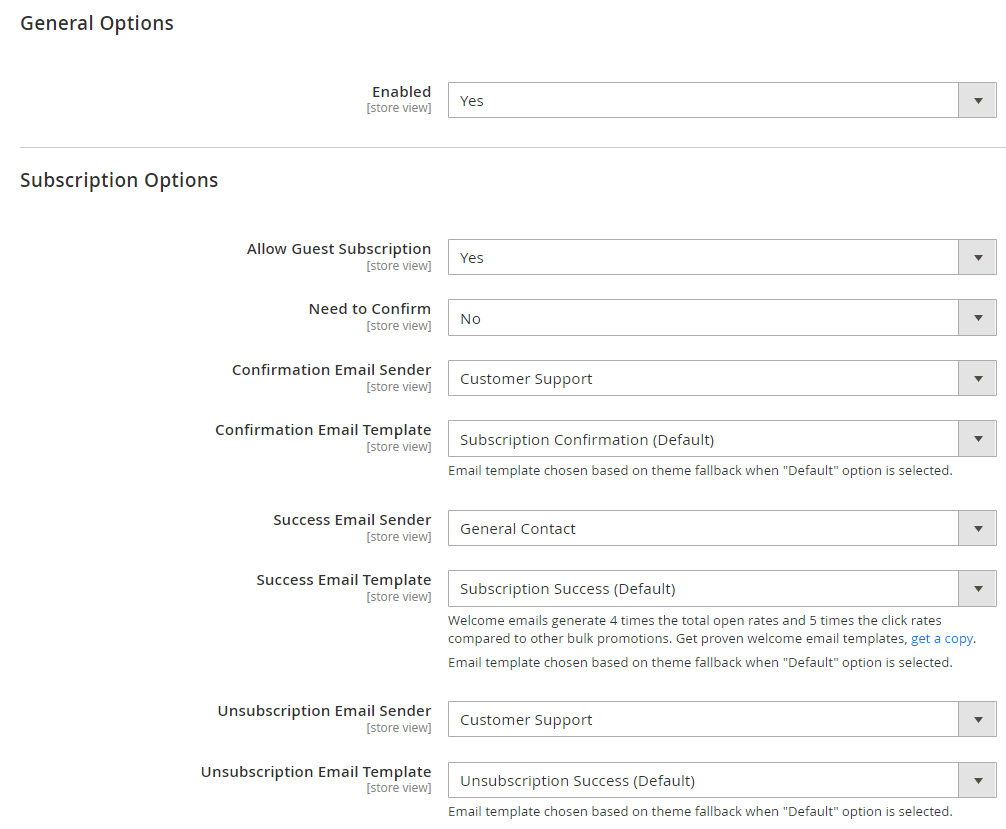
1. Configure Your Newsletter
Navigate to Stores > Settings > Configuration > Customers > Newsletter
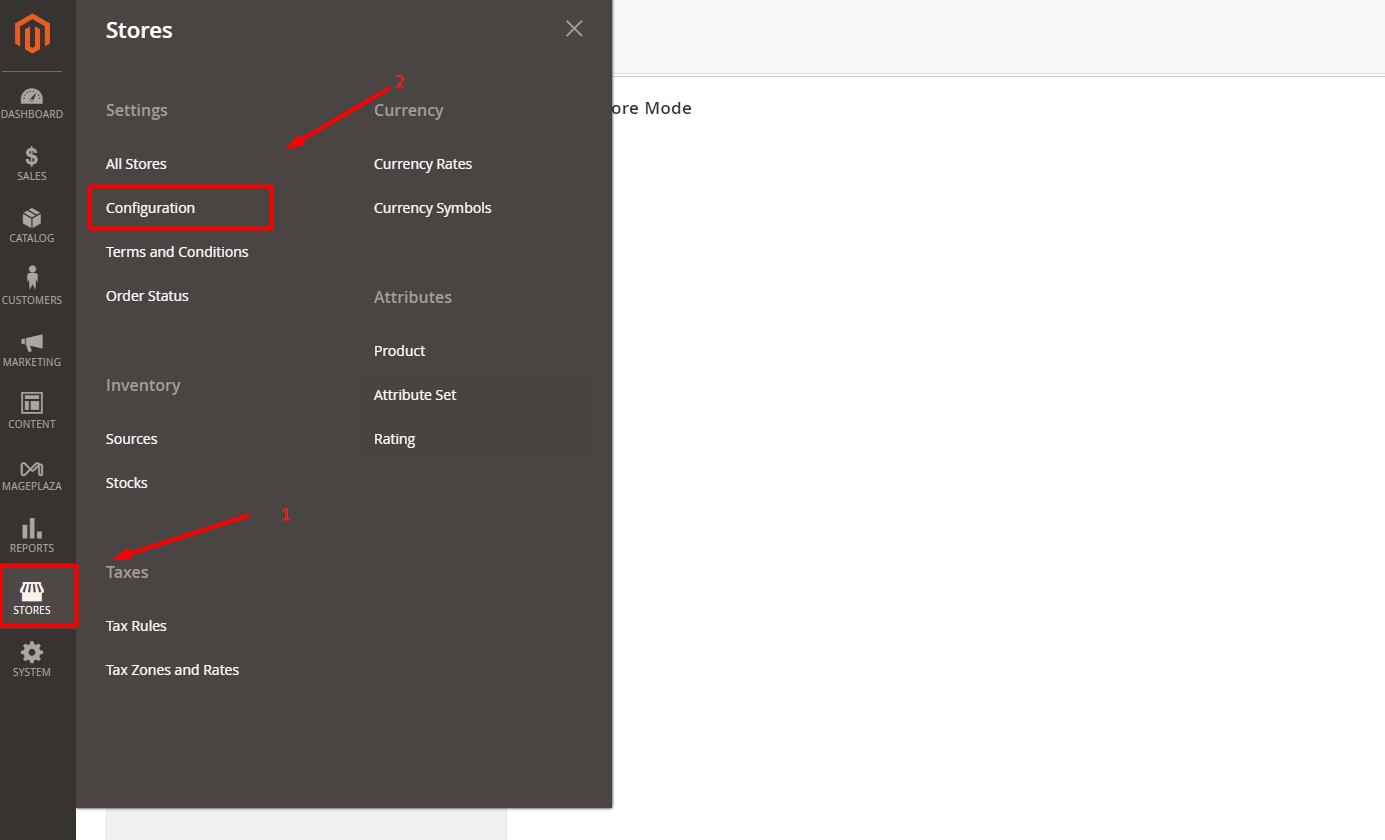
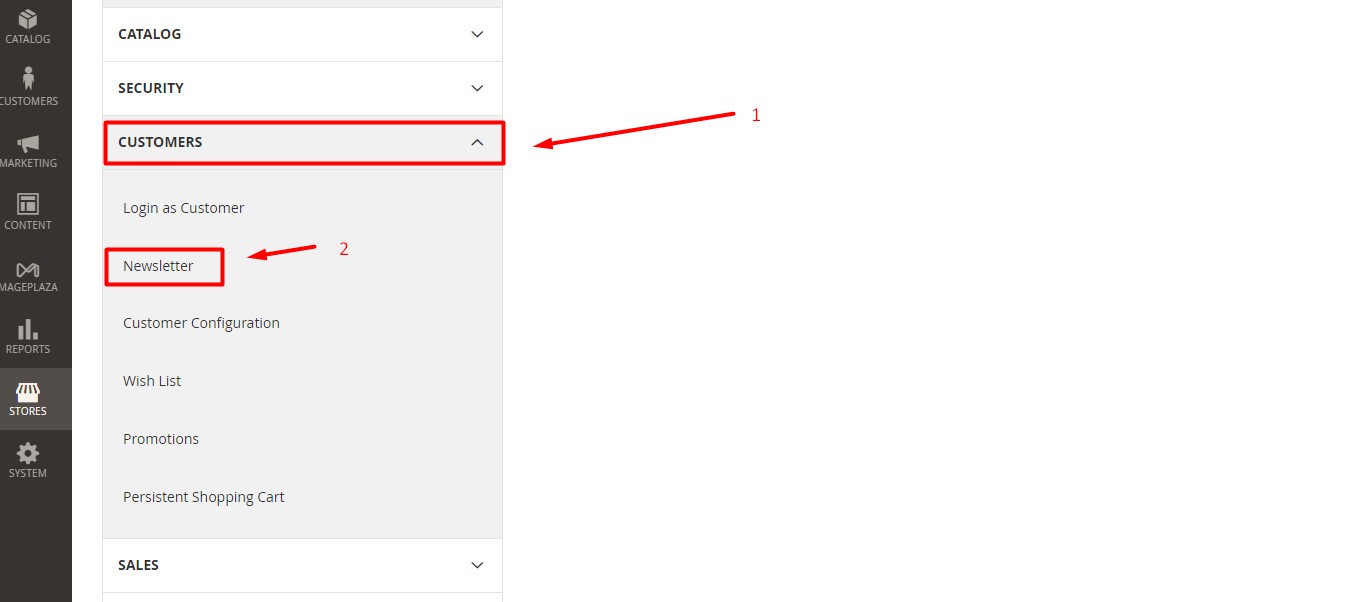
Then, you can adjust the subscription settings under the Subscription Options to match your needs about Newsletter.
2. Create and Design Your Newsletter Templates
Once you’ve finished tailoring your newsletter to your liking, it’s time to design!
Go to Marketing > Communications > Email Templates and click on Add New Template
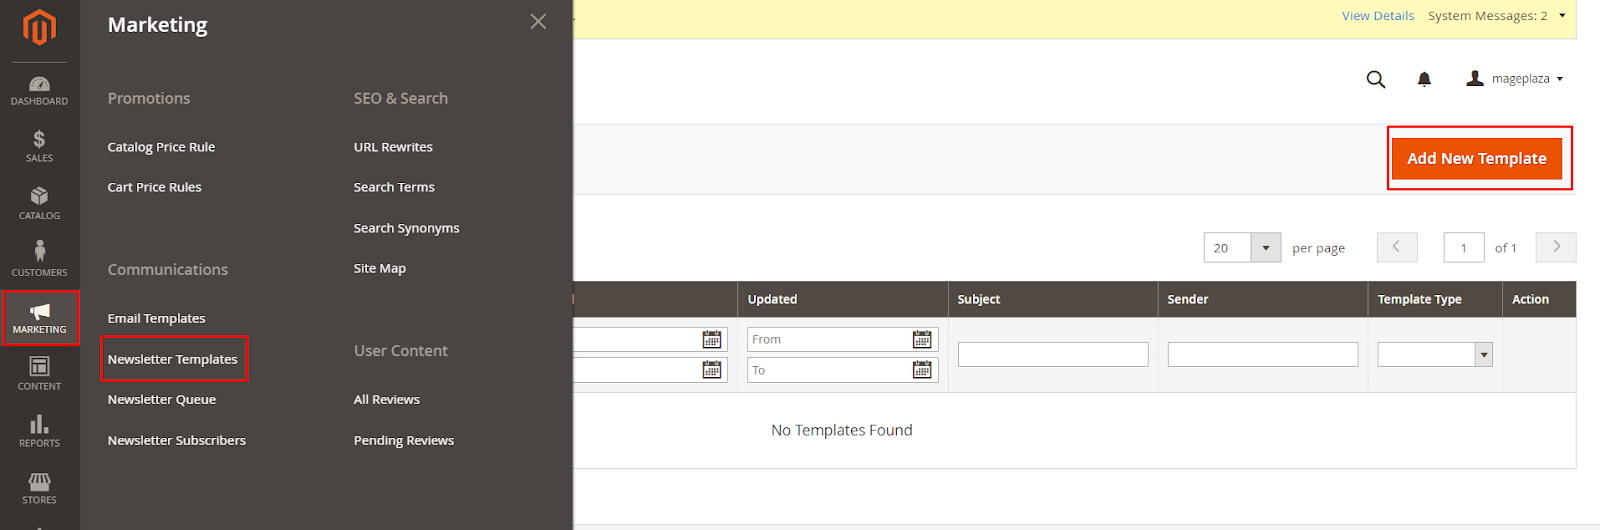
At your Template Information section, you can adjust the layout, content, and automated messages.
3. Monitor the Newsletter Queue
Go to Marketing > Communications > Newsletter Queue
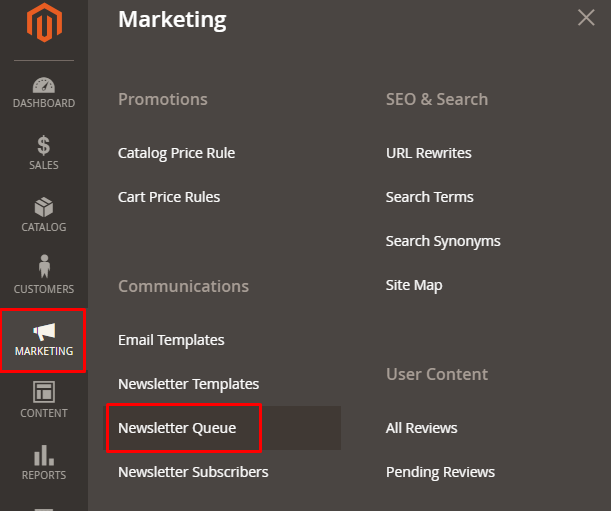
This will show you all newsletters awaiting processing. You can add a new queue right in the grid.
4. Manage Subscribers
View and manage your subscribers under Marketing > Communications > Newsletter Subscribers
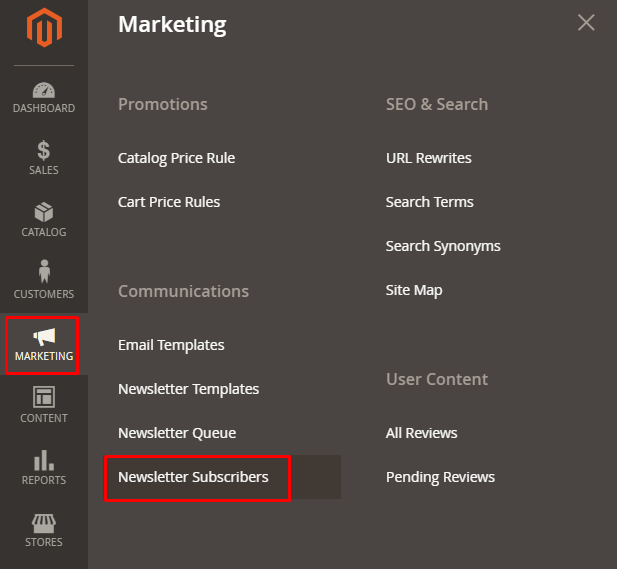
This section allows you to unsubscribe contacts and export subscriber lists.
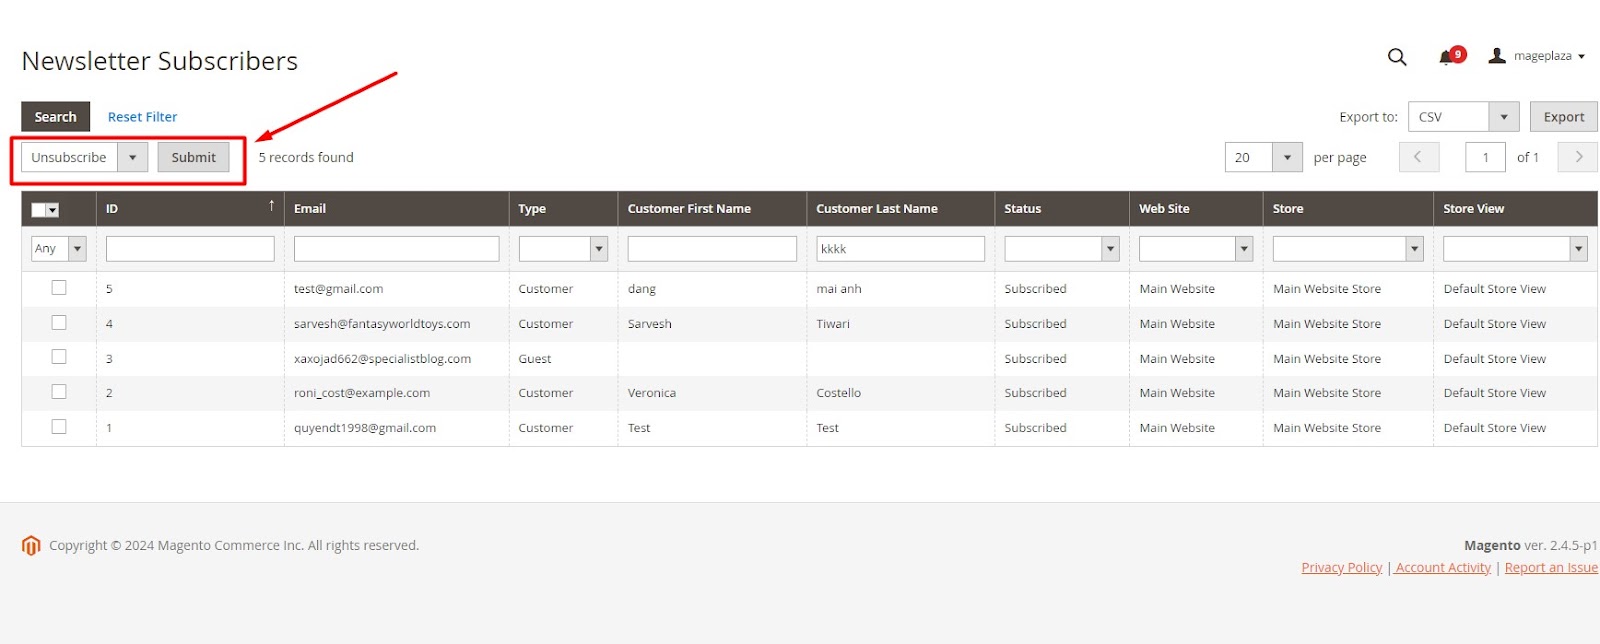
Any contact may be unsubscribed at any time. Also, you may export all of your contacts with just one click by using the Export option.
About SEO & Search of Magento 2 Marketing Menu
Enhancing your site’s SEO is vital for attracting visitors and improving your search engine rankings. Magento 2 provides powerful tools to optimize SEO and search functionalities. Follow these steps to make the most of them:
Catalog Navigation
1. Top Navigation
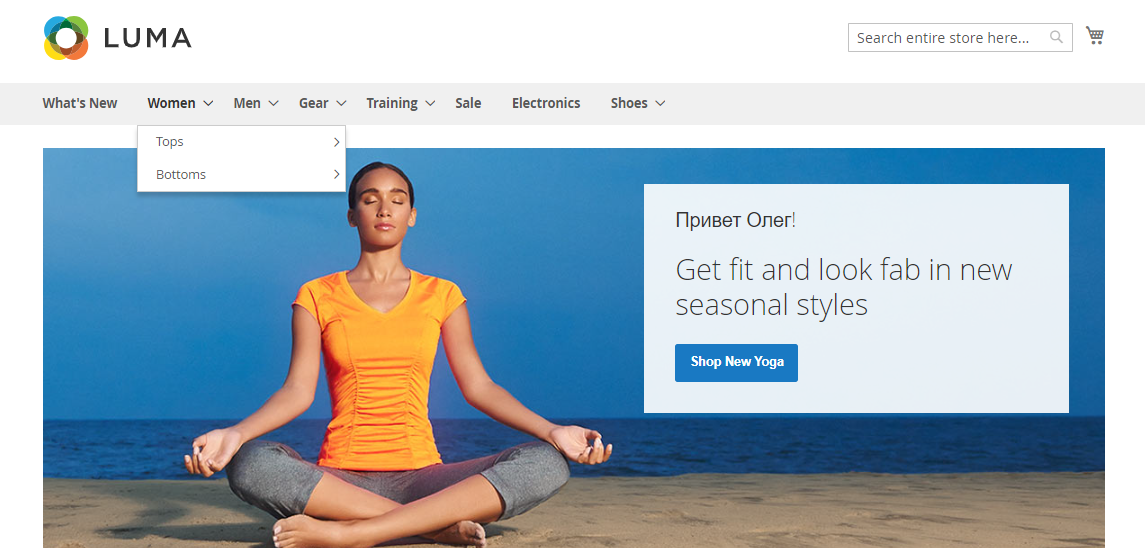
The top navigation menu organizes your product categories and impacts both user experience and search engine visibility. To set up this task in the most complete way, you can read full post for this guide at here: How to Set Up Magento 2 Top Navigation Menu [No code required]
2. Breadcrumb Trails
You often come across breadcrumb trails on the Internet, typically at the top of a webpage. They are a series of clickable links that show your navigation path, like this:
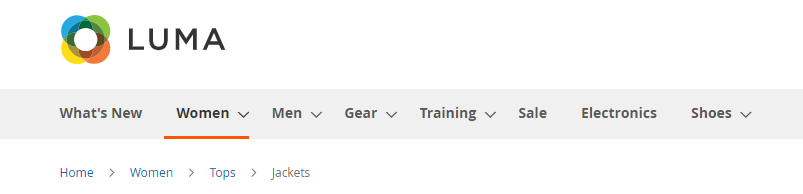
From an SEO and search perspective, breadcrumbs provide three benefits:
- They help customers navigate back to previous pages easily.
- Search engines, particularly Google prefer websites that have breadcrumbs.
- Magento 2 breadcrumbs enhance the appearance of content pages.
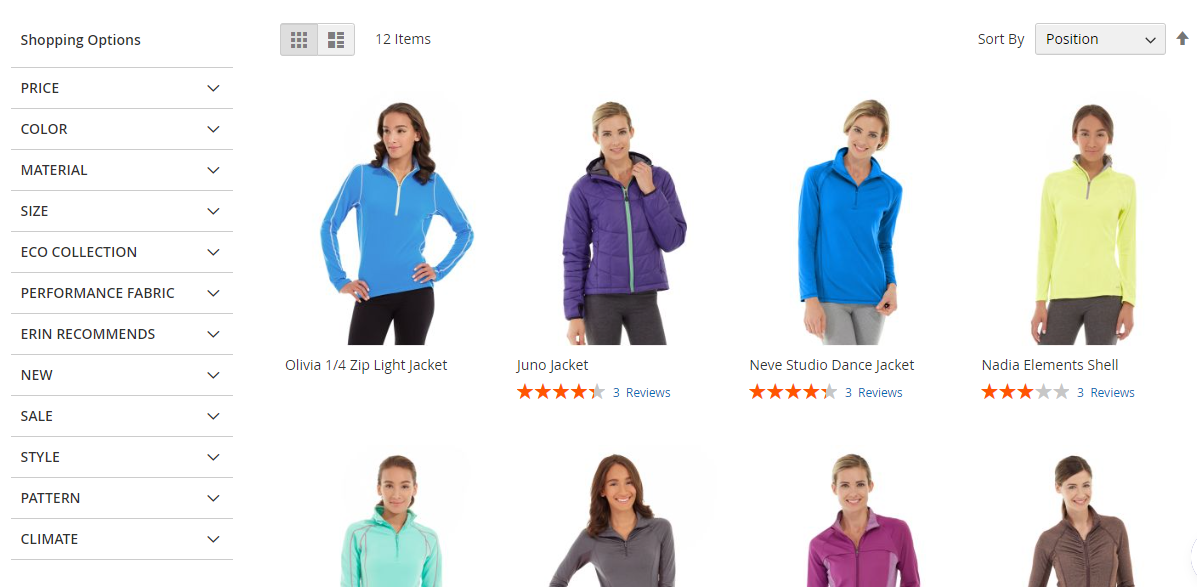
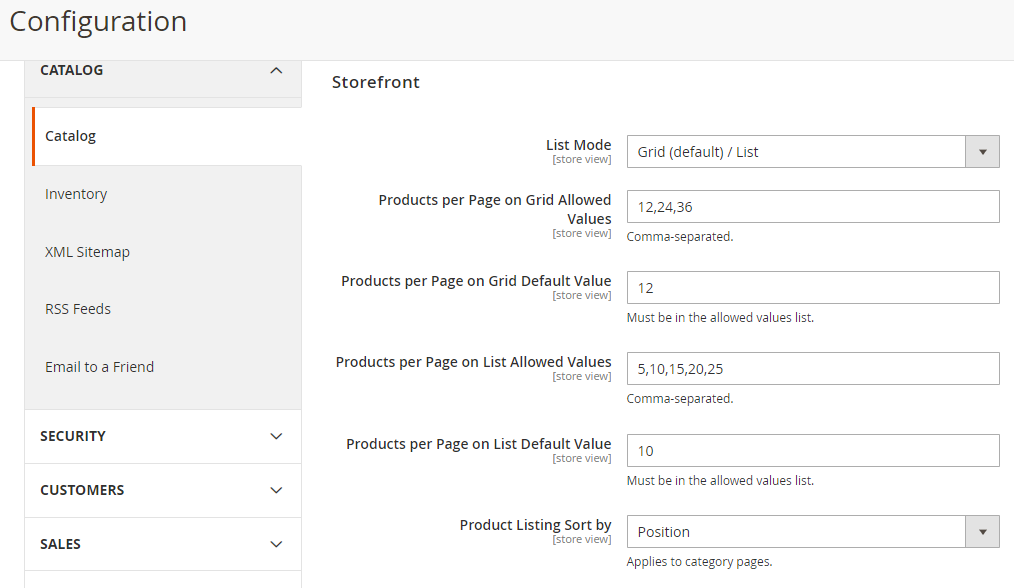
3. Product Listings
Typically, products are displayed in either a list or grid format, allowing shoppers to quickly view key details like price, name, images, and ratings.
In the admin panel, you can specify which attributes to use for sorting and set the number of products displayed per page.
-
Go to Stores > Settings > Configuration > Catalog > Catalog
-
Expand the Storefront section and set up as you like > then hit Save Config.
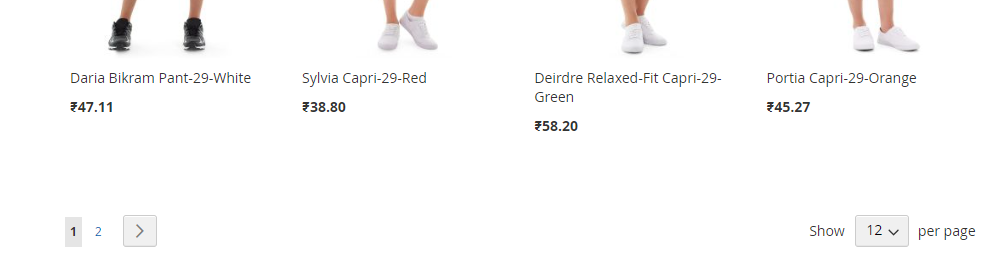
4. Pagination Controls
Pagination settings are located at the top and bottom corners of the product list. By adjusting these settings, you can change the format of the pagination links, set the number of links that appear, and configure the Next and Previous links for product listings.
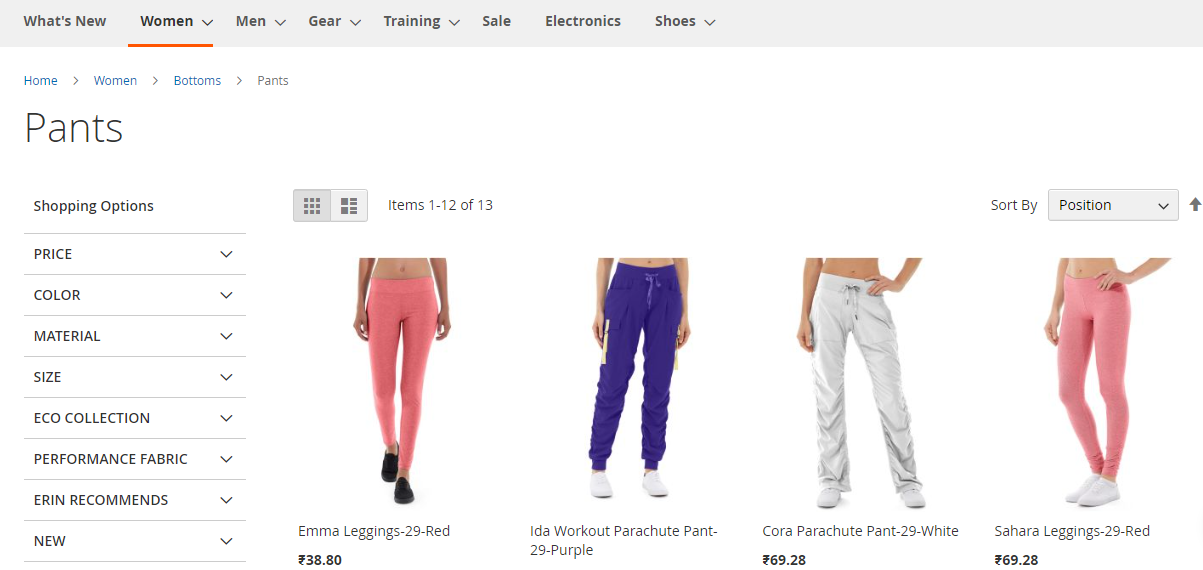
5. Layered Navigation
The faster customers can find their desired items, the more likely they are to make a purchase. Besides using the search box, layered navigation, typically displayed on the left side of search result or category pages, is also effective.
On one hand, shoppers can easily sort products by filterable attributes, category, or price range. On the other, this Magento 2 product filter acts as a versatile recommendation system, showcasing items that match customers’ preferences and budgets.
Catalog Search
Nearly all consumers have 3 options to look for products in the catalog.
1. Enable Quick Search

2. Advanced Search
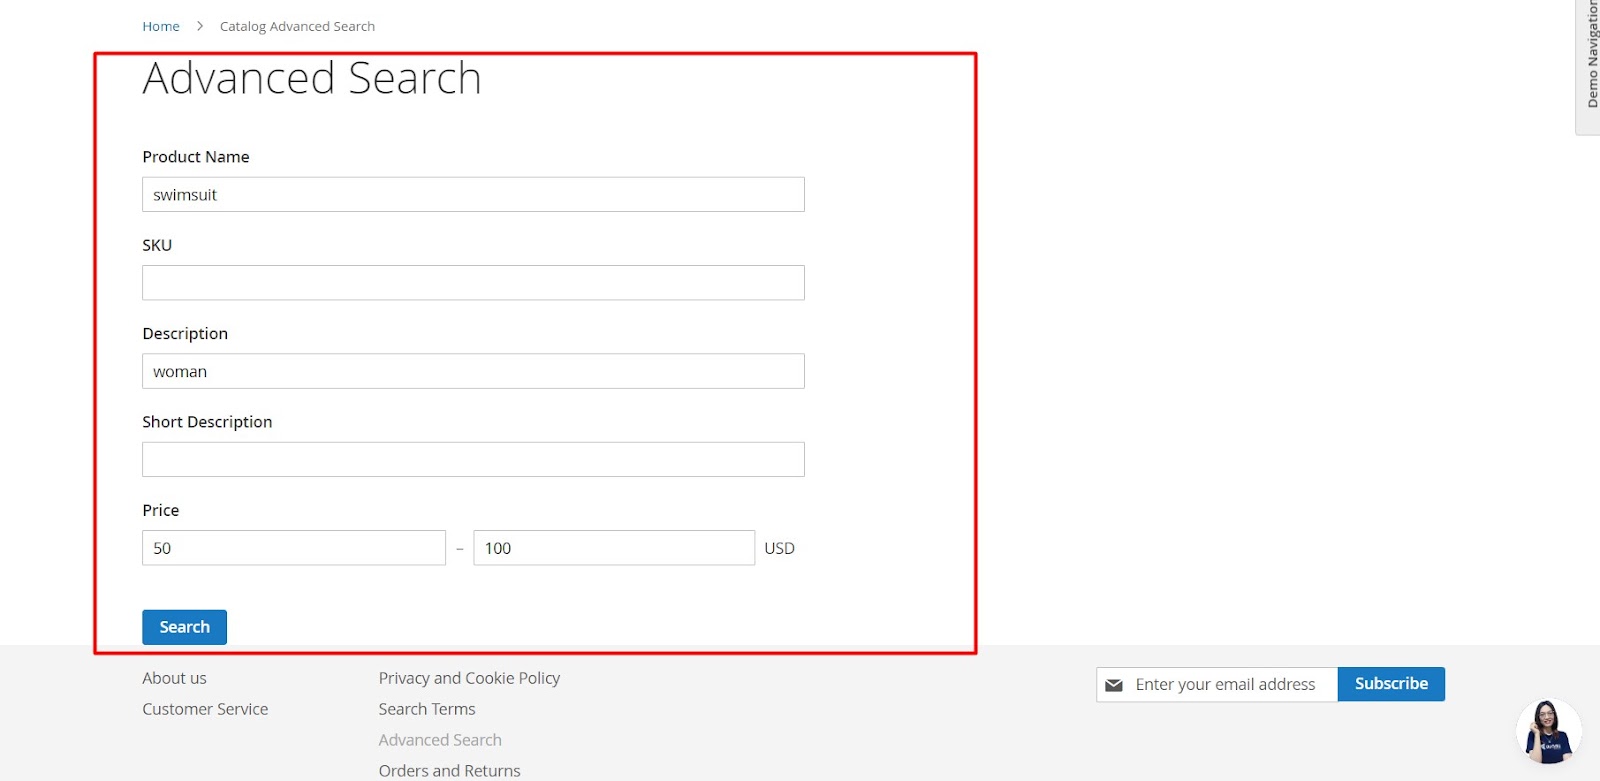
3. Search Results Page
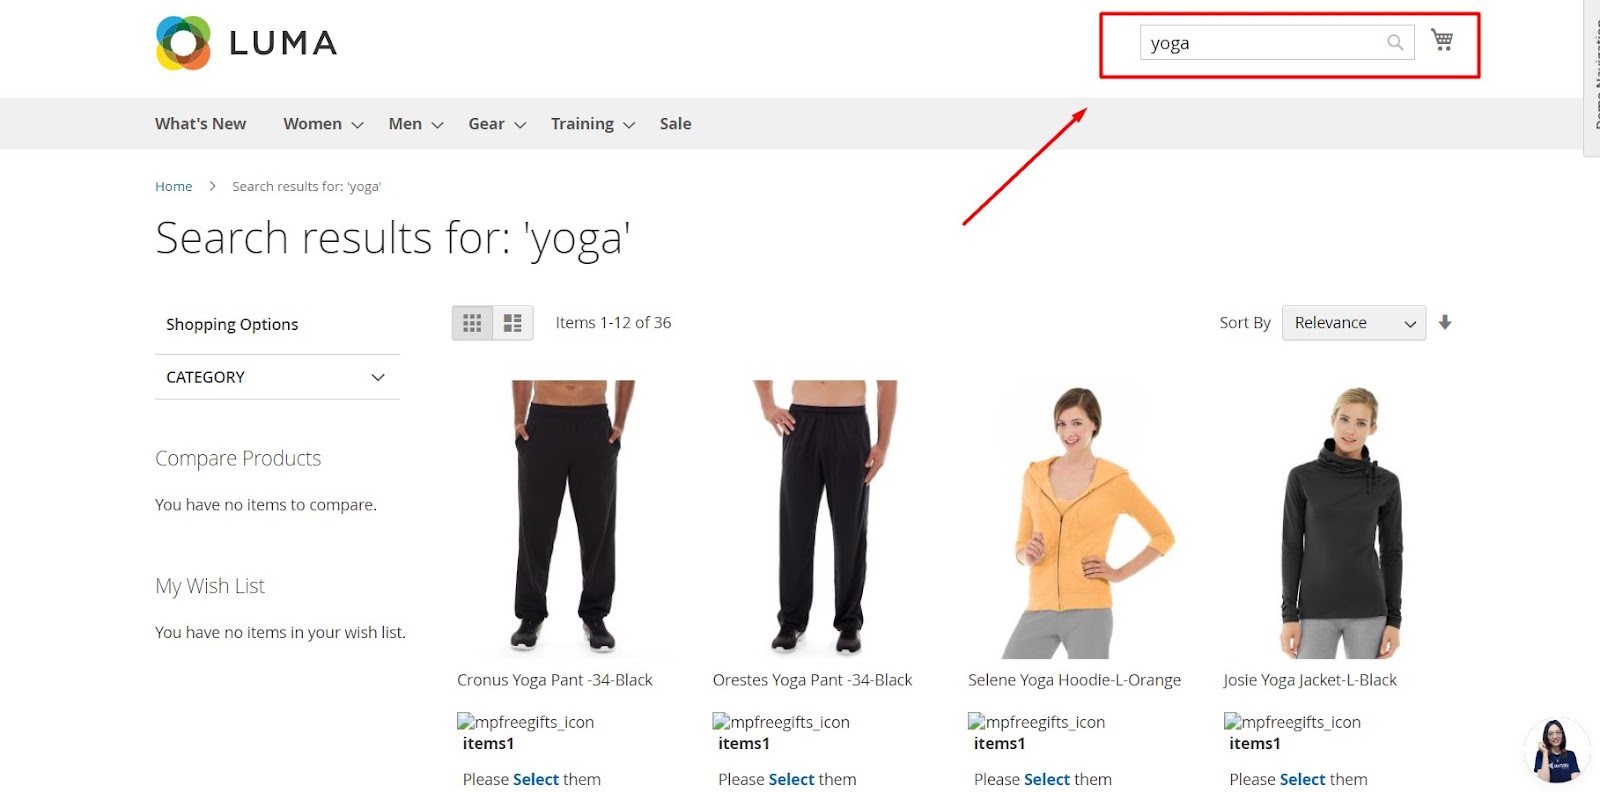
All goods that match the advanced or fast search are shown on this page. In a way, this is a product listing.
From the above analysis, you can see that we need to have optimal modification steps in Search. So that customers can find the item that best suits their needs, thereby bringing them a good experience. Here is the complete way to optimize that:
Adjust Storefront Properties Settings
- At the Stores section, then Click Stores > Attribute > Product
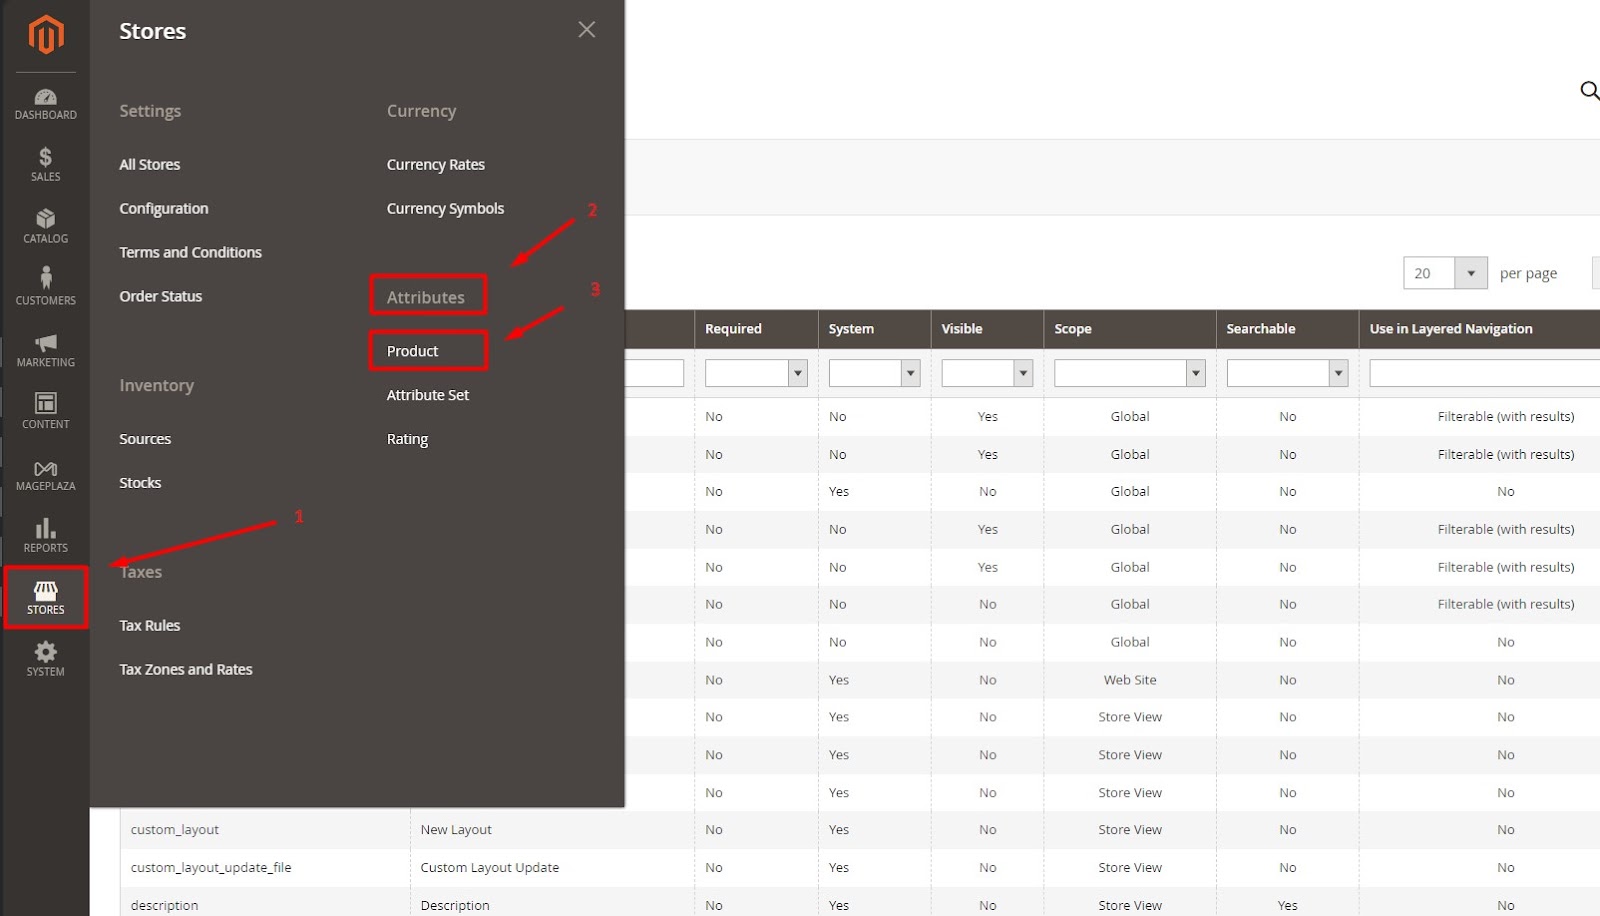
- Click the Product you want to adjust
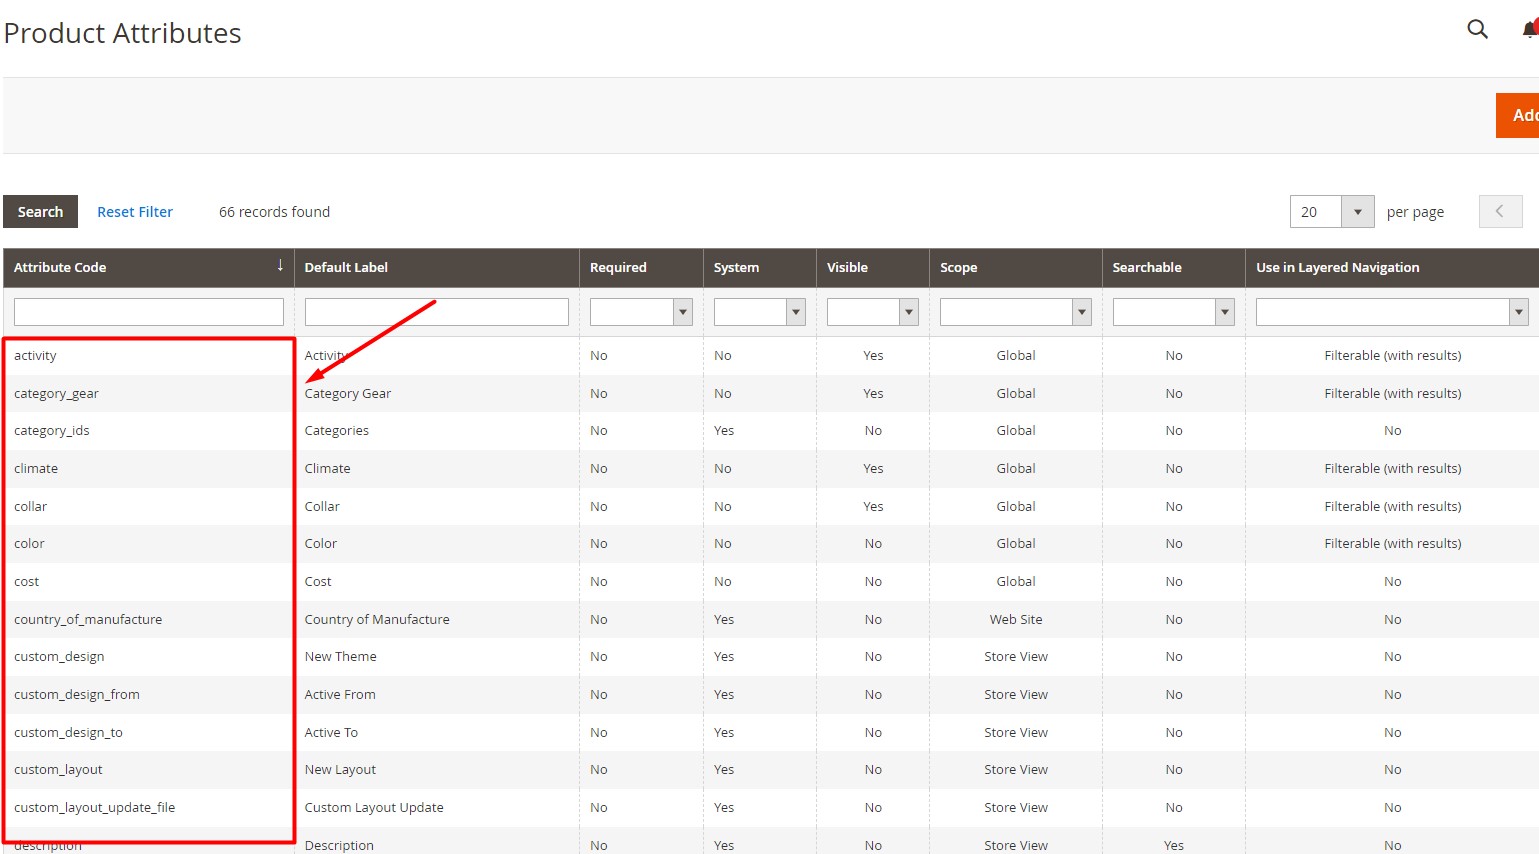
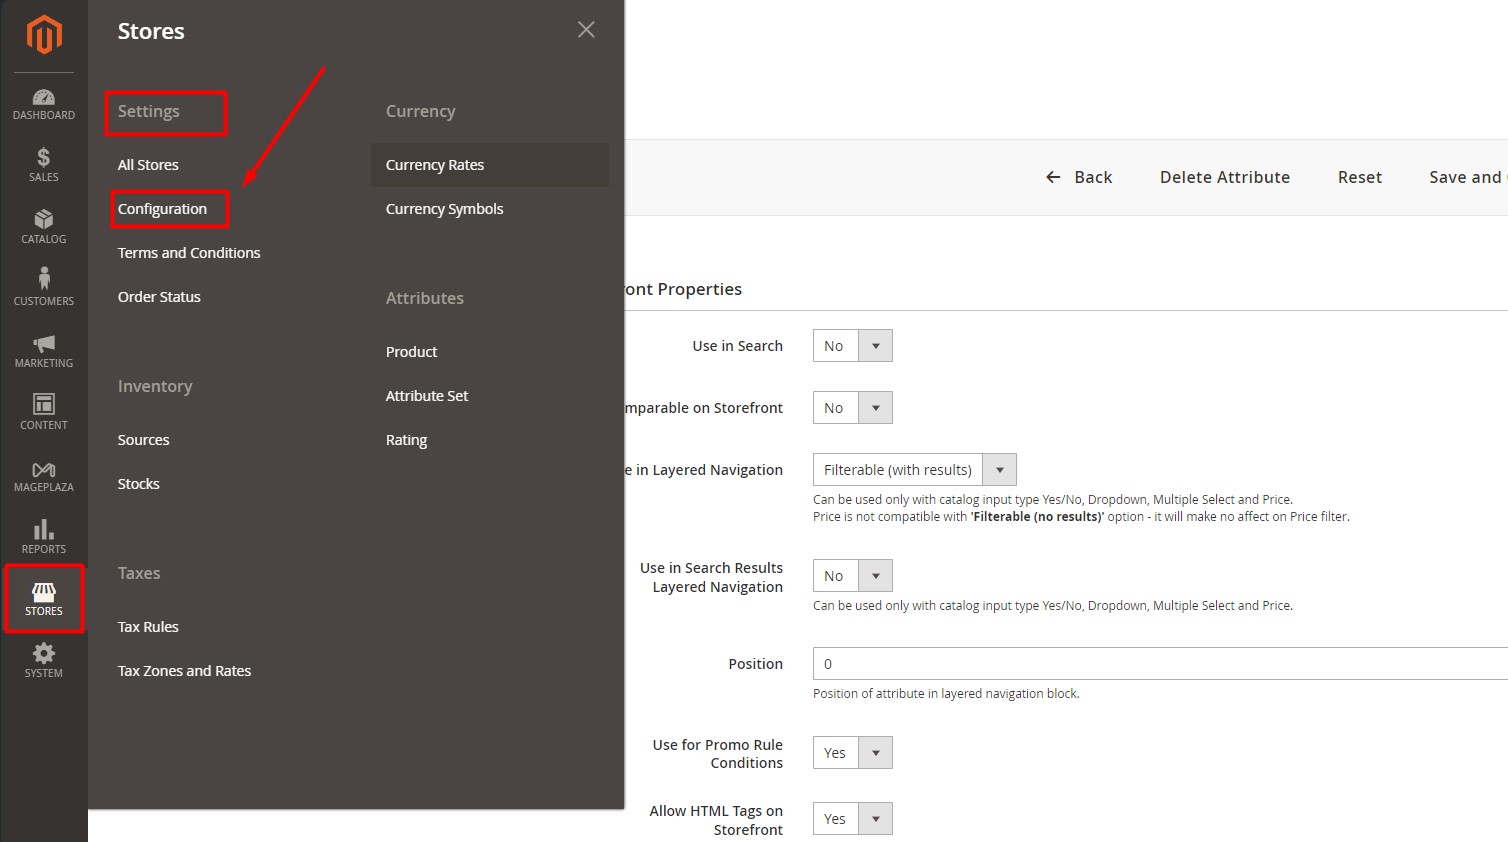
- Then click Storefront Properties, and start adjusting

- Use in Search: Set to “No” to avoid unnecessary attribute clutter in search results.
- Comparable on Storefront: Set to “No” to streamline product comparison features.
- Use in Layered Navigation: Set to “Filterable (with results)” for effective filtering options.
- Use in Search Results Layered Navigation: Set to “No” to keep search results uncluttered.
- Position: Set to “0” to keep default positioning in layered navigation.
- Use for Promo Rule Conditions: Set to “Yes” to enable promotional rule applications.
- Allow HTML Tags on Storefront: Set to “Yes” to enhance attribute display with HTML formatting.
- Visible on Catalog Pages on Storefront: Set to “Yes” for better product attribute visibility.
- Used in Product Listing: Set to “No” to simplify product listings.
- Used for Sorting in Product Listing: Set to “No” to maintain straightforward sorting options.
4. Configure Search Engine Options
Configuring catalog search in Magento 2 is essential for optimizing search functionality on your e-commerce site. By default, Magento 2 uses the MySQL search engine with theEAV Indexer enabled. You can customize search behaviors, query text size, and search recommendations.
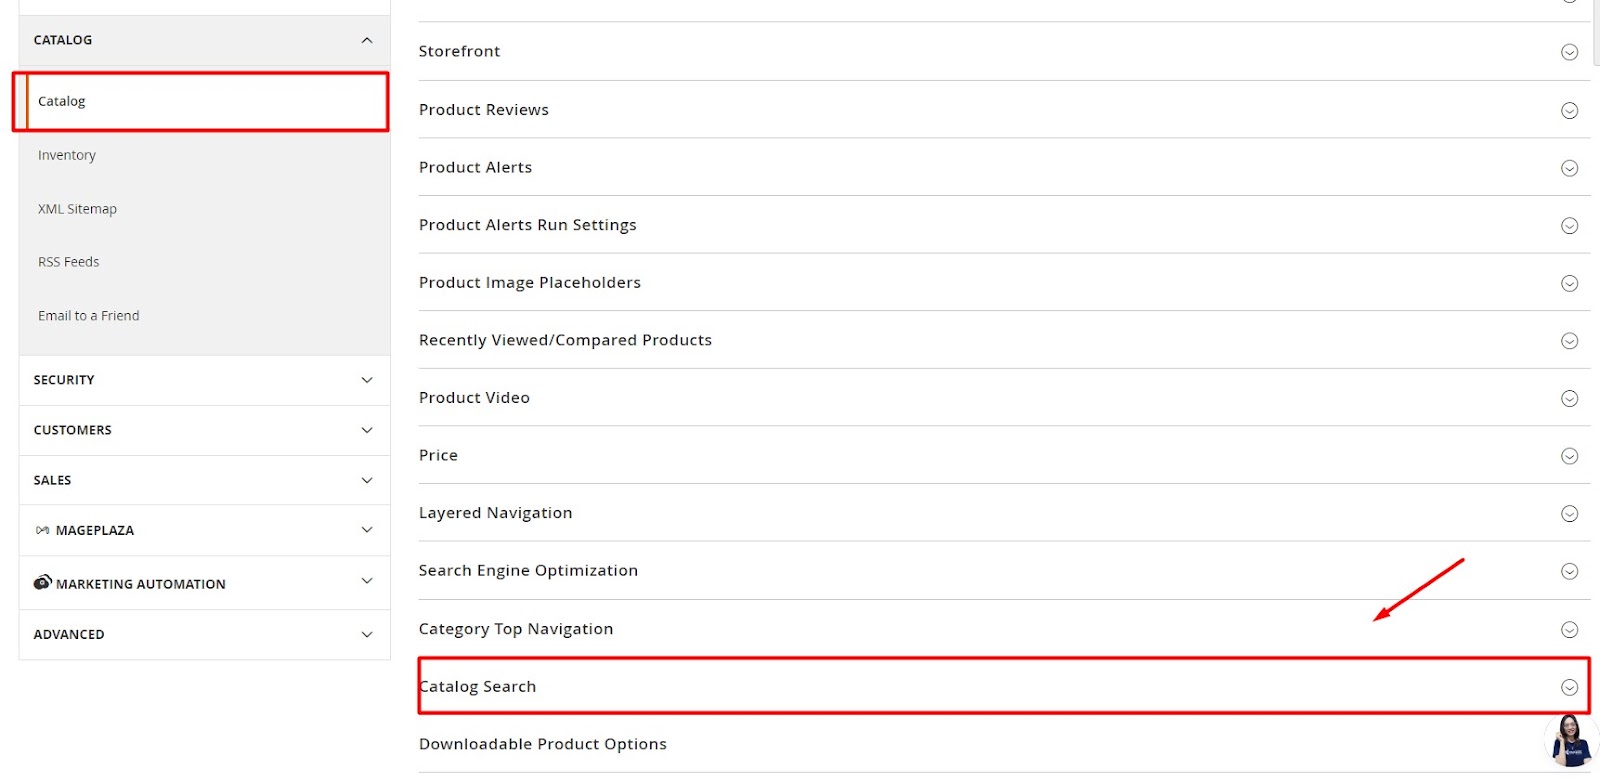
Access Catalog Search Configuration:
- Navigate to Stores > Settings > Configuration
- Scroll down to Catalog and click it, then you access Catalog Search.
5. Switch to Elasticsearch
In the Search Engine section, you can switch from MySQL to Elasticsearch. This powerful tool offers advanced search suggestions and recommendations.
Before switching, you have to install the Elasticsearch Service. You can install it at here
When you install it successfully, here are options that Mageplaza recommends for you to fill:
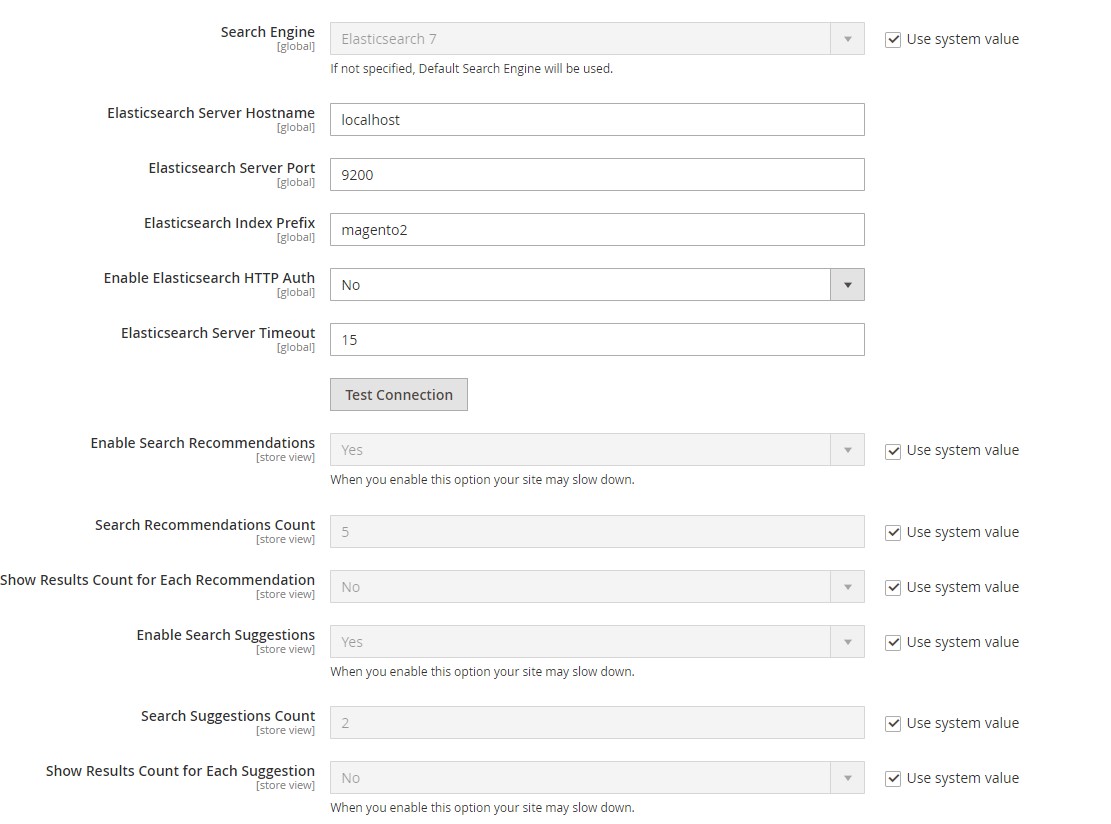
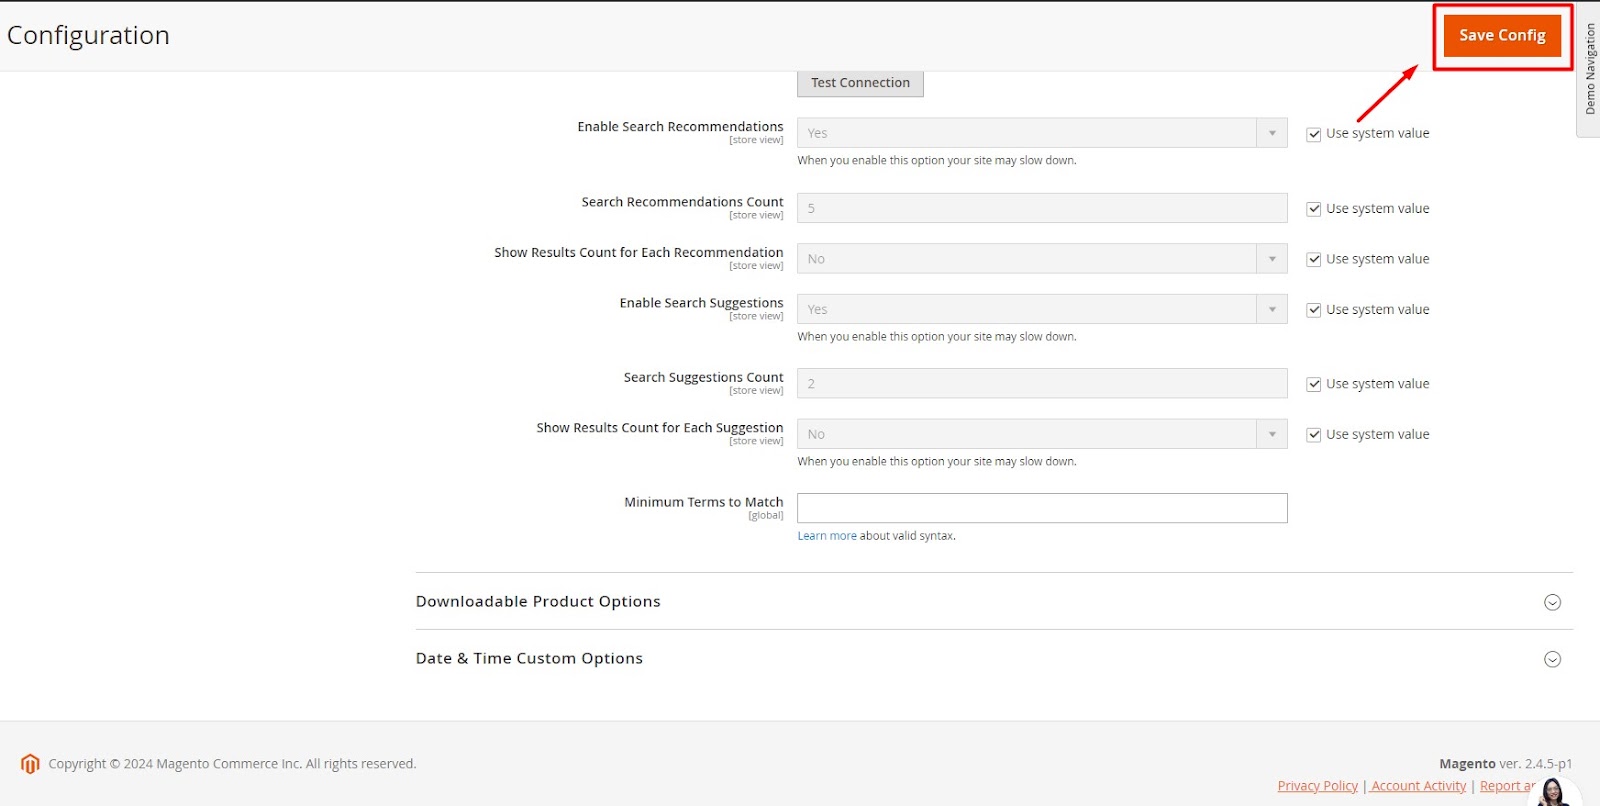
When you’re done, just click Save config to finish.
Search Terms
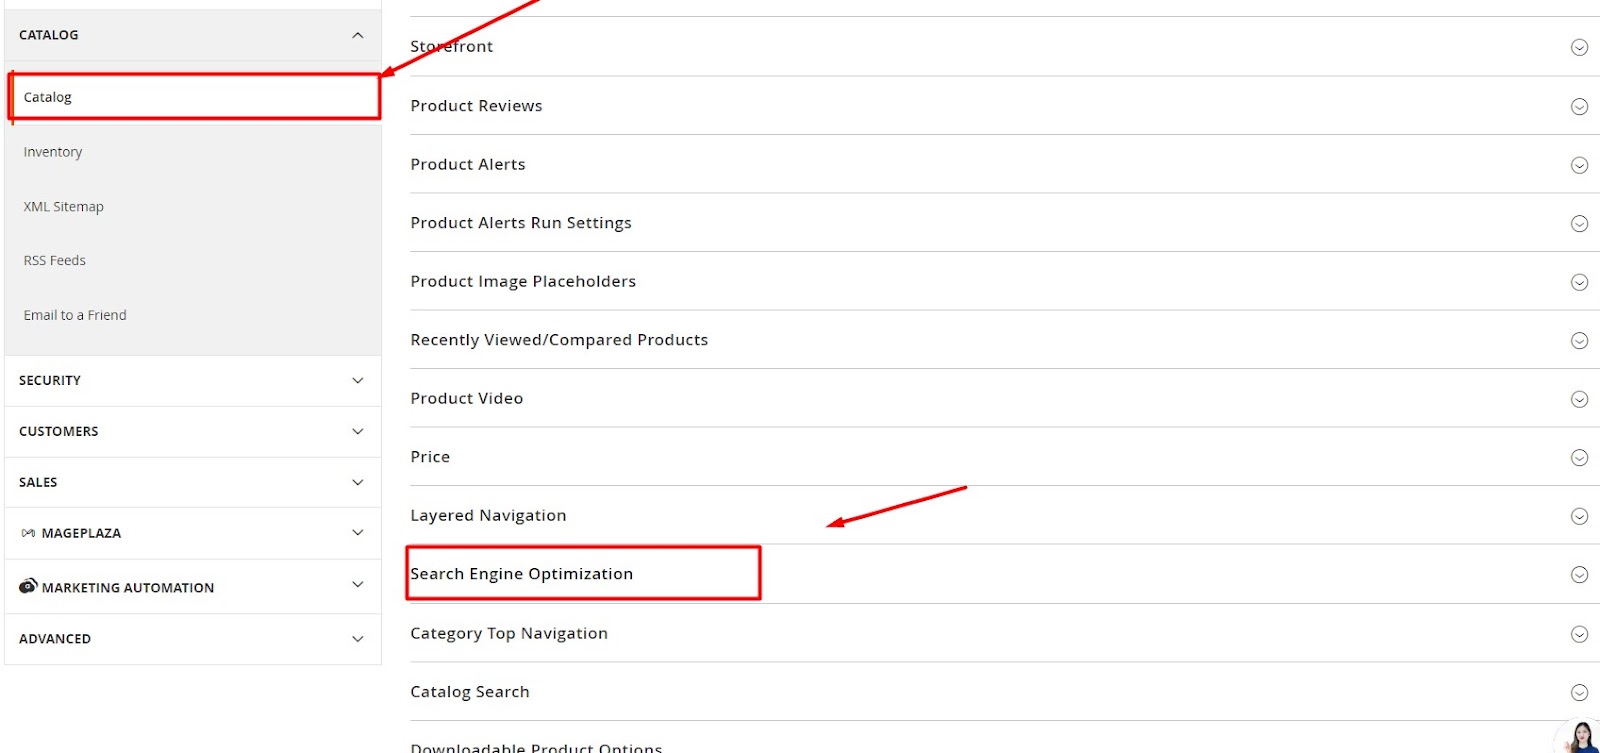
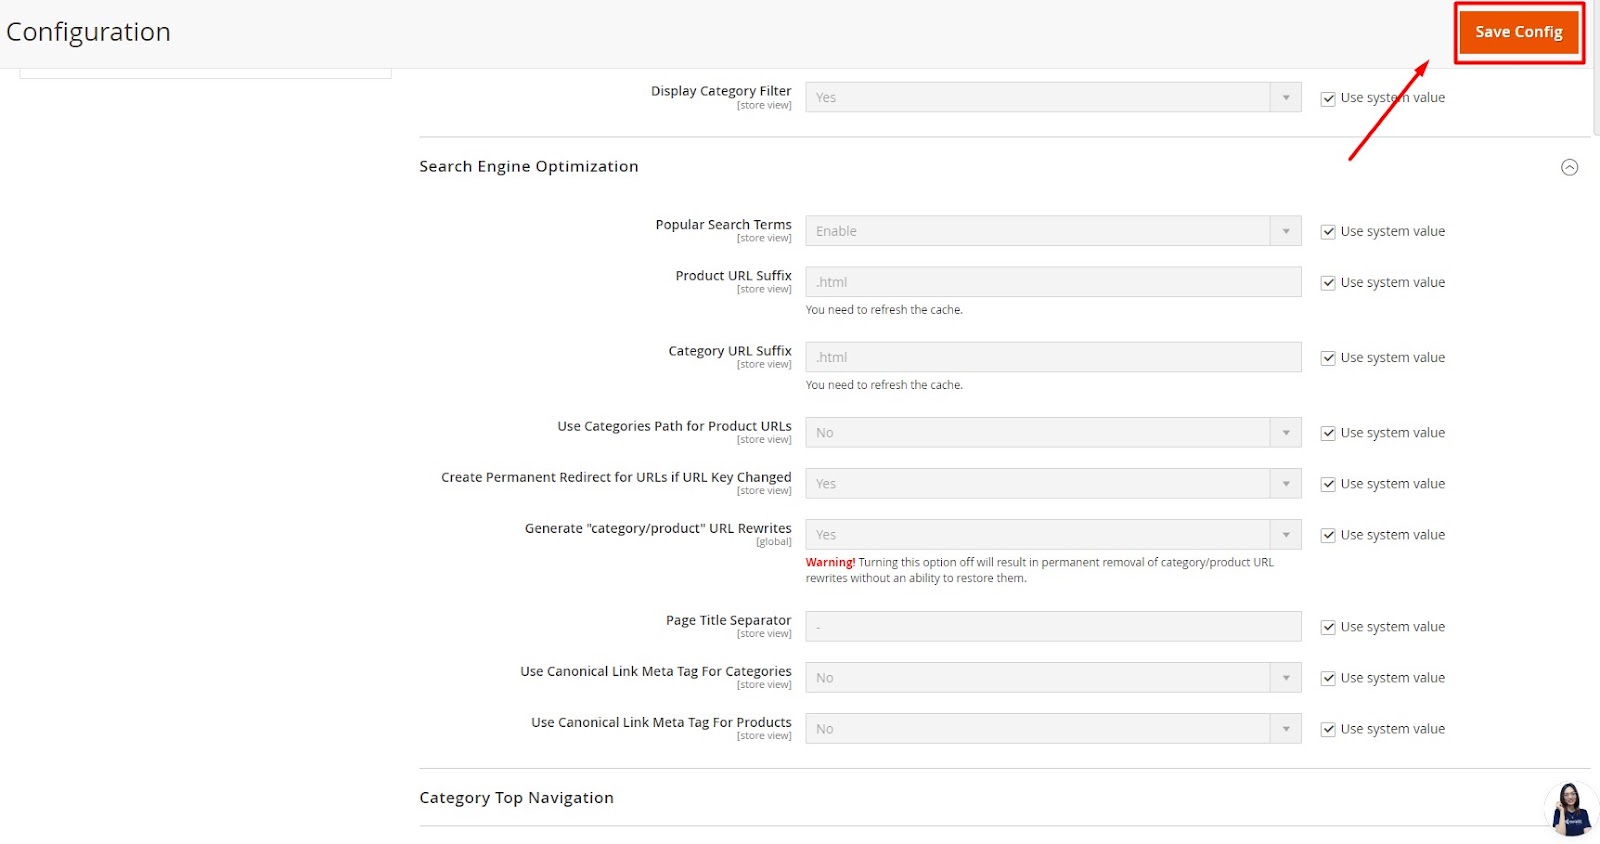
1. Configure Popular Search Terms
Magento 2 automatically generates a “tag cloud” of popular search terms. Access and set this up under Stores > Settings > Configuration > Catalog > Search Engine Optimization.
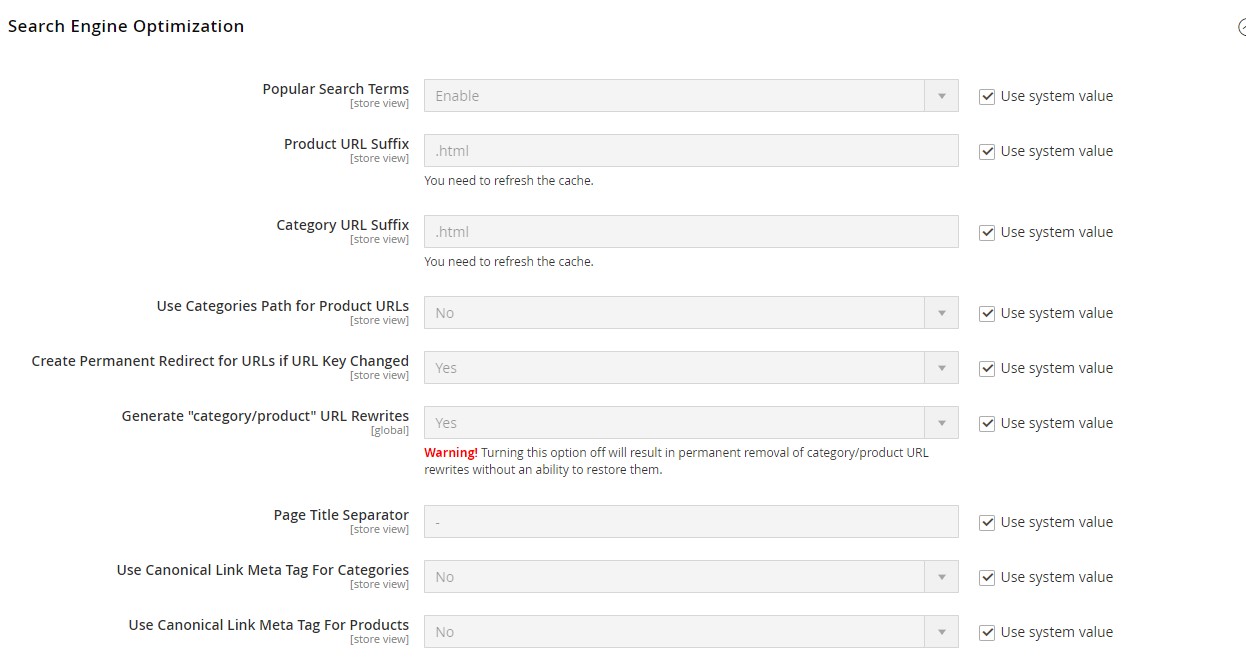
When you’ve finished adjusting, just click Save config
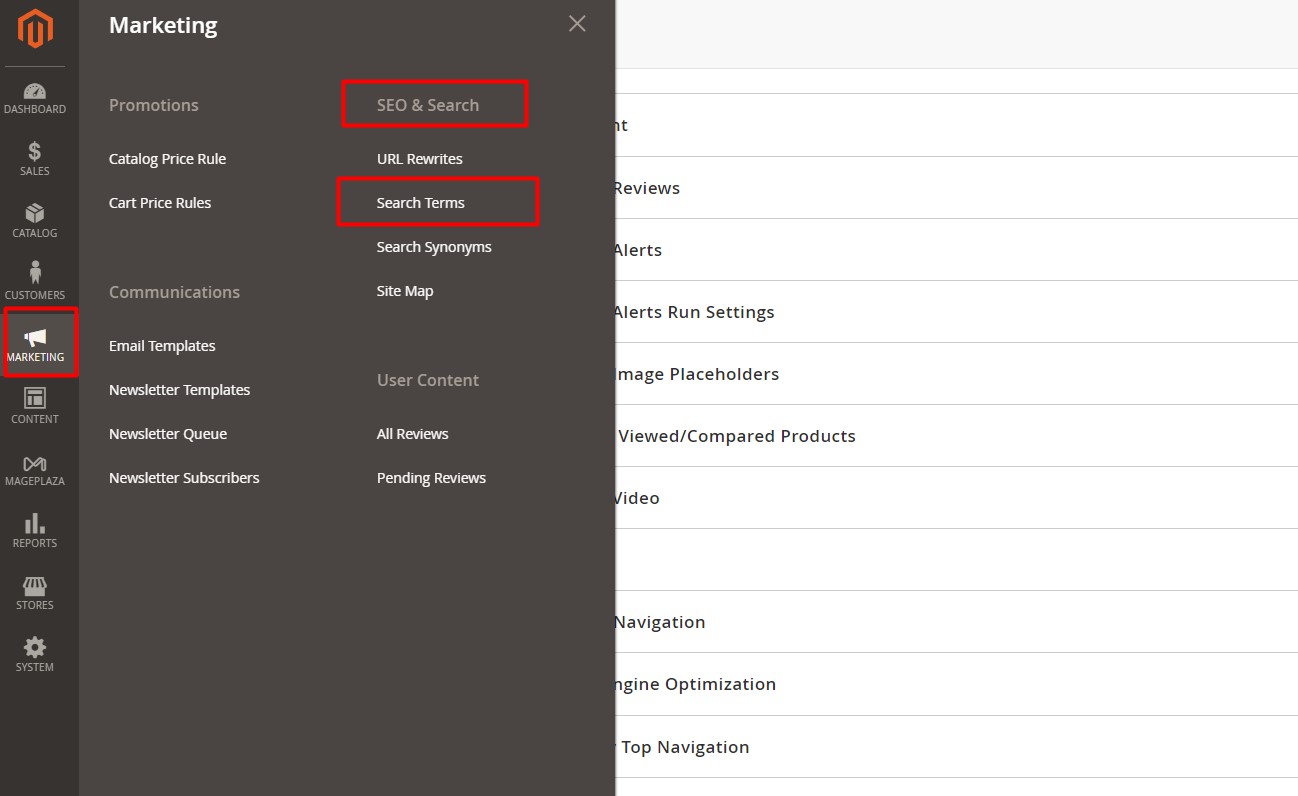
2. Manage Search Terms
Navigate to Marketing > SEO & Search > Search Terms for management options.
Check the performance of your search terms in the Search Terms.
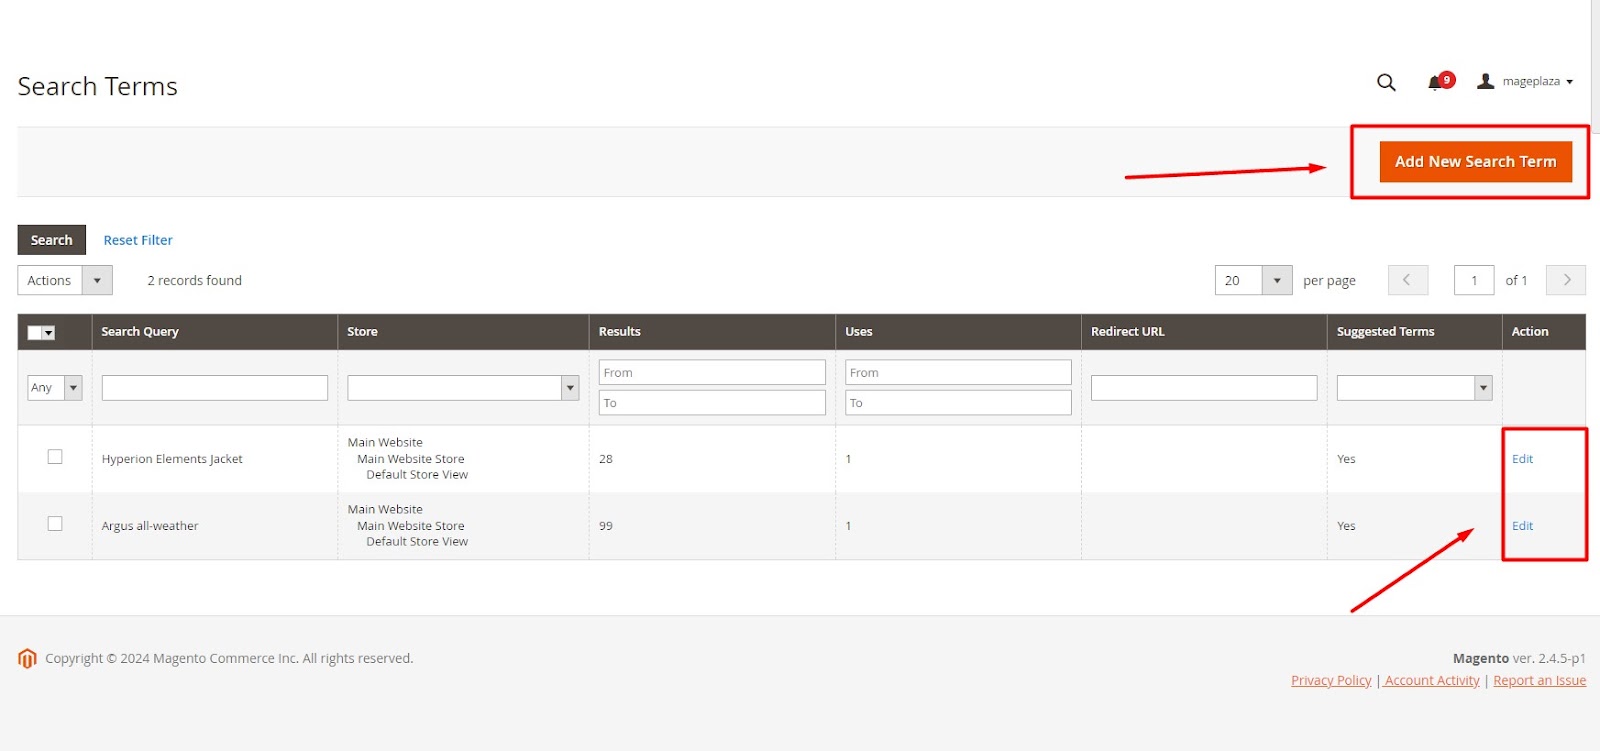
You may Add New Search Term, Edit, or even Delete the Search Terms in Search Term as per your preference.
About User Content: Product Reviews of Magento 2 Marketing Menu
**1. Access Reviews **
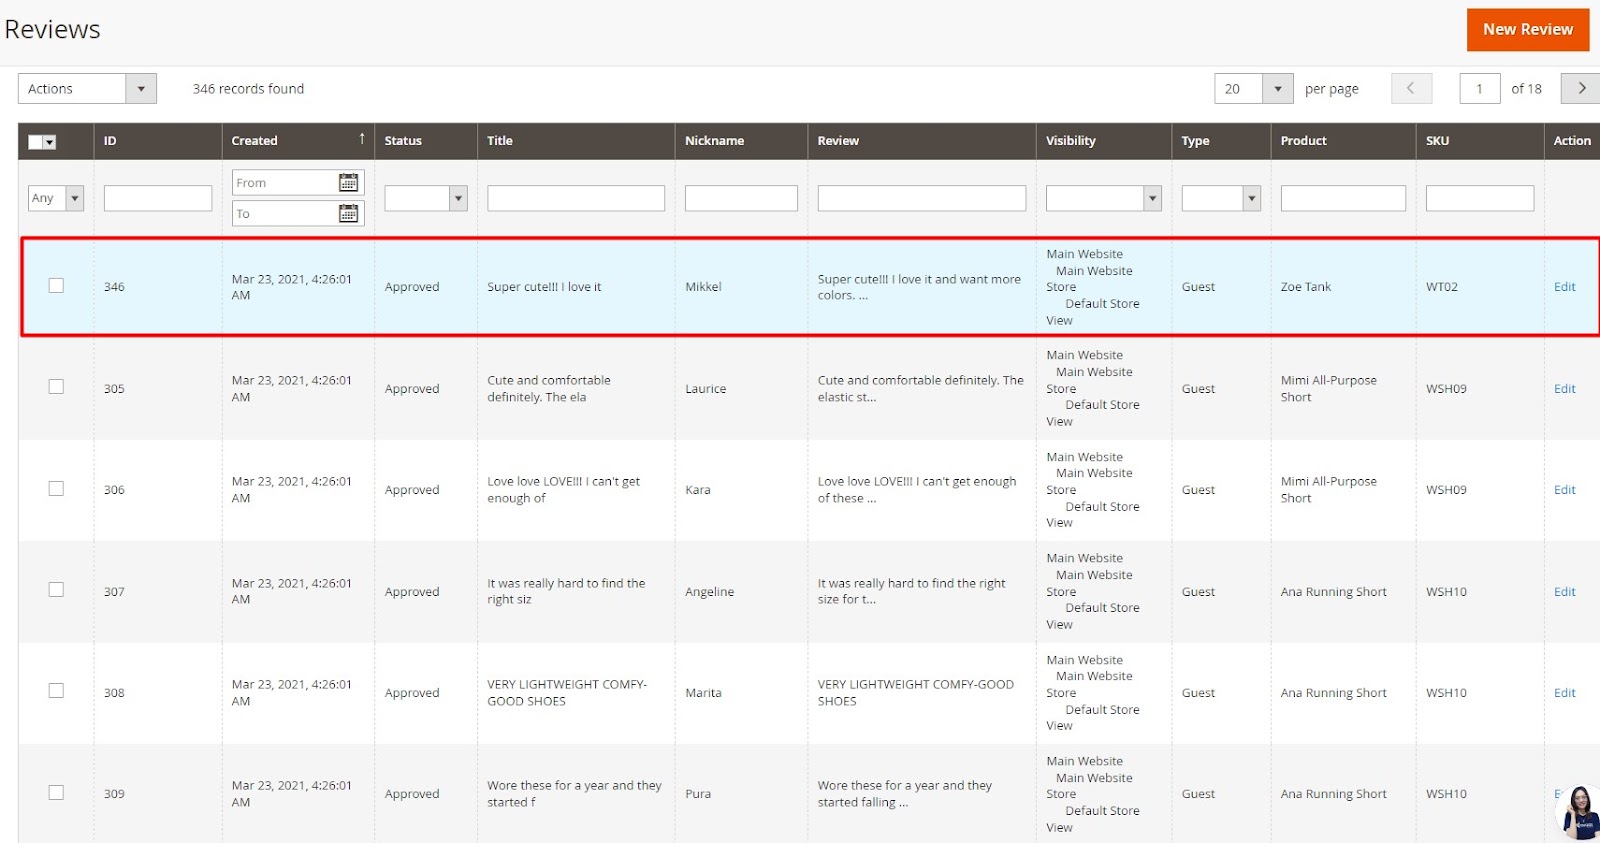
Go to Marketing > User Content > All Reviews to view all approved reviews.
2. Manage Reviews
From this section, you can search, sort, approve, delete, or add new reviews to improve your store’s value and quality
FAQ
1. Do I need additional extensions to leverage the full marketing potential of Magento 2?
While the default menu offers a solid foundation, additional extensions can significantly expand your marketing capabilities. Popular extensions include:
- Advanced email marketing tools for building personalized email campaigns and automation workflows.
- Loyalty program extensions to incentivize repeat purchases and customer retention.
- Social media integration extensions to streamline social media marketing efforts.
2. Is the Marketing Menu available in all Magento 2 versions?
The Marketing Menu is a core feature included in all editions of Magento 2, from the Open Source version to Adobe Commerce (formerly Magento Commerce). This ensures that all Magento 2 users have access to essential marketing tools regardless of their chosen edition.
However, some functionalities within the Marketing Menu might have limited capabilities in the Open Source version compared to Adobe Commerce. For instance, Adobe Commerce offers additional features like private sales and advanced customer segmentation for targeted promotions.
3. Can I customize the Marketing Menu in Magento 2?
Yes, Magento 2 allows some level of customization for the Marketing Menu. You can:
- Rearrange menu items: Adjust the order of menu options to prioritize the features you use most frequently.
- Limit menu visibility: Restrict access to specific marketing tools based on user roles within your Magento admin panel.
Final Thought From Mageplaza
In conclusion, fully utilizing the Magento 2 Marketing Menu can transform your e-commerce strategy and maximize your store’s potential. By tapping into features like promotions, SEO tools, and customer segmentation, you can create targeted marketing campaigns that drive traffic and boost sales. If you haven’t yet explored these default features, now is the time to dive in and leverage them to their fullest.
Embracing these tools not only enhances your marketing efforts but also helps you stay ahead in the competitive e-commerce landscape. Whether you’re optimizing promotions or fine-tuning customer engagement, the Magento 2 Marketing Menu offers powerful options to streamline and elevate your marketing strategy. Start exploring these features today and see the difference they can make in achieving your business goals.

Jacker is the Chief Technology Officer (CTO) at Mageplaza, bringing over 10 years of experience in Magento, Shopify, and other eCommerce platforms. With deep technical expertise, he has led numerous successful projects, optimizing and scaling online stores for global brands. Beyond his work in eCommerce development, he is passionate about running and swimming.
Related Post

Adobe Commerce SaaS or Magento 3? The Future of Magento
Discover how Adobe Commerce SaaS is reshaping the future of Magento. Learn the key differences, what Magento 3 really means, and what merchants should expect next.

Magento 2.4.8 Official Release: What's Updated?
In this article, we’ll explore the standout new features and enhancements that make the Magento 2.4.8 official version truly special.

Mageplaza Announces Official Separation from Avada Group
Mageplaza is pleased to announce a significant milestone in our journey as we officially separate from the Avada Group to operate as an independent company.
Adobe Commerce SaaS or Magento 3? The Future of Magento
Discover how Adobe Commerce SaaS is reshaping the future of Magento. Learn the key differences, what Magento 3 really means, and what merchants should expect next.
Magento 2.4.8 Official Release: What's Updated?
In this article, we’ll explore the standout new features and enhancements that make the Magento 2.4.8 official version truly special.
Mageplaza Announces Official Separation from Avada Group
Mageplaza is pleased to announce a significant milestone in our journey as we officially separate from the Avada Group to operate as an independent company.
& Maintenance Services
Make sure your store is not only in good shape but also thriving with a professional team yet at an affordable price.
Get Started