How to Set Up “Sort by Position” in Magento 2?

The more products you have, the more critical it is for product sorting. If customers walk into your store and find it disorganized, bet they will leave it within 3 seconds. In this blog, we will figure out how to sort products by position in Magento 2 simply, guaranteeing anyone can do it in the blink of an eye.
Why Is Magento 2 Sort By Position Important?
Each product in Magento 2 has a position number, and learning how to sort items based on this detail can bring store owners certain benefits. Let’s dive in!
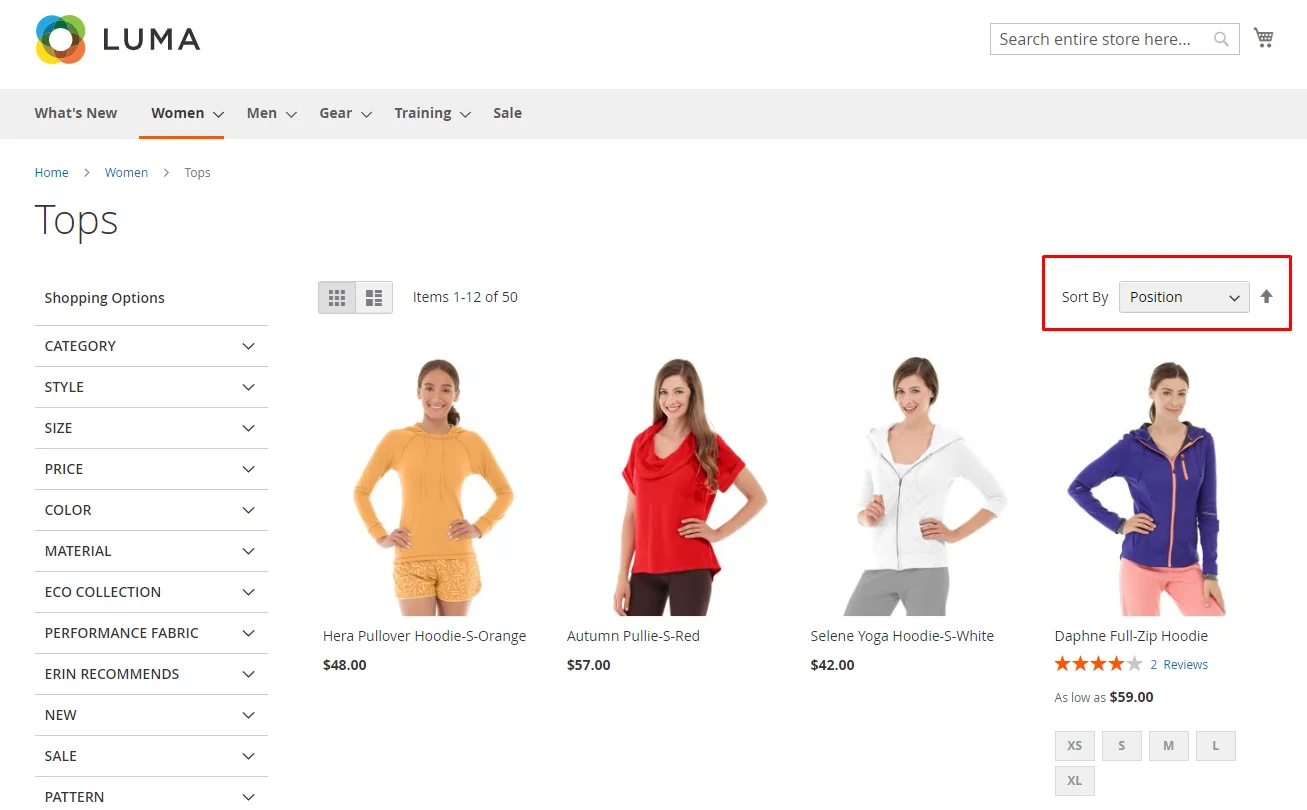
Improve User Experience
The most essential advantage of setting up sorting is to make your customers’ shopping experience more convenient. Instead of scrolling forever to find one item, shoppers can easily use the sorting tool to remove unwanted options and find their favorite ones much faster. Don’t underestimate this task if you run a big business with many products.
Magento 2 default has three basic sorting options: product name, price, and position. You can arrange the orders of these options and products to prioritize best-sellers, newest items, or any other plans according to your strategy.
Boost Sales
In e-commerce, happy customers mean more profit. Once you’ve got satisfied clients with positive shopping experiences, chances are they will come back for more.
Additionally, with the correct configuration, which we will provide detailed instructions on later, you can ensure that the products you want to promote appear first whenever customers use sorting. This method increases their potential to see these items and helps you boost the conversion rate naturally.
Diverse Customization Options
One common thing about customers is they always want the best. The store that has the lowest price, most incentives, and most features people will go for them.
Why not use this to make your website more professional, convenient, and easy-to-use? Besides, it’s way too easy to set up. Let’s move to our central part today, configuring Magento 2 Sort By Position!
Steps to Set Up Sort by Position in Magento 2
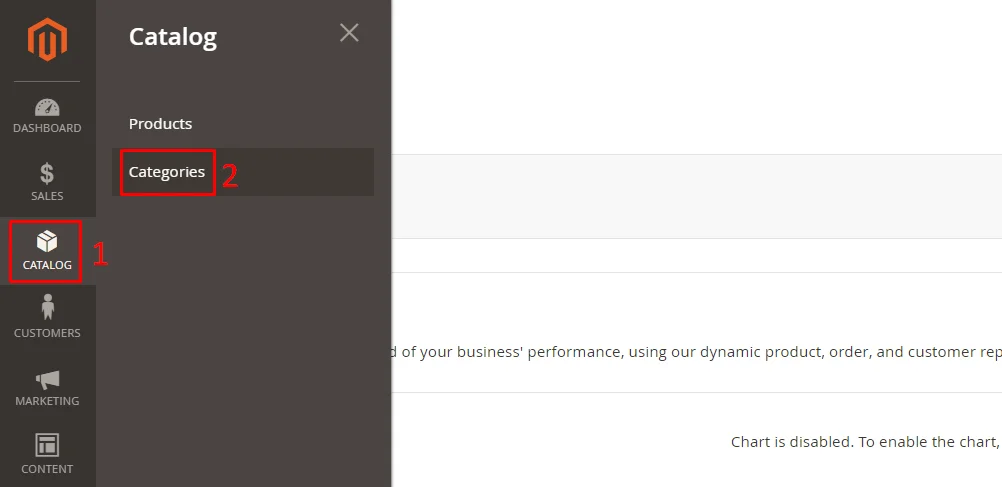
Step 1: Log in to your admin backend dashboard > Catalog > Categories
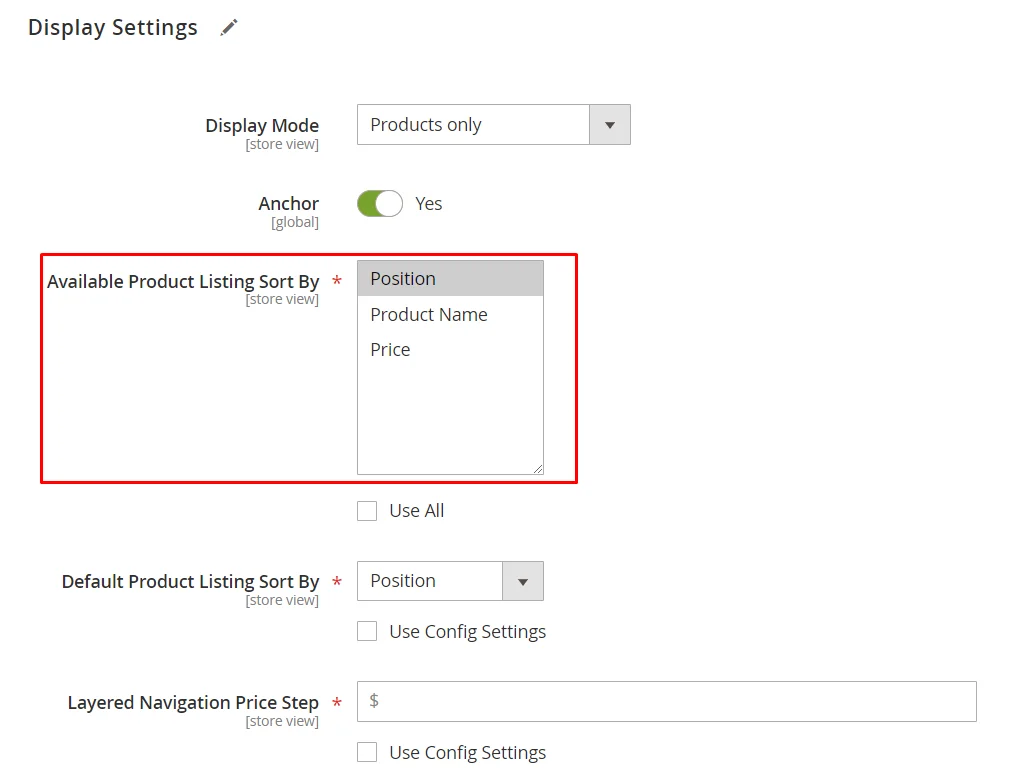
Step 2: Expand the Display Setting section and add the sorting options you want in the Available Product Listing Sort By field. Remember to select Position.
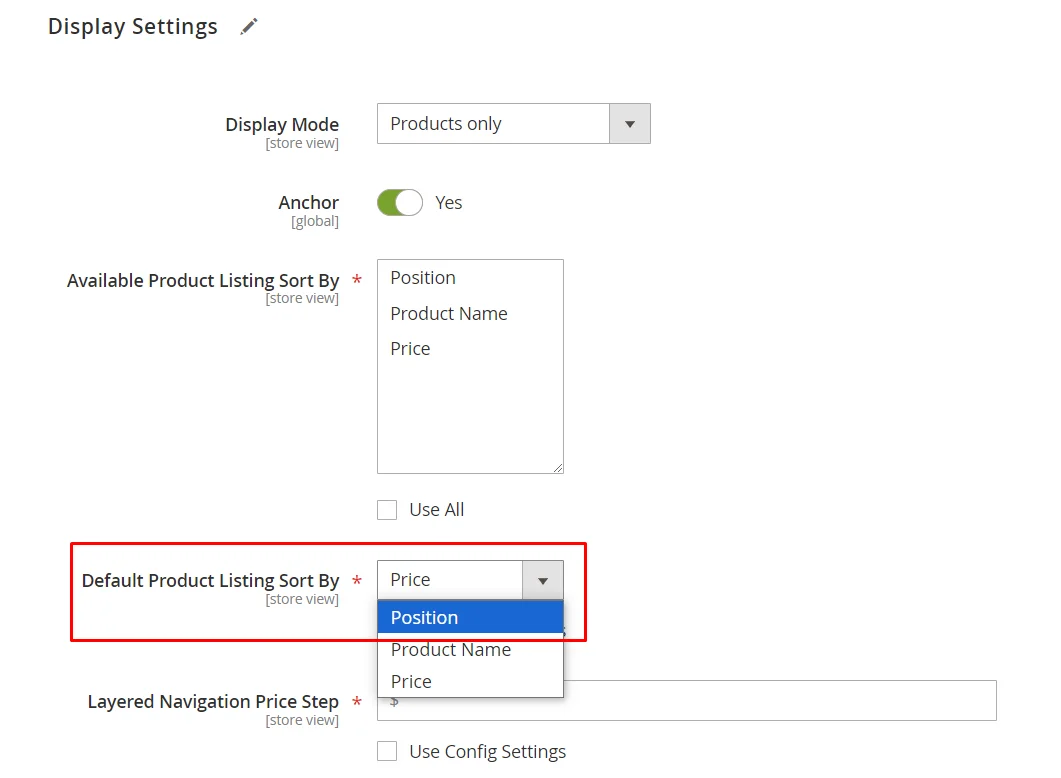
Step 3: Set the Default Product Listing Sort By field to Position. This action will make sorting by position the default option when customers visit your store.
Step 4: Hit Save
How to Optimize Product Sorting
Tip 1: Promote your targeted products by using the Position attribute
Applying sort by position is not simply a primary method to help customers find their desired products faster; it’s a way to control which item should appear on top of the category pages.
- To do this, go to
Catalog > Categories - Scroll down and expand the
Products in Categorysection. There’s a table of all your products. Pay attention to the Position column. - Change the product’s position number based on your plan.
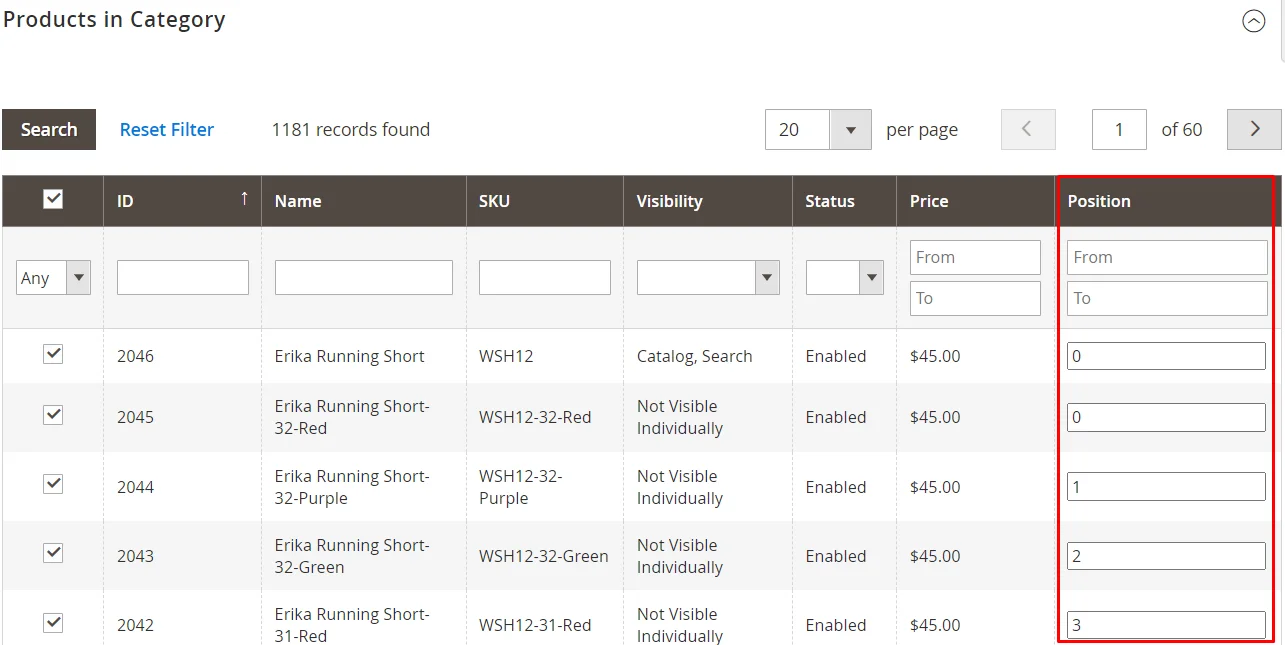
Remember: Lower numbers mean higher priority when displayed on the storefront.
So, give it a lower number with products you want to promote.
Tip 2: Test, test, and test
What is essential needs to be reminded three times. Testing is never enough in today’s modern fast pace. The world is changing every day, and so are we, so it’s necessary to follow your store’s changes and monitor their results.
It’s the same with checking sorting options efficiency. You need to implement regular testing and track how they are doing or whether your customers usually use them. If the results are not good, you need to develop other strategies ASAP.
Tip 3: Upgrade product sorting options
Since the default Magento 2 sorting options are limited, adding more attractive ones by using third-party extensions is recommended. These modules allow you to add cooler, hotter, more trending sorting methods that current buyers are looking for.
Look at Mageplaza’s Improved Sorting for Magento 2 extension - an advanced tool with diverse sorting options such as Discount, Bestseller, Most Viewed, Top Rated, etc.
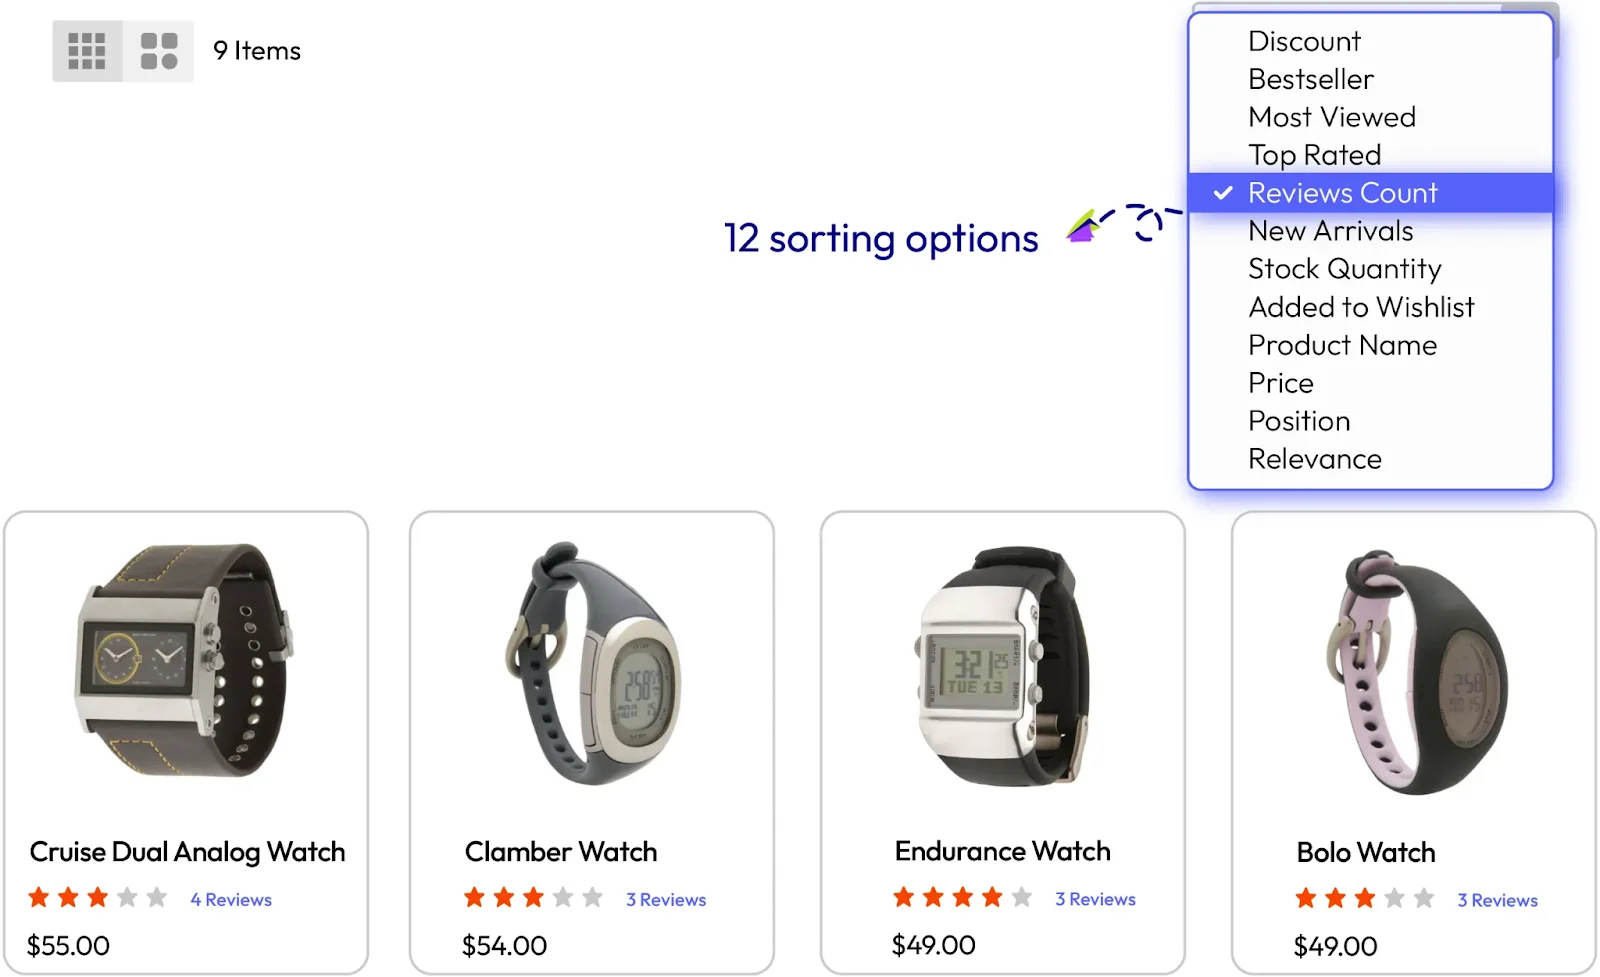
Besides, the Mageplaza Improved Sorting plugin also allows merchants to customize each criterion’s label easily. You can use this feature to make the sorting options sound more attractive. For example, admins can name Discount’s label as Hot Deals, Crazy Sales, or 24 Hours Only to create a sense of urgency. These motivational words attract shoppers, so they are likelier to click on them.

Add 12 product sorting options which are flexibly customizable
Check it out!Conclusion
And that’s it! I hope today’s blog has cleared your mind in setting a good strategy for your store organization. If you have any questions, please feel free to ask.


