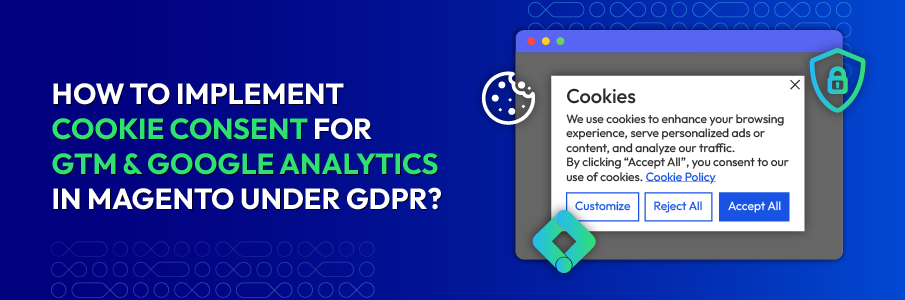
Cookies help us enhance your experience on our site by storing
information about your preferences and interactions. You can customize your
cookie settings by choosing which cookies to allow. Please note that disabling
certain cookies might impact the functionality and features of our services,
such as personalized content and suggestions.
Cookie Policy
These cookies are strictly necessary for the site to work and may not be disabled.
Cookie name
Description
Lifetime
Provider
_ce.clock_data
Store the difference in time from the server's time and the current browser.
1 day
Crazy Egg
_ce.clock_event
Prevent repeated requests to the Clock API.
1 day
Crazy Egg
_ce.irv
Store isReturning value during the session
Session
Crazy Egg
_ce.s
Track a recording visitor session unique ID, tracking host and start time
1 year
Crazy Egg
_hjSessionUser_2909345
Store a unique user identifier to track user sessions and interactions for analytics purposes.
1 year
HotJar
_hjSession_2909345
Store session data to identify and analyze individual user sessions.
1 day
HotJar
apt.uid
Store a unique user identifier for tracking and personalization.
1 year
Mageplaza
cebs
Store user preferences and settings.
Session
Mageplaza
cf_clearance
Store a token that indicates a user has passed a Cloudflare security challenge.
1 year
Cloudflare
crisp-client
The crisp-client/session cookie is used to identify and maintain a user session within the Crisp platform. It allows the live chat system to recognize returning users, maintain chat history, and ensure continuity in customer service interactions.
Session
Crisp
_ga
Store a unique client identifier (Client ID) for tracking user interactions on the
2 years
Google
_ga_7B0PZZW26Z
Store session state information for Google Analytics 4.
2 years
Google
_ga_JTRV42NV3L
Store session state information for Google Analytics 4.
2 years
Google
_ga_R3HWQ50MM4
Store a unique client identifier (Client ID) for tracking user interactions on the website.
2 years
Google
_gid
Store a unique client identifier (Client ID) for tracking user interactions on the website.
1 day
Google
_gat_UA-76130628-1
Throttle the request rate to Google Analytics servers.
1 day
Google
Advertising cookies
Advertising cookies deliver ads relevant to your interests, limit ad frequency, and measure ad effectiveness.
Advertising cookies deliver ads relevant to your interests, limit ad frequency, and measure ad effectiveness.
Cookie name
Description
Lifetime
Provider
_gcl_au
The cookie is used by Google to track and store conversions.
1 day
Google
__Secure-3PAPISID
This cookie is used for targeting purposes to build a profile of the website visitor's interests in order to show relevant and personalized Google advertising.
2 years
Google
HSID
This security cookie is used by Google to confirm visitor authenticity, prevent fraudulent use of login data and protect visitor data from unauthorized access.
2 years
Google
__Secure-1PSID
This cookie is used for targeting purposes to build a profile of the website visitor's interests in order to show relevant and personalized Google advertising.
2 years
Google
SID
This security cookie is used by Google to confirm visitor authenticity, prevent fraudulent use of login data and protect visitor data from unauthorized access.
2 years
Google
APISID
This cookie is used by Google to display personalized advertisements on Google sites, based on recent searches and previous interactions.
2 years
Google
__Secure-1PAPISID
This cookie is used for targeting purposes to build a profile of the website visitor's interests in order to show relevant and personalized Google advertising.
2 years
Google
__Secure-3PSID
This cookie is used for targeting purposes to build a profile of the website visitor's interests in order to show relevant and personalized Google advertising.
2 years
Google
SSID
This cookie is used by Google to display personalized advertisements on Google sites, based on recent searches and previous interactions.
2 years
Google
SAPISID
This cookie is used by Google to display personalized advertisements on Google sites, based on recent searches and previous interactions.
2 years
Google
__Secure-3PSIDTS
This cookie collects information about visitor's interactions with Google services and ads. It is used to measure advertising effectiveness and deliver personalised content based on interests. The cookie contains a unique identifier.
2 years
Google
__Secure-1PSIDTS
This cookie collects information about visitor's interactions with Google services and ads. It is used to measure advertising effectiveness and deliver personalised content based on interests. The cookie contains a unique identifier.
2 years
Google
SIDCC
This security cookie is used by Google to confirm visitor authenticity, prevent fraudulent use of login data, and protect visitor data from unauthorized access.
3 months
Google
__Secure-1PSIDCC
This cookie is used for targeting purposes to build a profile of the website visitor's interests in order to show relevant and personalized Google advertising.
1 year
Google
__Secure-3PSIDCC
This cookie is used for targeting purposes to build a profile of the website visitor's interests in order to show relevant and personalized Google advertising.
1 year
Google
1P_JAR
This cookie is a Google Analytics Cookie created by Google DoubleClick and used to show personalized advertisements (ads) based on previous visits to the website.
1 month
Google
NID
Show Google ads in Google services for signed-out users.
6 months
Google
Analytics cookies
Analytics cookies collect information and report website usage statistics without personally identifying individual visitors to Google.
Analytics cookies collect information and report website usage statistics without personally identifying individual visitors to Google.
Cookie name
Description
Lifetime
Provider
_dc_gtm
Manage and deploy marketing tags through Google Tag Manager.
1 year
Google
1P_JAR
Gather website statistics and track conversion rates for Google AdWords campaigns.
1 month
Google
AEC
1 month
Google
ar_debug
Debugging purposes related to augmented reality (AR) functionalities.
1 month
Doubleclick
IDE
The IDE cookie is used by Google DoubleClick to register and report the user's actions after viewing or clicking on one of the advertiser's ads with the purpose of measuring the effectiveness of an ad and to present targeted ads to the user.
1 year
Doubleclick
ad_storage
Enables storage, such as cookies (web) or device identifiers (apps), related to advertising.
1 year
Google
ad_user_data
Sets consent for sending user data to Google for online advertising purposes.
1 year
Google
ad_personalization
Sets consent for personalized advertising.
1 year
Google
analytics_storage
Enables storage, such as cookies (web) or device identifiers (apps), related to analytics, for example, visit duration.
Everything you need to know about Magento htaccess - Mageplaza
Everything you need to know about Magento htaccess
Vinh Jacker|03-17-2025
Any website uses web server software, providing access to the server via HTTP and HTTPS protocols. And, Apache HTTP Server is one of the most commonly used software for this purpose. Apache is configured with a special configuration file. This configuration file specifies the configuration of the webserver fleet and is sometimes not accessible via FTP. That’s why system administrators will have to use a particular .htaccess file that provides configuration changes on a per-directory basis.
This file provides the ability to customize the configuration defined in httpd.conf/apache.conf. The commands provided in the .htaccess file apply to the directories containing the file and to all subdirectories.
In this blog post, we will learn all about the .htaccess file in Magento. What is .htaccess? Benefits of htaccess? How to edit it in Magento as well as How to enable Magento developer mode .htaccess?
Now, without further ado, let’s get started!
What is the htaccess file in Magento?
The Magento htaccess file is a configuration text file that controls directories and subdirectories and allows them to be changed. This is an especially important file for Search Engine Friendly URLs. In addition, it also contains a standard web server and PHP directives which are modified to improve site performance. You need to backup the Magento htaccess file template (.htaccess.sample) when it is required to extract the appropriate lines of code or replace it instead of the current line of code when it is not working after updating.
More importantly, if you want to build a website that has SEO-friendly URLs, smart sitemaps, as well as optimizes your online store, and so on, consider installing the Magento 2 SEO suite for your store!
However, keep in mind that using the .htaccess file slows down your Apache HTTP server a bit, so we recommend you don’t add too much information.
The htpasswd file should be generated as well. This text file is a password list with the following structure:
user1:password
user2:password
Here the password is encoded. One can find plenty of online password creators like this. The line: test:$apr1$3gKh3mag$KrgTcxAqx4EeMVP//3wc80
Prohibit Hotlinking
Hotlinking means the direct links from site A to non-html objects, which includes images, movie files, etc., on site B. This can considerably affect bandwidth usage and CPU load. At this time, you can stop these requests on your server by adding these directives to your htaccess:
Apache server will be able to use many external extensions that help extend the default function. One of them is mod_gzip. You are able to compress your HTML, JS and CSS files. To do this, you can add these directives to htaccess:
Usage of the caches can be predefined by means of the mod_expires extension. Apply this sample command:
<ifModule mod_expires.c>
        ExpiresActive On
        ExpiresDefault "access plus 1 seconds"
        ExpiresByType text/html "access plus 1 seconds"
        ExpiresByType image/gif "access plus 2592000 seconds"
        ExpiresByType image/jpeg "access plus 2592000 seconds"
        ExpiresByType image/png "access plus 2592000 seconds"
        ExpiresByType text/css "access plus 604800 seconds"
        ExpiresByType text/javascript "access plus 216000 seconds"
        ExpiresByType application/x-javascript "access plus 216000 seconds"
</ifModule>
How to edit .htaccess in the cPanel’s File Manager
There are many methods to edit a .htaccess file. They are:
Modify the file on your computer and upload it to the server via FTP (FileZilla)
Use an FTP program’s Edit Mode (FileZilla)
Use SSH and a text editor
Use the File Manager in cPanel
However, the fastest and easiest way to edit .htaccess files is to use File Manager in cPanel. This tutorial will show how to edit the .htaccess file using this method.
Please keep in mind that you need to backup your website before doing anything. This is to make sure that if anything goes wrong, you don’t take any risks.
You can find some links below which will redirect you to cPanel and its features with the following condition:
You are signed in to the Customer Portal. Also, you can log in after clicking the link.
The hosting plan you are trying to access is shared or cloud.
#2. Press on the File Manager to open in the Files section
CAPTION
#3. The File Manager will show different folders or website directories and website files - some of which are hidden. Choose the directory you want to access.
#4. Select Settings in the upper right-hand corner to view the .htaccess file.
#5. Make sure that the Show Hidden Files (dotfiles) is checked. This will clear the page and all files starting with a “.” (dot) will be shown.
CAPTION
#6. Don’t forget to press the Save button.
#7. Define the .htaccess file in the list of files. You need to scroll your cursor a little bit to find it.
#2. If you have a single domain, navigate to public_html to look for the .htaccess file. (In case you have other domains, access that domain’s document root to edit the .htaccess).
CAPTION
#3. Right-click on the .htaccess file and press Edit from the menu. Alternatively, you also are able to click on the icon for the .htaccess file and then choose the Edit icon at the top of the page.
CAPTION
#4. A dialogue box will appear asking you about encoding. You only need to click Edit to continue. A new window will be opened by the editor.
CAPTION
#5. When entering the codes needed, for instance, for Redirects and Rewrites, you can paste the whole code from the second line in .htaccess.
CAPTION
If you need to add more codes, please ensure an extra line before entering a new code.
CAPTION
#6. Click on Save Changes in the upper right-hand corner to complete.
CAPTION
#7. Last but not least, you need to test your website to ensure that all your changes were saved successfully. If not, please fix the issue or revert back to the previous version until your website can work well again.
#8. Finally, you only need to click on the Close button to exit out of your File Manager.
NOTE: you can completely edit the .htaccess file via FTP or SSH as an easy alternative instead of using the cPanel method.
How to enable the developer mode htaccess in Magento?
First and foremost, you should double-check everything is prepared well.
Disable Cache System > Cache Management > Choose All [Check-Boxes] > Actions > Disable > Submit
Re-Index All System > Index Management > Choose All [Check-Boxes] > Actions > Reindex Data > Submit
Disable Complication System > Tools > Compilation > Disable
Turn On Logging System > Configuration > Advanced > Developer > Log Settings > Enabled > Yes
The mode can be enabled by applying the command line (only in Magento 2).
For instance: for M 2: MAGE_MODE should be set to developer value:
> bin/magento deploy:mode:set developer
############################################
## overrides deployment configuration mode value
## use command bin/magento deploy:mode:set to switch modes

# SetEnv MAGE_MODE developer

############################################
## uncomment these lines for CGI mode
## make sure to specify the correct cgi php binary file name
## it might be /cgi-bin/php-cgi

# Action php5-cgi /cgi-bin/php5-cgi
# AddHandler php5-cgi .php
How to redirect 301 using htaccess file in Magento
Here are a few important reasons to 301 redirect using htaccess in Magento.
Change the store altogether.
Change the URLs as a part of your efforts to improve SEO.
Change in the products you offer
Simplify a URL or expanded it to include the details
Correct a typo mistake in the URL
Delete a product attribute
If you’re not sure that a 301 redirect results in a “404-Page Not Found” error, this is the last thing you can wish for in your online store. So it’s time you need to make sure to redirect 301 using htaccess in the Magento store.
When you redirect an individual file such as example.com/oldfile.htm run a 301 redirect as the below:
Locate the htaccess configuration file in the root on web servers by running the Apache Web Server software and adding:
If you use this method, users and search engines will be redirected to your new URL. So you can completely get rid of 404 errors in Magento stores by using redirect 301.
Final words
That’s all you need to know about the htaccess file in Magento. If you have any questions regarding this, please feel free to comment in the section below. Our experts will be here to support you all.
Also, if you find this tutorial helpful, don’t hesitate to share it with your friends!
Thanks a lot for reading and see you in the next post!
Jacker is the Chief Technology Officer (CTO) at Mageplaza, bringing over 10 years of experience in Magento, Shopify, and other eCommerce platforms. With deep technical expertise, he has led numerous successful projects, optimizing and scaling online stores for global brands. Beyond his work in eCommerce development, he is passionate about running and swimming.
Master UTM parameters and Google Analytics for Magento. Track traffic sources, measure campaign performance, and practical tips to use it for better business decisions.
Master UTM parameters and Google Analytics for Magento. Track traffic sources, measure campaign performance, and practical tips to use it for better business decisions.