How to set up Facebook pixel on Shopify?
Summer Nguyen | 06-25-2024
Setting up the Facebook Pixel on your Shopify store is a crucial step for anyone looking to enhance their online marketing efforts. How to set up Facebook pixel on Shopify?
This guide includes all the necessary steps in the process of Facebook Pixel implementation with Shopify as well. Whether you want to optimize ad targeting, make repeat visitors, or simply obtain expert understanding of customers, you will be able to make decisions on a data basis, which will undoubtedly be important in improving the performance of your company.
Table of Contents
What is Facebook Pixel?
According to Facebook, Facebook pixel is a piece of code inserted in a webpage that allows the marketers to measure the ad impact by analyzing the visitors’ actions. The Meta pixel is the new name given to the Facebook pixel after the recent re-branding of the tech giant.
To put it another way, it’s an analytics tool that monitors the actions of your website users. You can use this behavior as a benchmark to see what actions you want visitors to your ads to take. By monitoring particular actions, or events, it examines how users interact with your website.

The following are some of the most significant actions that users of your website conduct that the Meta pixel records:
- Add to cart
- Initiate checkout
- Purchase
- Subscribe
- Pages visited
What Advantages Come with Incorporating the Facebook Pixel?

Incorporating the Facebook Pixel offers several strategic advantages for enhancing your digital marketing efforts:
- Improved Ad Targeting: Personalize ads that are based on your user’s activities on your site, pursuing those perceived as having a higher chance of converting/getting to purchase.
- Conversion Tracking: Gate the performance of your ads by following the steps the visitors make after an interaction with the ad.
- Retargeting Capabilities: Retarget those visitors who had not converted earlier by side advertisements as they navigate Facebook and its paired sites.
- Optimized Spending: The budget needs to be directed to interested users before generating actual results.
- Rich Insights: Do gain vital insights about the various ways in which users interact and navigate your website; thereby the refinement of the marketing techniques and the videos, images or articles on your Website becomes easy and effective.
- Cross-Device Tracking: Know how persons jump from device to device and, therefore, enhance your targeting methods to reach your audience properly.
The Facebook pixel’s targeting options
Custom Audiences
Facebook enables you to retarget your visitors with Custom Audiences from your website. If you have the Meta pixel set up, it will follow visitors to your website who are also signed into Facebook at the same time.
The pixel will track activities such as:
- Website Traffic: Target users based on their activity on your website, such as visiting a specific page, making a purchase, or spending a certain amount of time.
- Event-Based Targeting: Reach users who take specific actions on your website, such as signing up for a newsletter, adding items to their cart, or completing a purchase.
You can market to highly specific audiences. Utilizing this data can also help you contact potential clients by building lookalike audiences.
Custom Conversions
The ability to generate custom conversions in the same way that you create custom audiences is one of the most fascinating features of the Meta pixel. Choosing a completion page and giving the conversion a name creates a custom conversion.
For example:
- I appreciate you making purchases. Your order is being delivered.
- We appreciate you registering. We’ll be sending you your first email soon.
- I appreciate your feedback. This is a free download for you.
This implies that you can make bespoke conversions outside of your Facebook advertisements and decide later on when to use them.

The tracking pixel can readily track when someone visits a completion page because it already activates on all of your website pages, especially for those who have clicked on your Facebook advertisements.
Dynamic Ads
You can run dynamic advertising on your e-commerce website by using the Meta pixel. Based on your target audience, these ads—also known as catalog sales in your ad account—automatically display products from your catalog.
Creating customized advertisements based on individual pages visited and actions taken might not be the most effective solution if your company sells thousands of products. Alternatively, you can design dynamic ad layouts so that a prospective customer’s experience varies based on their actions.
Standard and Custom Events
In digital marketing, particularly when using tools like the Meta Pixel, you’ll come across two types of events: standard and custom.
Standard Events
Standard events are predefined by platforms like Facebook (Meta) and are designed to cover typical actions users might take on a website.
- View Content
- Search
- Add To Cart
- Add To Wishlist
- Initiate Checkout
- Add Payment Info
- Purchase
- Lead
- Complete Registration
Custom events are defined by the user or marketer to track actions that are specific to their website and business needs that aren’t covered by standard events.
- Video Watched
- Level Achieved
- Subscription Change
- Form Error
How to Set up Facebook Pixel on Shopify?
You will get the best results from your advertisements if you have access to the best data and most comprehensive information on the behavior of your clients. To maximize the use of your data, it’s critical to understand how to build and configure a Facebook pixel.
Here is our detailed tutorial on creating or locating your Facebook pixel and adding it to Shopify.
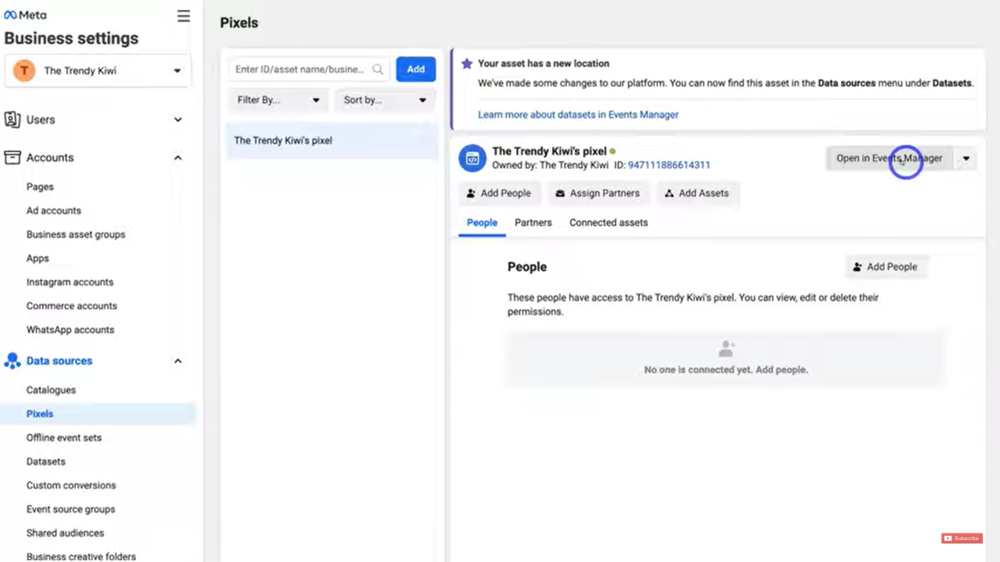
Step 1: Create your pixel in Facebook
Initially, you need to locate your Facebook pixel ID. To accomplish this, go into your Shopify store and visit the Facebook Events Manager admin page.

Tell Facebook where you want to get your data from by selecting “connect data source” (next to the green arrow on the left-hand side).
Since your Shopify store will be the source of the information, you should choose “Web” as the source.
Step 2: Name your pixel
Click Connect once your data source has been selected. So give your pixel a name.
Step 3: Check for partner integration
You will then be prompted to look for a partner integration. After entering your website, choose Check.
Step 4: Select the connection method for your website
You’ll select how to link your website to Facebook if you qualify for an integration. Meta suggests using the Meta pixel and Conversions API.
Next, decide on the Conversions API configuration. Integrating with your partners is the simplest method. Click Next after selecting “Set up with partner integration.”
Step 5: Select Shopify
If you haven’t already, select Shopify and follow the instructions to link your Shopify store to Facebook.
Tips to Consider to Add Facebook Pixel to Shopify
Adding the Facebook Pixel to your Shopify store is a strategic move to enhance your marketing efforts. Here are some concise tips to ensure a smooth integration:
- Locate Your Pixel ID: Find your Facebook Pixel ID in your Facebook Events Manager.
- Access Shopify Admin: Navigate to your Shopify admin panel and go to ‘Online Store’ then ‘Preferences’.
- Enter Pixel ID: Paste your Facebook Pixel ID into the Facebook Pixel section.
- Enable Enhanced Ecommerce Tracking: For better data collection, enable this feature in Shopify’s Google Analytics settings.
- Test Pixel Installation: Use Facebook’s Pixel Helper Chrome extension to verify the Pixel is firing correctly.
- Set Up Standard Events: Configure events like ‘Add to Cart’ or ‘Purchase’ to track conversions and user actions.
- Monitor and Optimize: Regularly check the data and adjust your ad campaigns based on the insights gathered.
- Stay Updated: Keep abreast of any changes Facebook makes to Pixel functionalities or privacy guidelines.

Wrap-up
In conclusion, tracking the effectiveness of your marketing campaigns is simple and quick with the addition of a Facebook pixel to your Shopify store. It also enables you to find out crucial information on the actions of your clients.
Your Facebook pixel may be easily set up and used to enhance ad targeting, retarget website visitors, and assess the effectiveness of your marketing campaigns.
With the help of this post’s instructions, you can easily construct a Meta previously known as the Facebook pixel—and add it to your Shopify store. No matter how much e-commerce expertise you have, you may use this functionality to start achieving your company objectives.


