2 Ways to Set Up Google Ads Conversion Tracking on Shopify
03-17-2025
Fed up with spending money on Google Ads without seeing results? This guide will help you set up Google Ads conversion tracking on your Shopify store and refine your ad strategy.
Understanding which paid ads perform well and which don’t is essential to making money rather than wasting it.
Since you’re investing your hard-earned money in Google Ads, it’s important to know what you’re getting in return.
In this guide, we’ll walk you through two methods to set up Google Ads conversion tracking on your Shopify store. We’ll also cover troubleshooting any issues and share three ways to use your new data to enhance conversions and boost revenue.
Let’s get started!
How Google Ads Conversion Tracking works?
Although it might seem like magic, tracking conversions is actually quite straightforward:
-
First, we define a conversion action we want to monitor, such as a purchase made on our store.
-
Google provides a piece of code, known as a conversion tracking tag, which we then add to our website or app.
-
When someone completes the action, the data is sent back to Google. For purchases, it also includes the revenue generated.
-
We can review all this information in our Google Ads account to determine which ads generated the most purchases, revenue, and other metrics.
Moreover, Google uses your conversion data to enhance your ads’ performance. Without this essential data, Google cannot optimize your ads, potentially resulting in a less effective advertising campaign—a significant drawback for online stores in general.
Since we already understand what conversion tracking is and how it works, let’s explore the major benefits of setting up Google Ads Conversion Tracking on Shopify.
Major benefits of setting up Google Ads Conversion Tracking on Shopify
Utilizing Google Ads conversion tracking with your Shopify store offers several significant benefits:
-
Measure Ad ROAS: Conversion tracking enables you to gauge the effectiveness of your ads in generating sales. By understanding how clicks translate into customers, you can calculate your Return On Ad Spend (ROAS). This insight allows you to allocate your budget more efficiently, concentrating on ads that yield the best results.
-
Optimize Campaigns for Conversions: Conversion tracking provides visibility into which ads, keywords, or audience targeting strategies are driving sales. Armed with this information, you can optimize your campaigns by reallocating resources to high-performing elements and refining those that are underperforming.
-
Gain Customer Insights: Beyond tracking sales, conversion tracking allows you to monitor other valuable actions such as signups, downloads, or adding items to carts. This data unveils patterns in user behavior, providing insights into your target audience. By tailoring your ad strategy to their interests and needs, you can attract more qualified leads and boost conversions.
Now that we understand what conversion tracking is and how it benefits us, let’s dive into getting it set up!
Setting up Google Ads conversion tracking on Shopify
There are two primary methods to set up Google Ads conversion tracking: using the Google & YouTube app or manually adding the code to your Shopify site. We’ll explain both options in this section.
Method 1: Using the Google & YouTube app
This is by far the easiest method. However, you need to meet a few requirements before using it:
Store Requirements
To use the Google & YouTube app, your online store must meet the Google Merchant Center requirements:
-
Shopify Store: You need a Shopify online store that isn’t password-protected. In case it’s locked by a password, you need to turn off password protection.
-
Payment Provider: Add a valid payment provider, such as Google Pay, PayPal, Apple Pay and Amazon Pay, in your Shopify admin.
-
Store Policies: Include a Refund Policy and Terms of Service on your online store, available in the footer navigation menu. If not added, you can add new return policies and terms of service in the setup checklist.
-
Contact Information: Add your contact details to a page in your store, making it visible to customers. Include at least one contact method such as an email address, phone number, mailing address, or contact form.
-
Shipping and Currency: Ship to one of the supported countries and sell in a currency that matches the country.
Additionally, a Google Merchant Center account is required; creating one is free and takes only a few seconds.
Set up on Shopify
-
Once you have everything set up, you can complete the process on Shopify with these steps:
-
Log into your Shopify account and go to the Google & YouTube app . Click Install on the app store page.
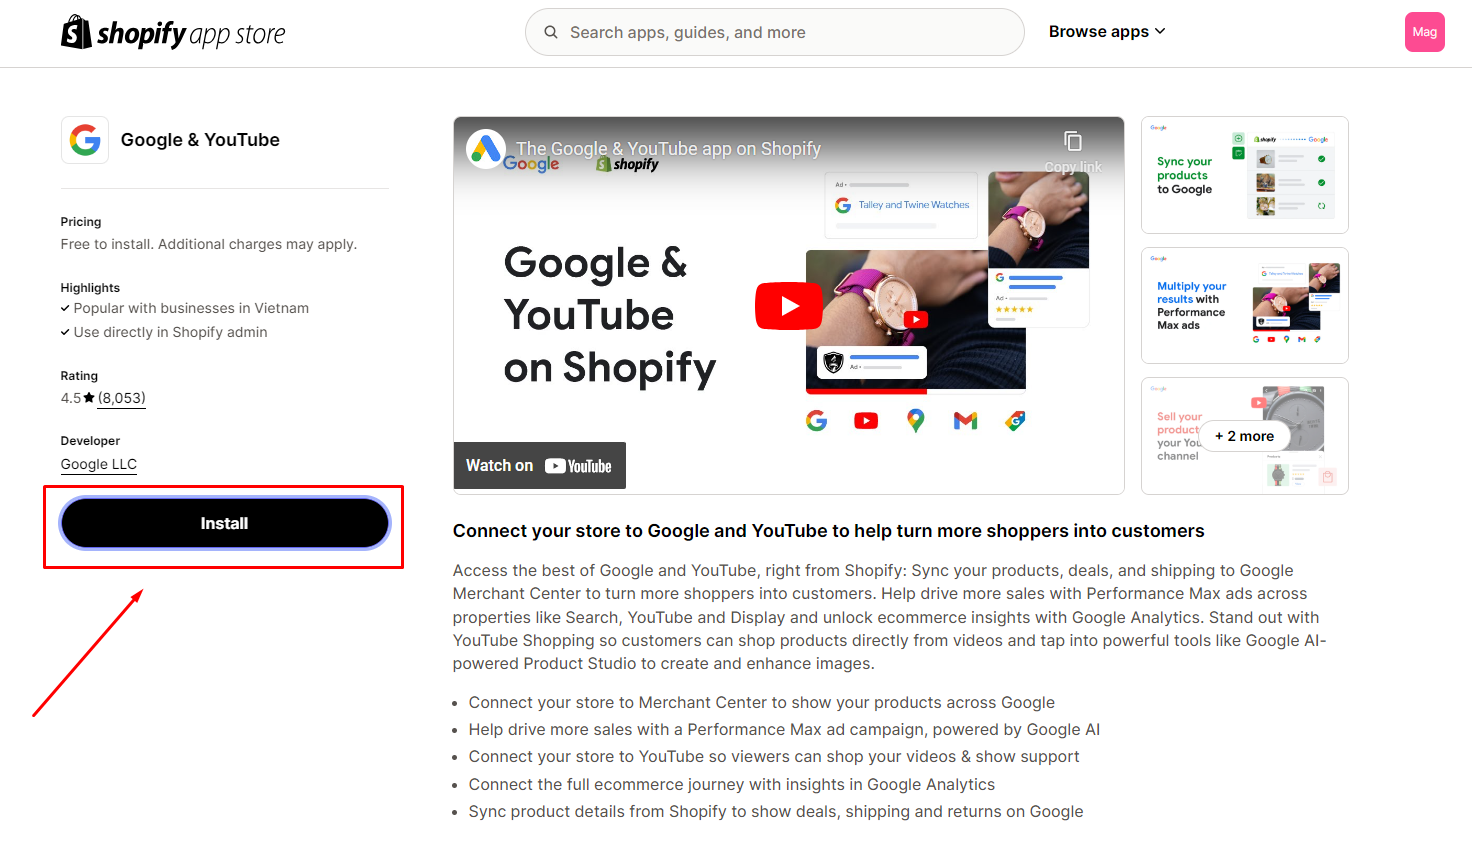
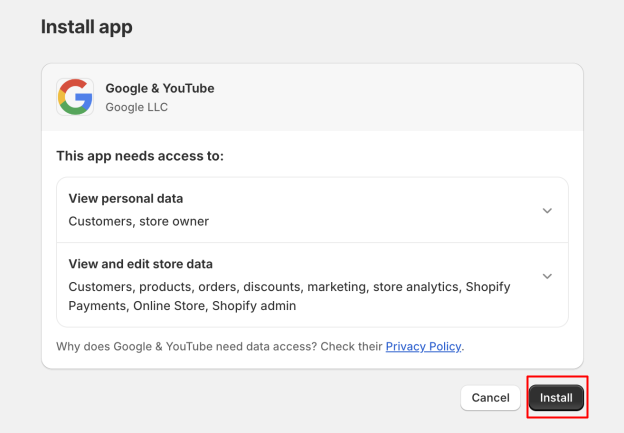
- A new window appears to ask for access allowance and to make you confirm the installation. Click Install to proceed.
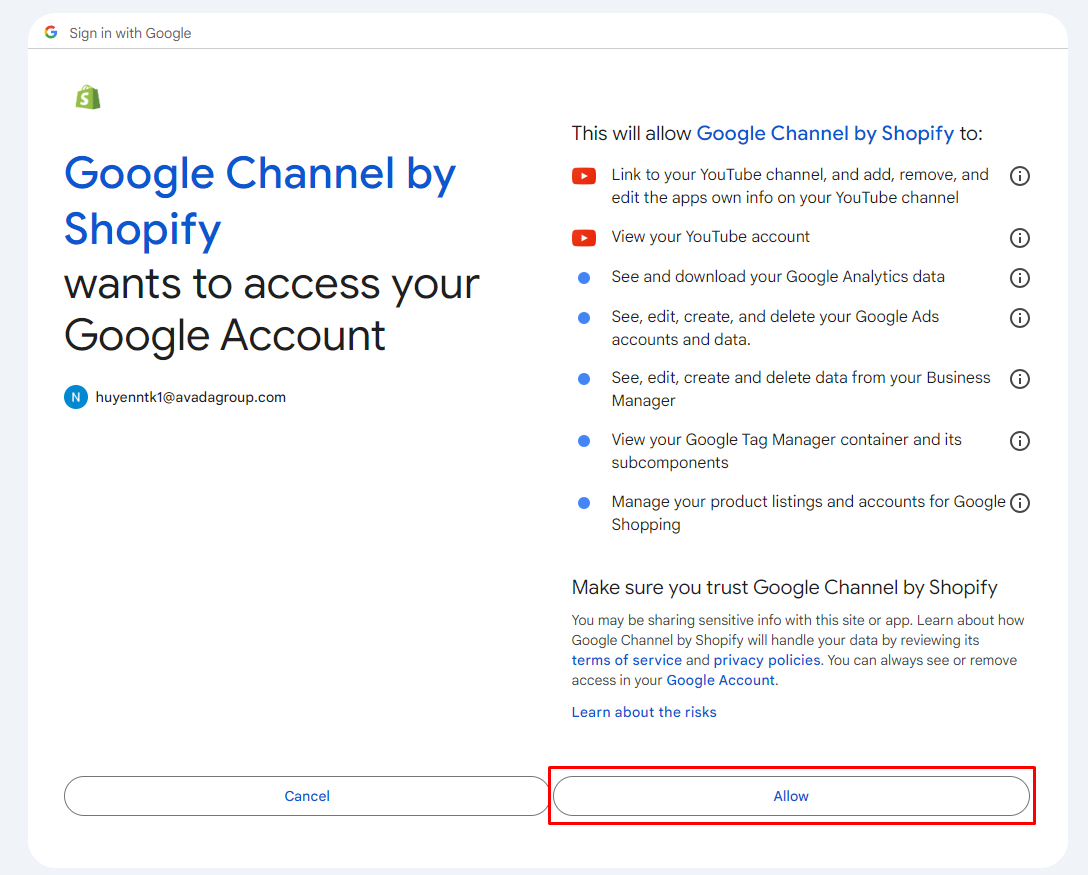
- In the Google & Youtube tab from the side-bar menu in the left, select Connect Google account > Allow to start the integration.

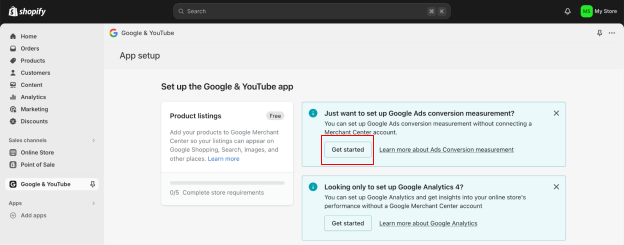
- To set up the Google & Youtube app, select Get started in the image below.
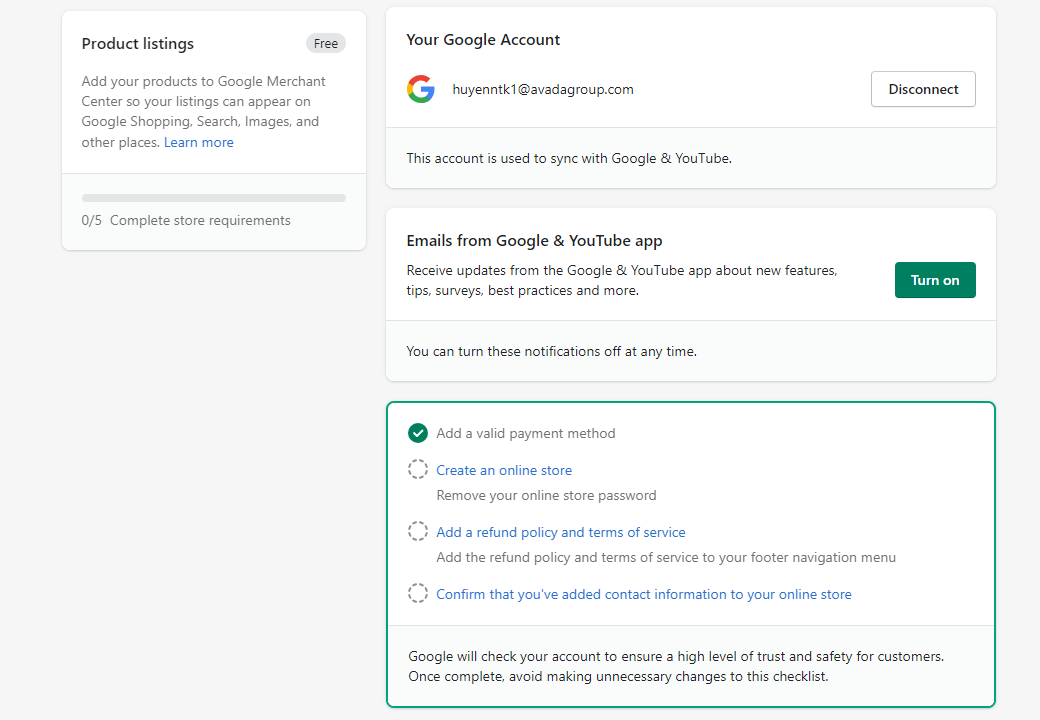
- If you haven’t met all the requirements, you’ll see a checklist on the next page showing the steps you need to complete before finishing the setup.
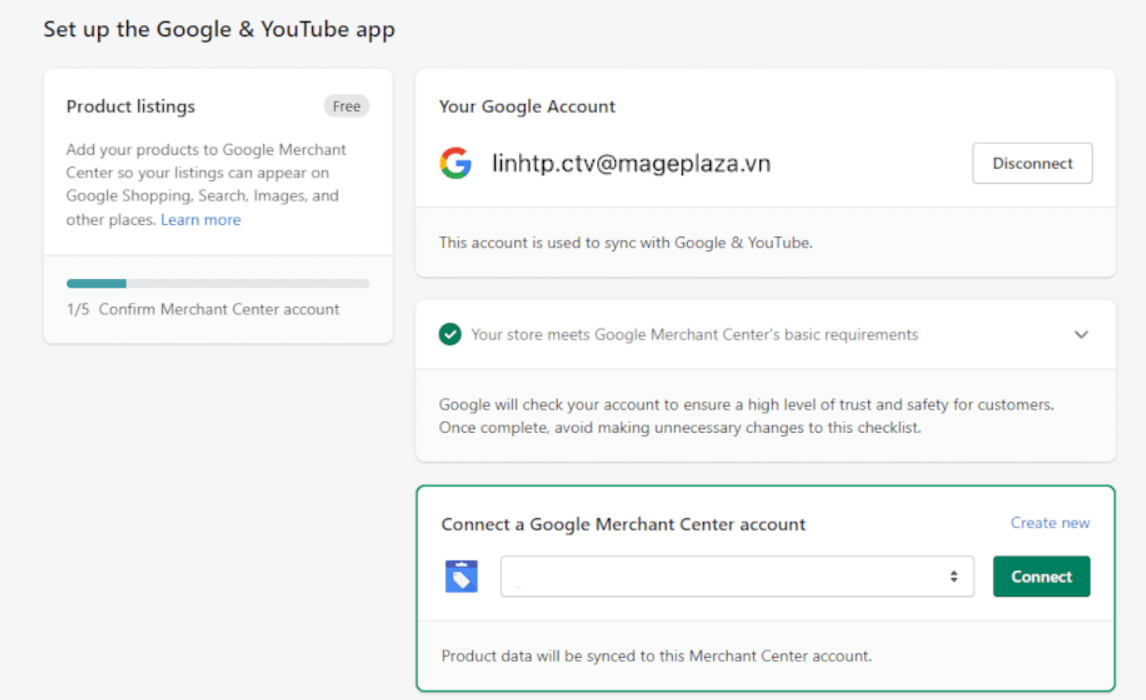
- Connect the Google Merchant Account (GMA) you created earlier. If the GMA and Google account you connected use the same email, your GMA will automatically populate in the field. Click Connect to finalize the connection.
- Google will then need to verify your identity via phone. Enter your phone number and the code you receive to complete the process.
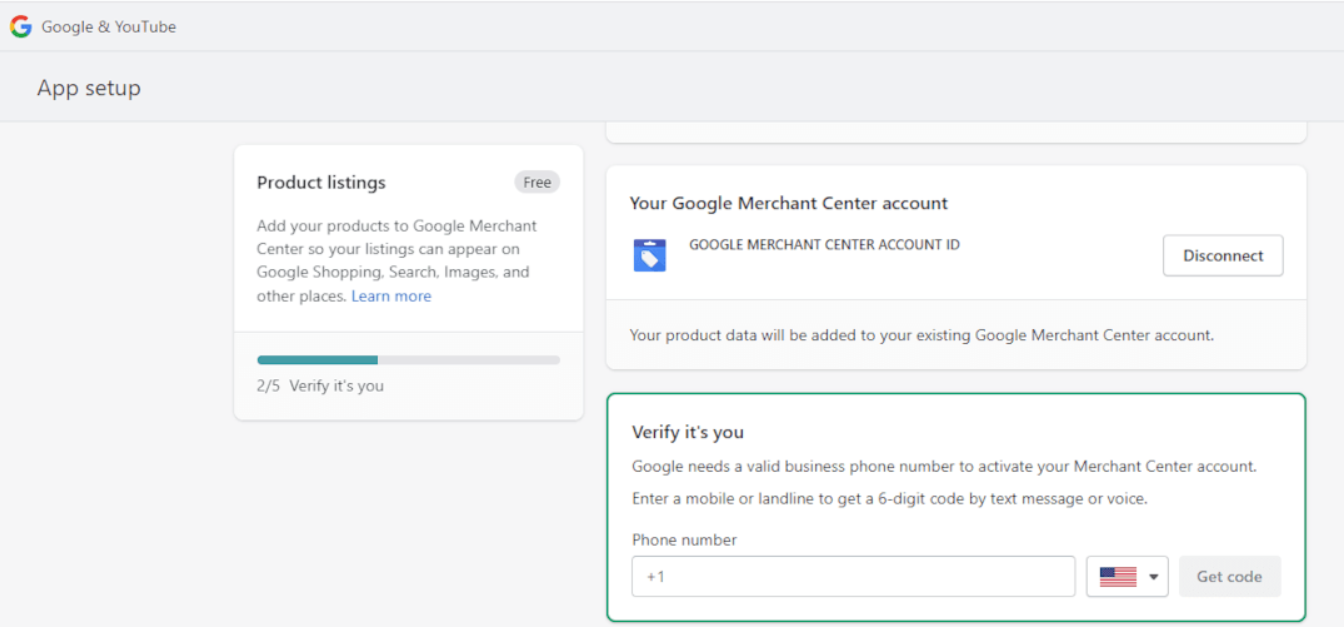
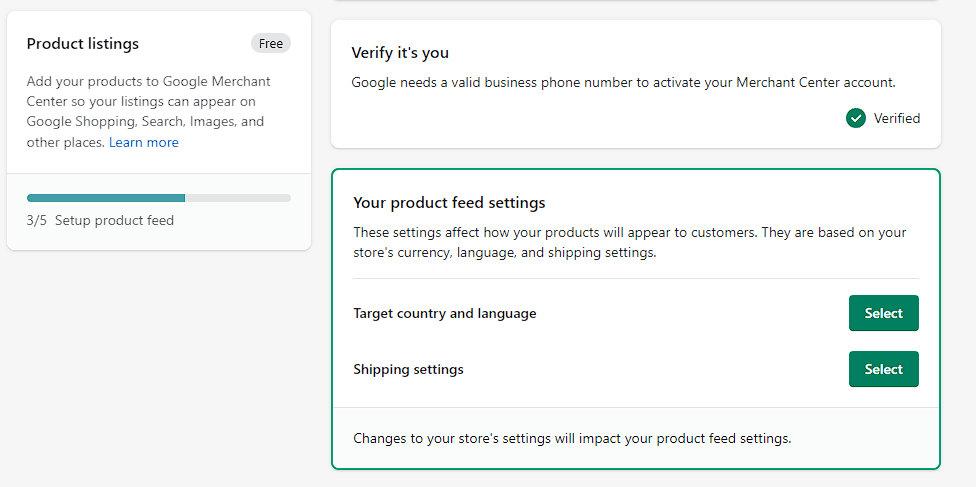
- Add your product feed settings so Google can display your products in Google Search, Shopping, and Images. Simply enter your shipping locations and shipping settings in the provided boxes.
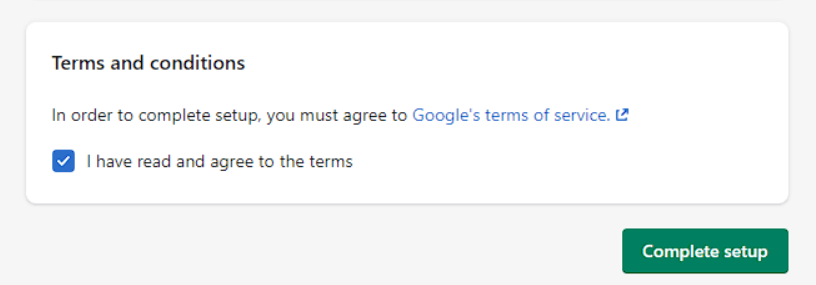
- Finally, accept the terms and conditions and complete your setup!
It might take up to an hour for all your products to sync to the Google Merchant Center, but rest assured that your tracking is set up and ready to go!
Method 2: Set up Google Ads conversion tracking manually
As previously noted, this method is slightly more complex. If you lack experience in coding, it may be beneficial to seek assistance from your developer to configure it in this way.
Unlike the app handling everything automatically as before, we now need to manually set up the conversion action, install the global site tag, and add the event snippet to the desired tracking location (in this scenario, for tracking purchases).
Additionally, we’ll need to modify the predefined event snippets to ensure they dynamically incorporate the revenue generated from each purchase.
Create a conversion action in Google Ads
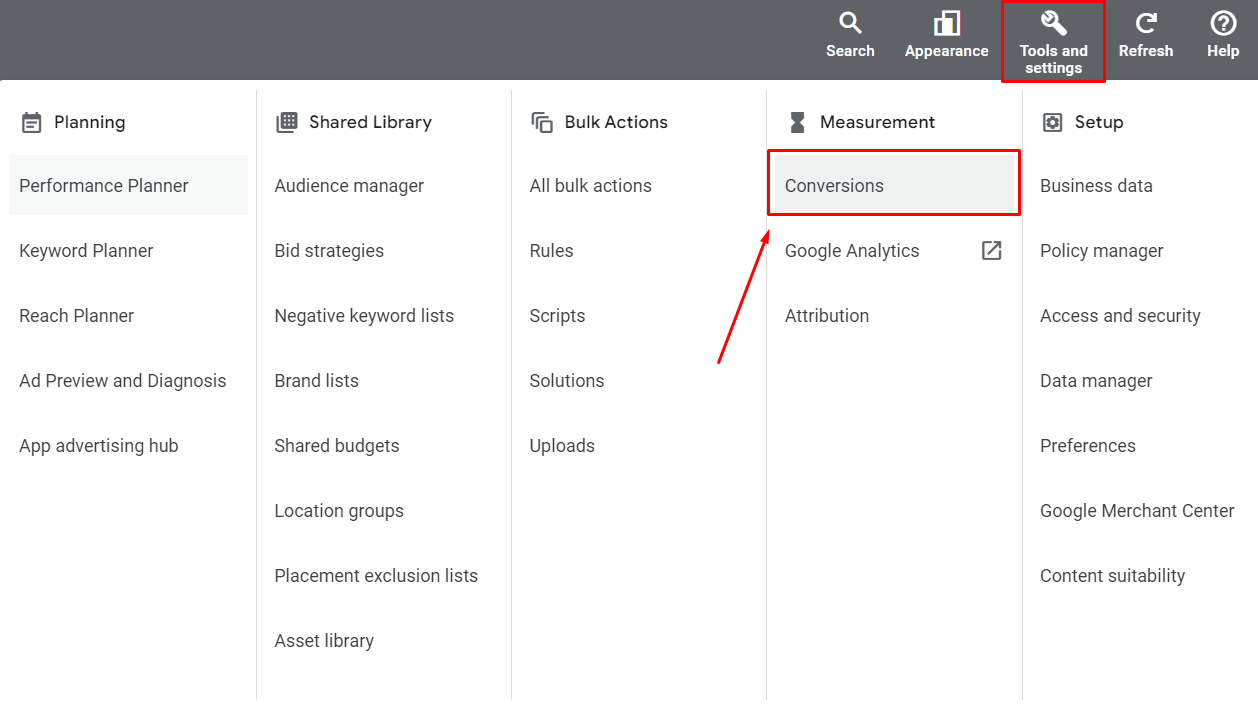
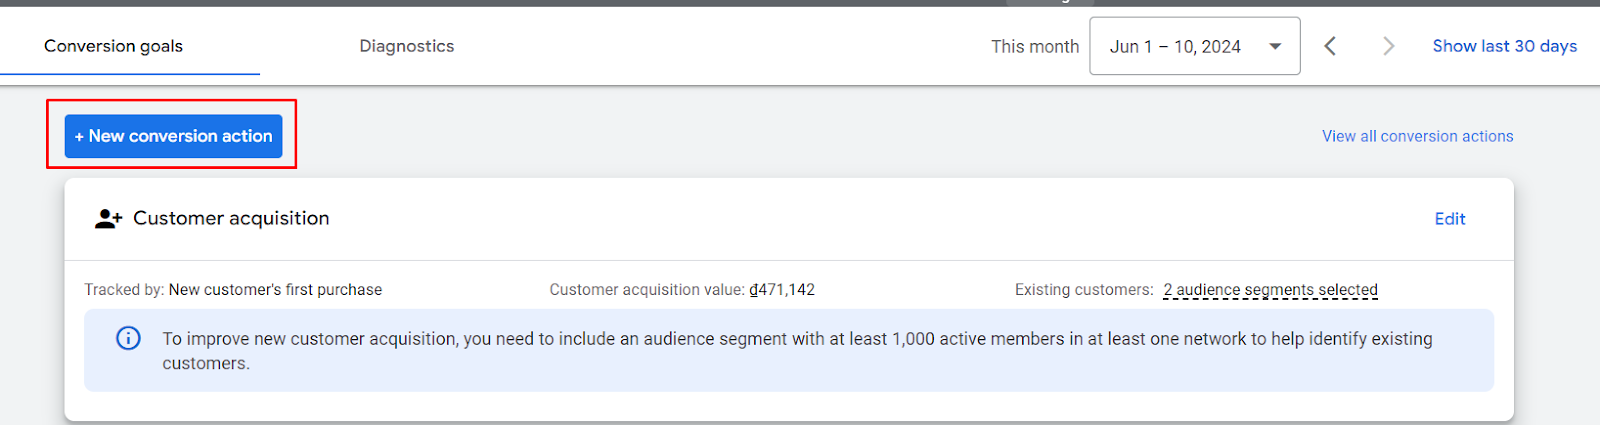
- To initiate the creation of the action, navigate to the Measurement section within Google Ad Manager and click on the Conversions option.
- Choose ‘+ New conversion action’ at the top of the page.
- Opt for the ‘Website’ option.
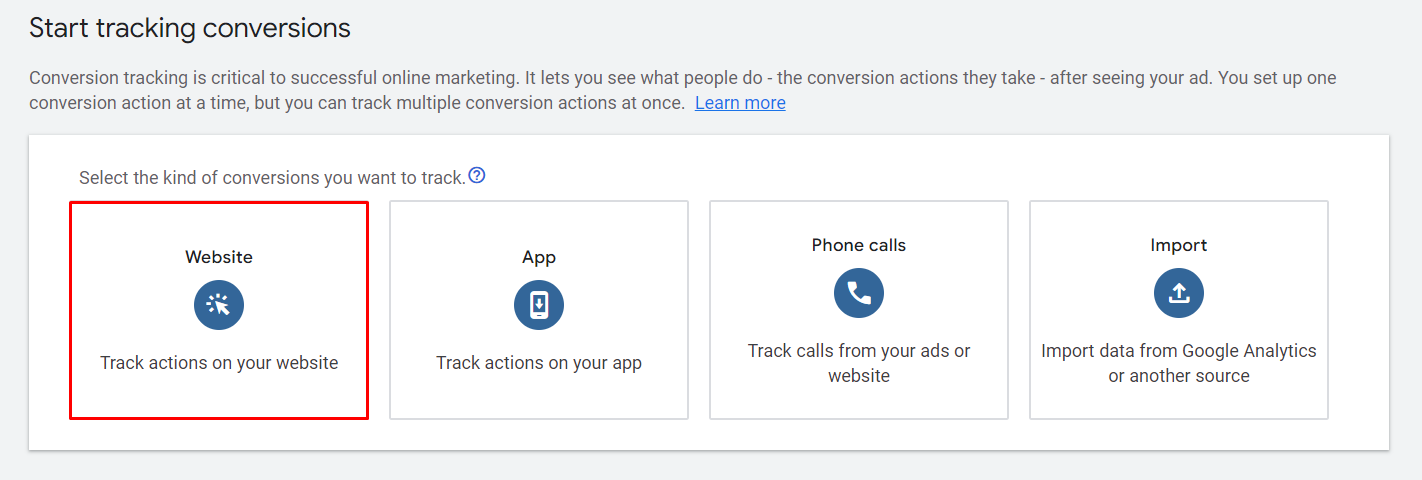
- Google will prompt you to input your website URL for scanning existing code setups.
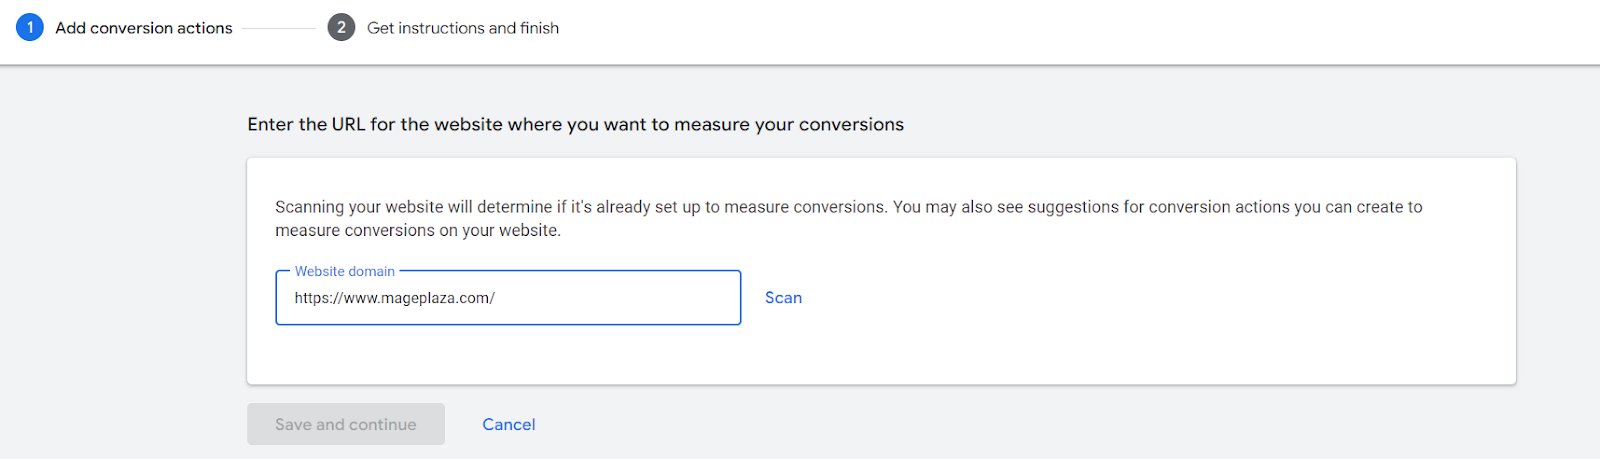
- However, since we require Google to pass back the purchase value, proceed to the bottom of the page and opt to manually create the conversion action.
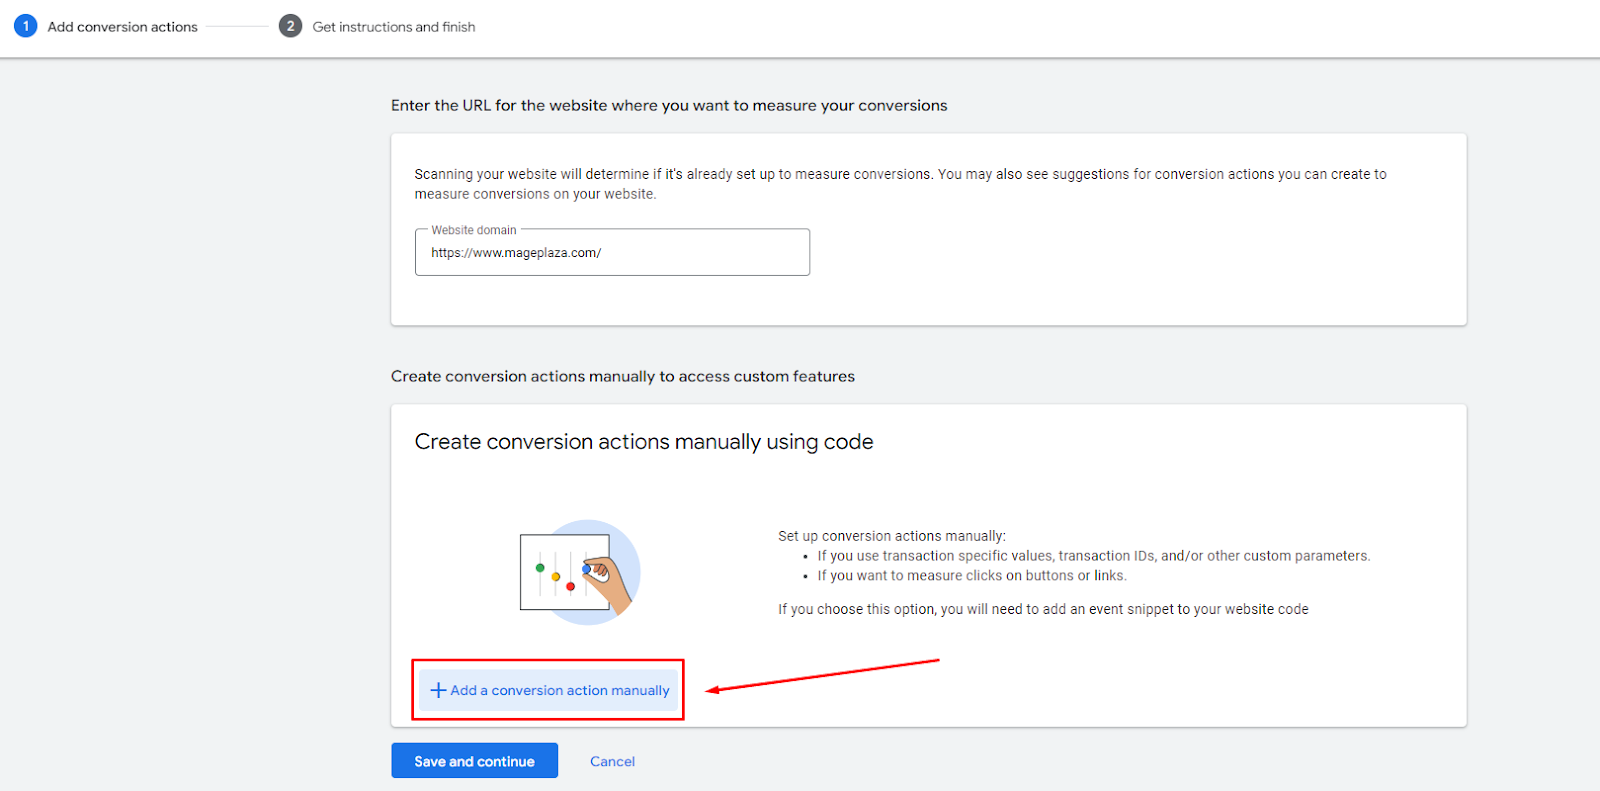
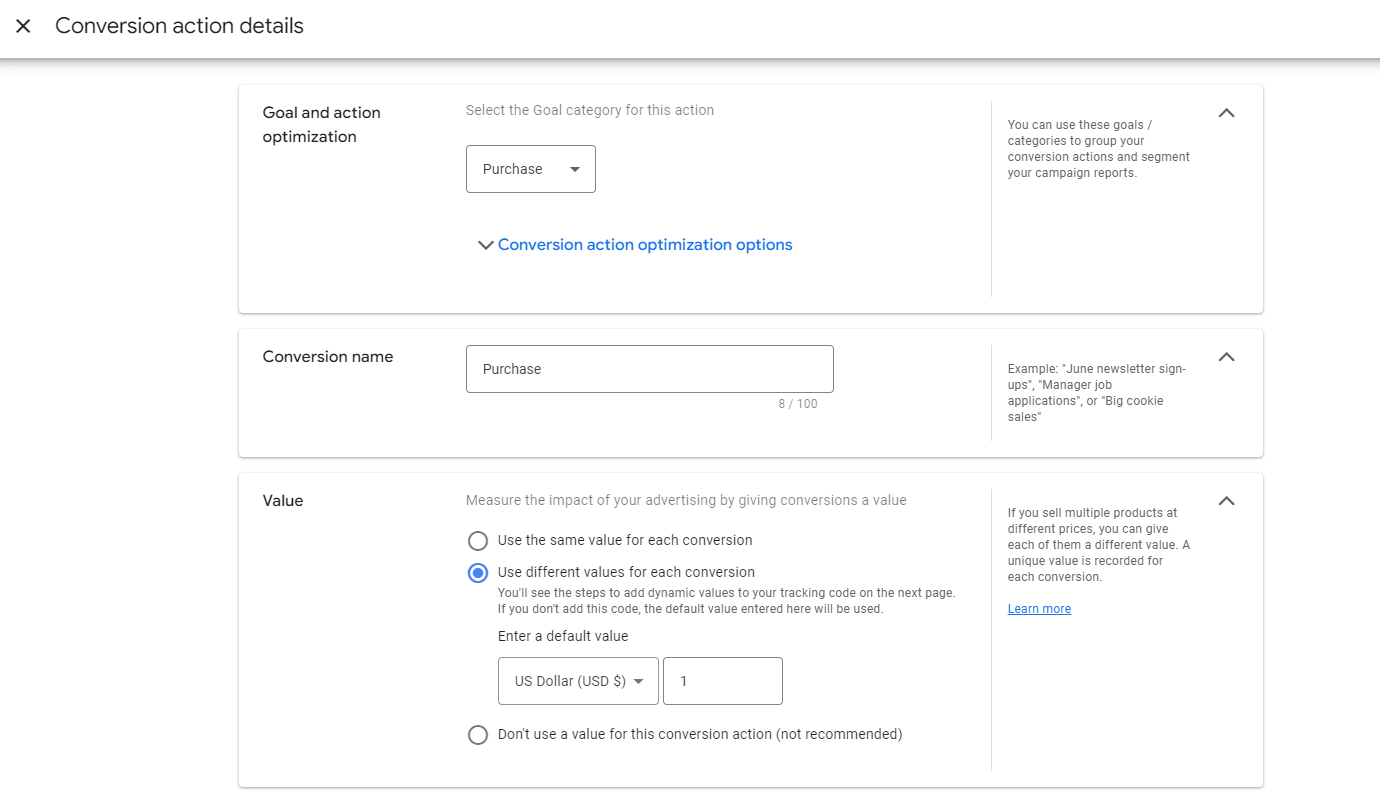
- Within the popup, provide details for the events. Keep the name straightforward, such as ‘Purchase.’ Ensure to select the ‘Use different values for each conversion’ option under the Value tab to track the prices of all items. Click Done to complete all your settings, then select Continue to save the conversion action.

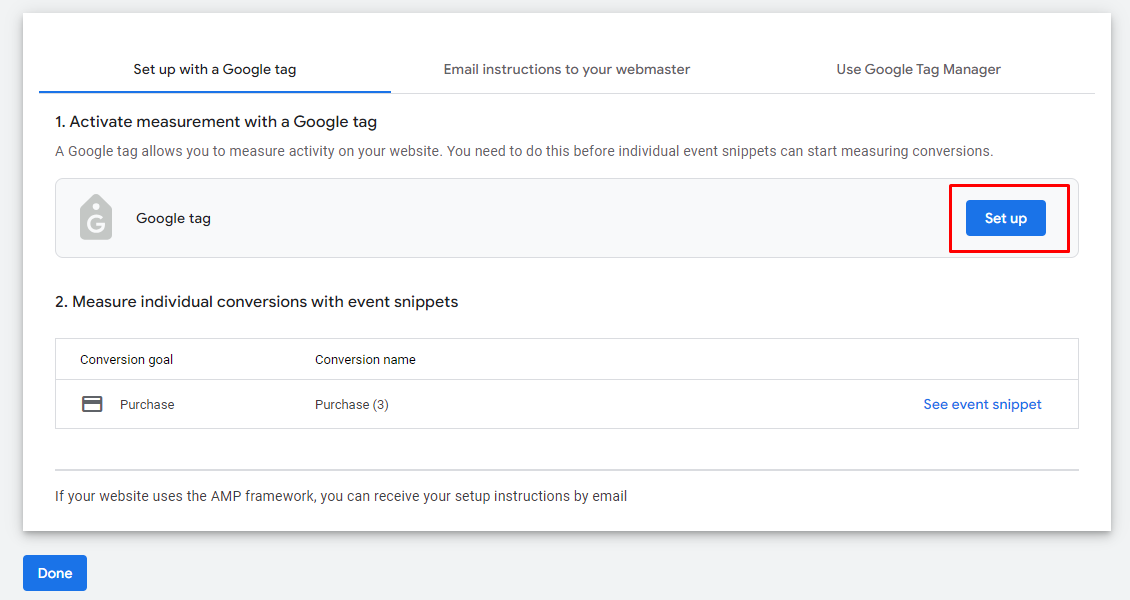
- After adding your code, you’ll obtain the event snippet for the newly added conversion. However, before finalizing everything, ensure to integrate our Google Tag across the entire site and modify the event snippet. Keep this tab open in another window for later reference.
Add Google Tag to Shopify
- Click the Set up button in the Google tag field under the section of Activate measurement with a Google tag.
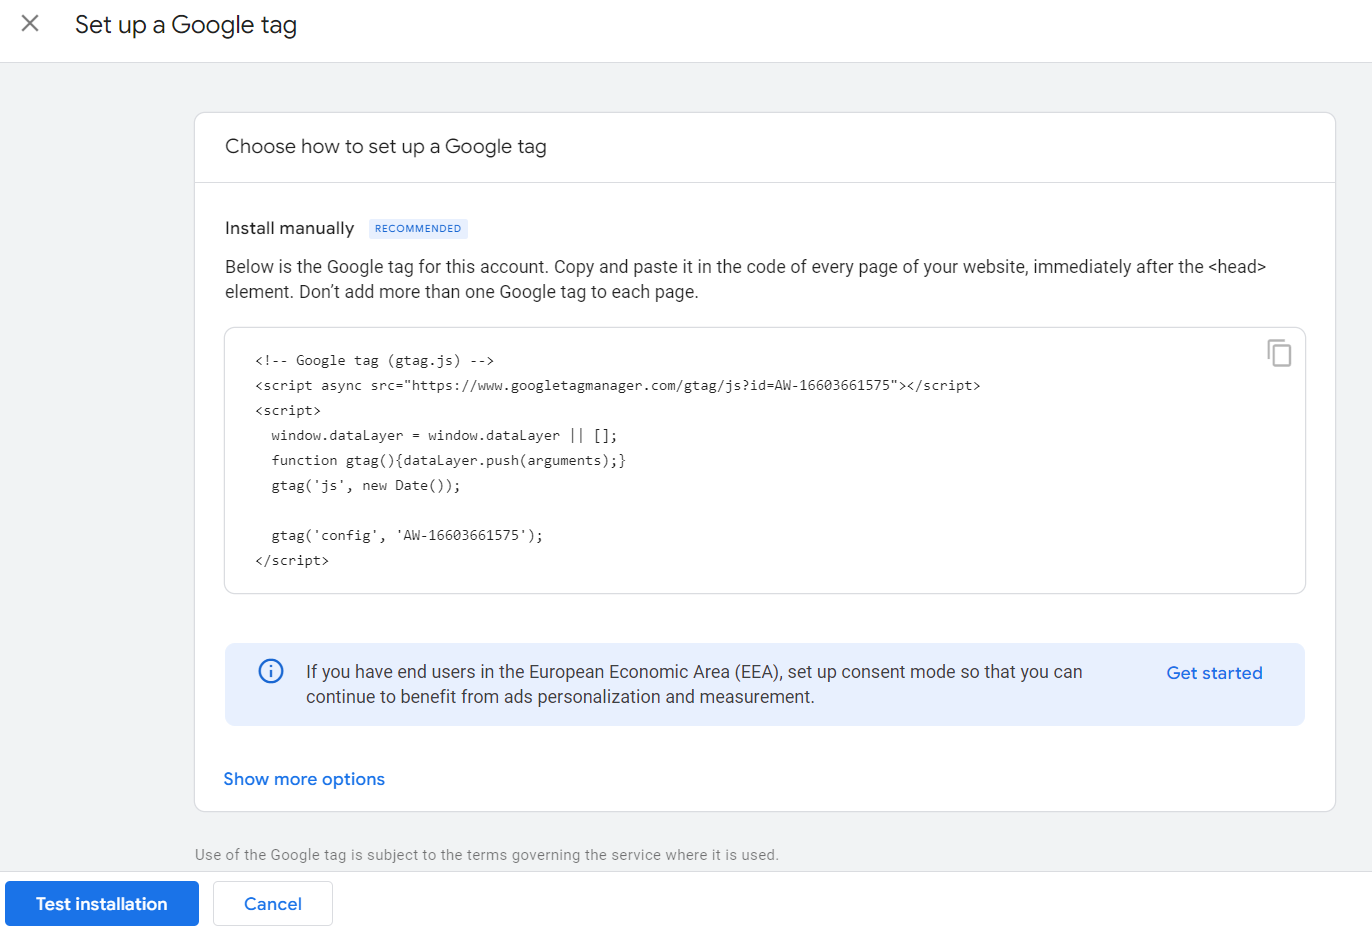
- On the final page of the setup, Google offers the option to install the tag either manually or automatically. If you choose the Install manually option, copy the code provided.
-
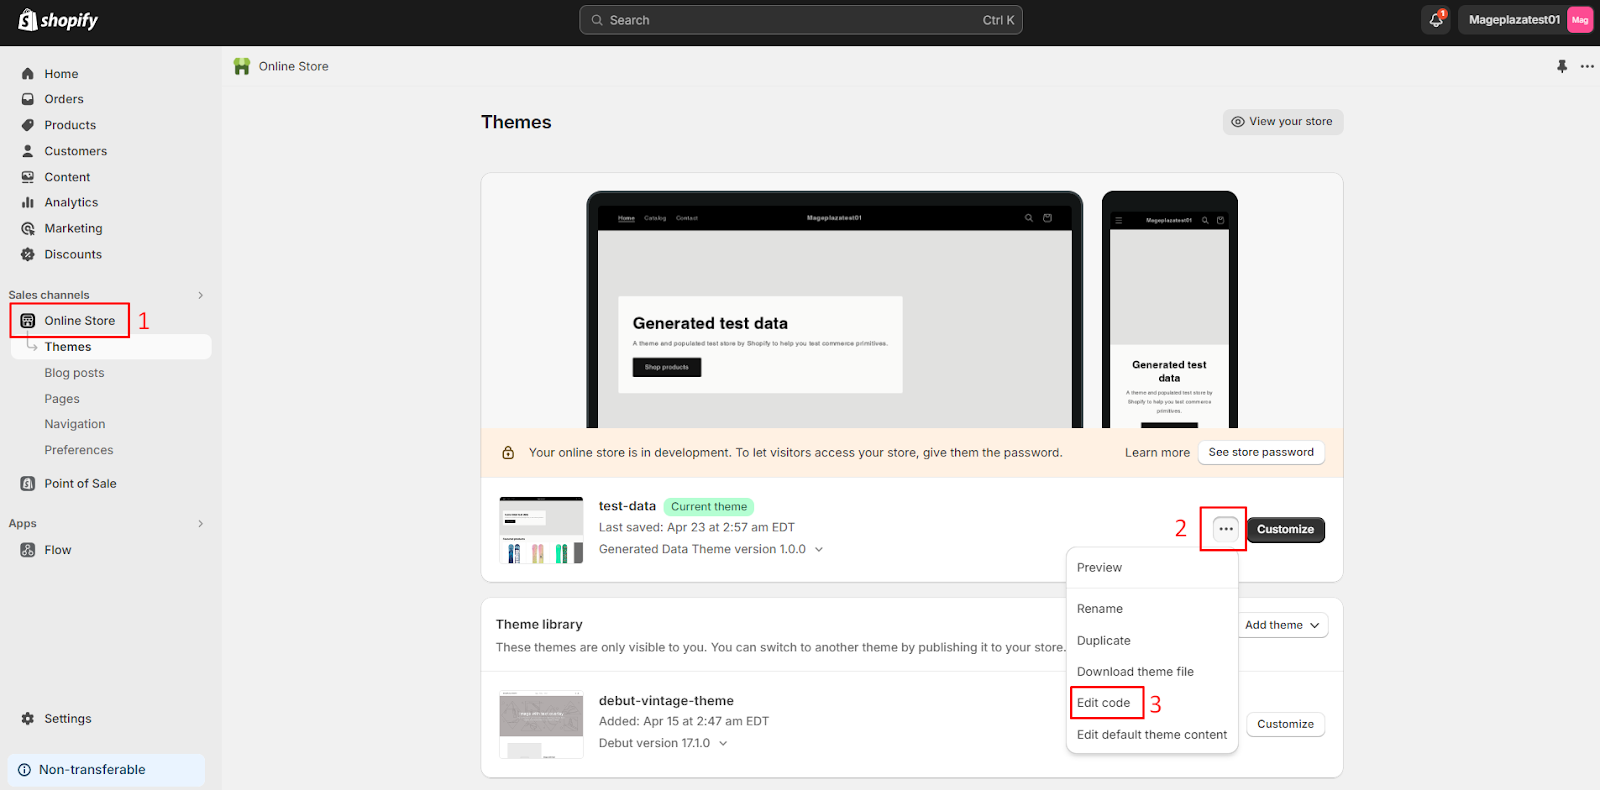
In another browser window, access your Shopify admin and navigate to Online Store.
-
Click on the … button, then select Edit code.
- Open your theme.liquid file. If it’s your first time installing a global site tag, paste the copied global site tag code between the <head> and </head> tags to apply it to every page in your store. If you’re modifying an existing global site tag, locate it in your theme.liquid file and update the code as instructed by Google Ads.
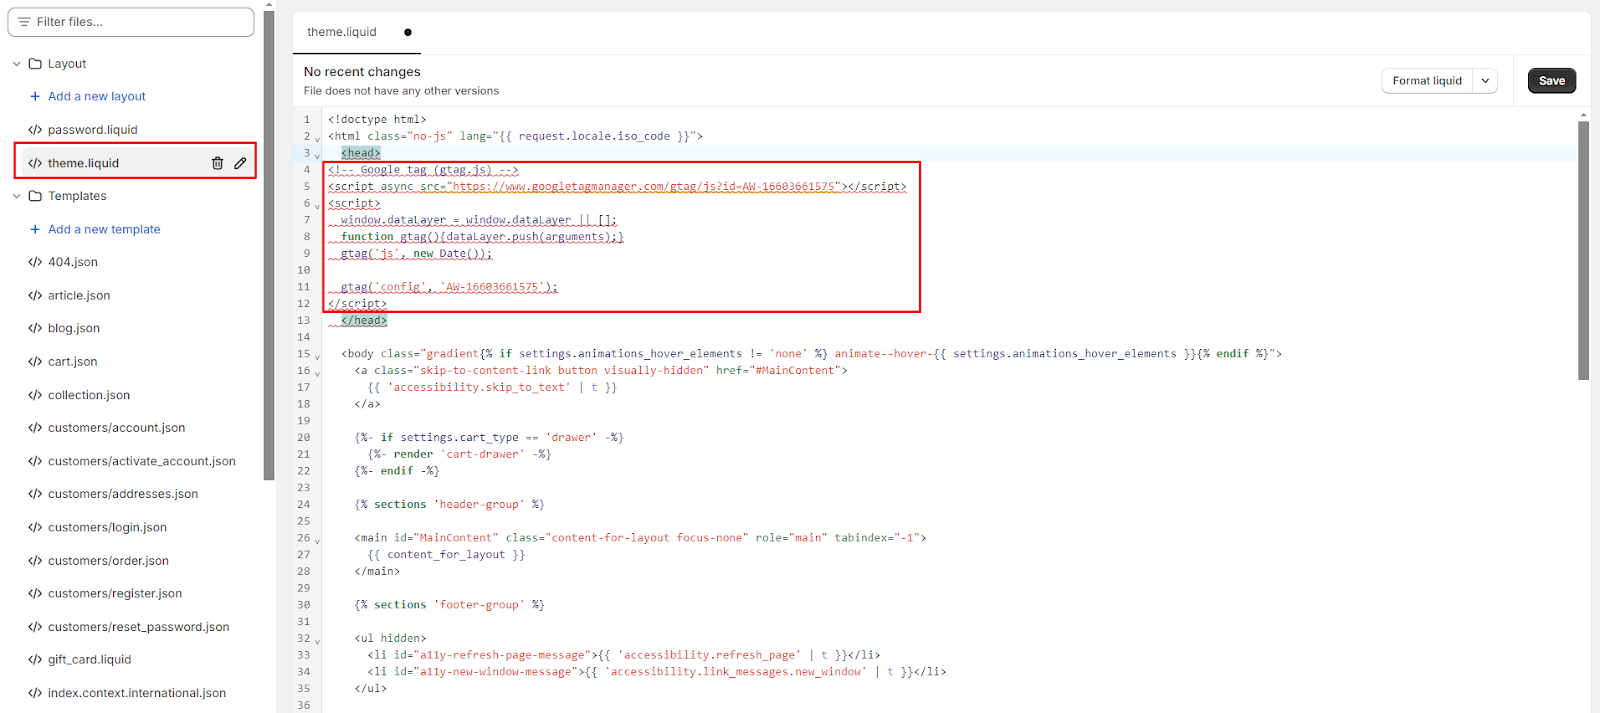
- Click Save. Now, we can proceed to the final step of the process - adding the event snippet to the checkout.
Add the event snippet to Shopify
The final step can be a bit intricate, as it requires editing the code snippet provided by Google before integrating it into Shopify.
- Return to the conversion action you previously created and select See event snippet.
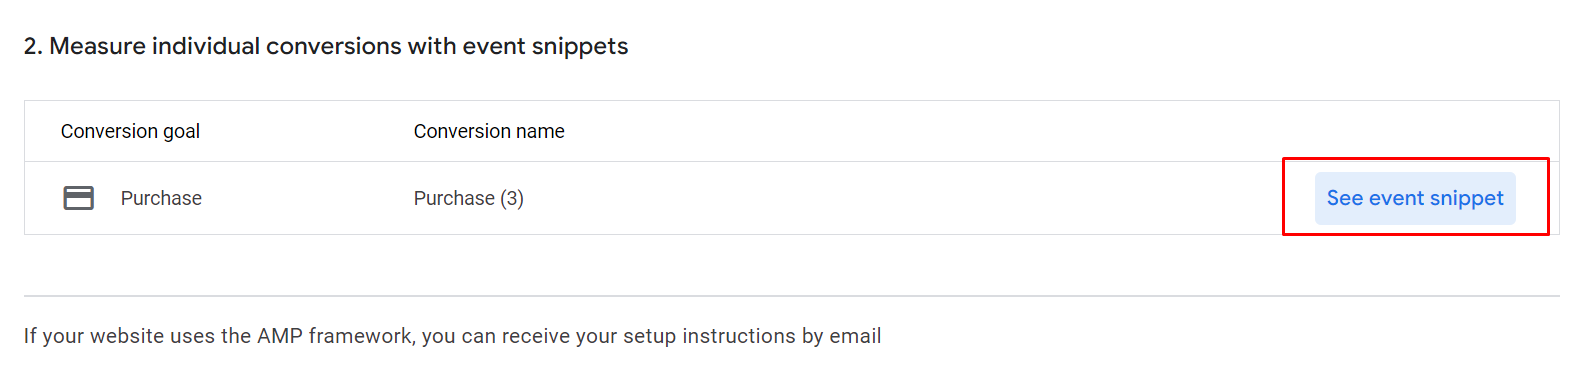
- Follow the instructions, copy the snippet displayed and paste it in between the
<head></head>tags of the page you’d like to track.
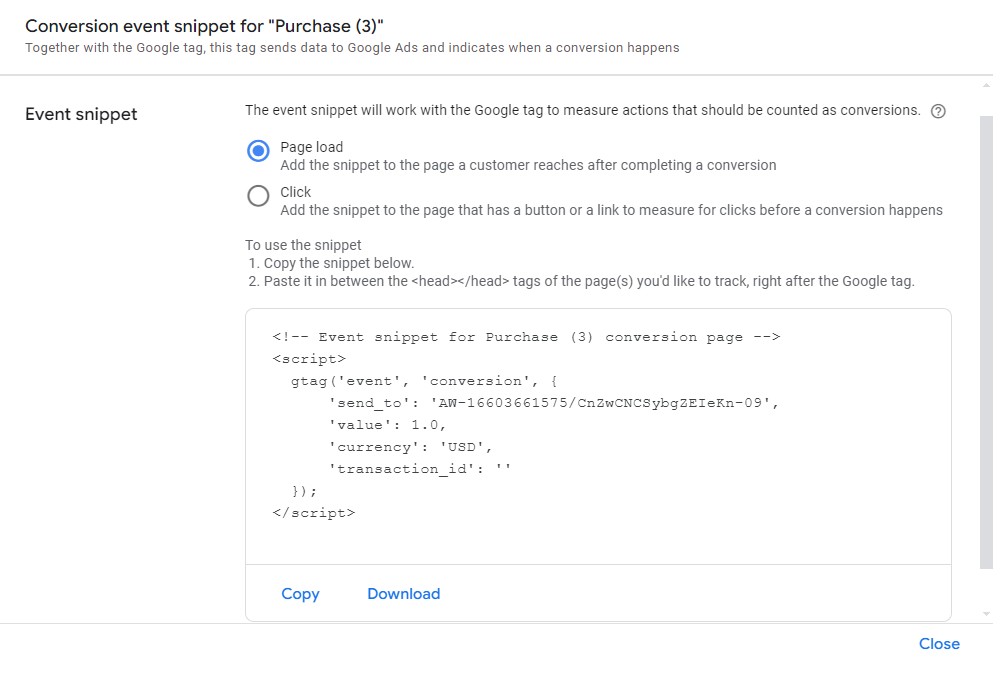
- In another browser window, access your Shopify admin and navigate to Settings > Checkout. In the ‘Additional scripts’ text box, paste the event snippet. If there’s existing code in the box, add the event snippet in a new line below it.

-
Copy the global site tag used in the ‘Install the global site tag’ step and add it above the event snippet.
-
To avoid recording duplicate conversions if a customer reloads the checkout page, add tags before and after the event snippet to ensure it triggers only once per customer:
- Paste `` on the line after the snippet.
-
The default currency is USD. If you’re not selling in US dollars, replace
USDin the event snippet with ``. -
The default transaction ID is blank. To prevent Google Ads from recording duplicate conversions, replace next to
transaction_idwith ``. -
Click Save. After implementing these adjustments, your script should resemble the following example:
- If your shop sells items with different prices, you’ll also need to modify the value section of the code. Replace the line beginning with ‘value’: with one of the following snippets:
- To exclude taxes and shipping from the conversion amount:
'value': 0.0, - To include taxes and shipping in the conversion amount:
'value': 0.0,
- To exclude taxes and shipping from the conversion amount:
- At this point, your code should resemble something like this (replacing ‘1234567’ with your Google code).
- Since we’ve demonstrated the example for purchase conversions only, remember to set up conversion actions for the rest of the funnel (e.g., add to cart, initiate checkout, etc.).
Congratulations! Your tracking is now configured and ready to go. Note that it may take a few hours for everything to sync in the backend and for actions to appear.
Verifying your Google Ads conversion tracking
Once you’ve set up your conversion actions, it’s crucial to verify their functionality promptly. Since there might be a delay in data synchronization, it’s advisable to wait for about an hour before conducting tests.
A straightforward method to test is by purchasing one of your own products and confirming its registration. Go through the entire purchase process on your store’s platform, then navigate to Google Ad Manager. Access the Conversions section within the Measurement tab as previously outlined.
Inspect the earlier established conversion. If configured correctly, it should display as active, showcasing the total conversions and their respective values.
When encountering issues with Google Ads conversion tracking, remember the wisdom of the pencil’s eraser—we all make mistakes. Here are some common problems and quick solutions to rectify them.
Lack of conversion data
If you’re not observing any conversion data, there could be an issue with the setup and execution of the preceding steps. The simplest way to verify this is by employing Google Tag Assistant tool.
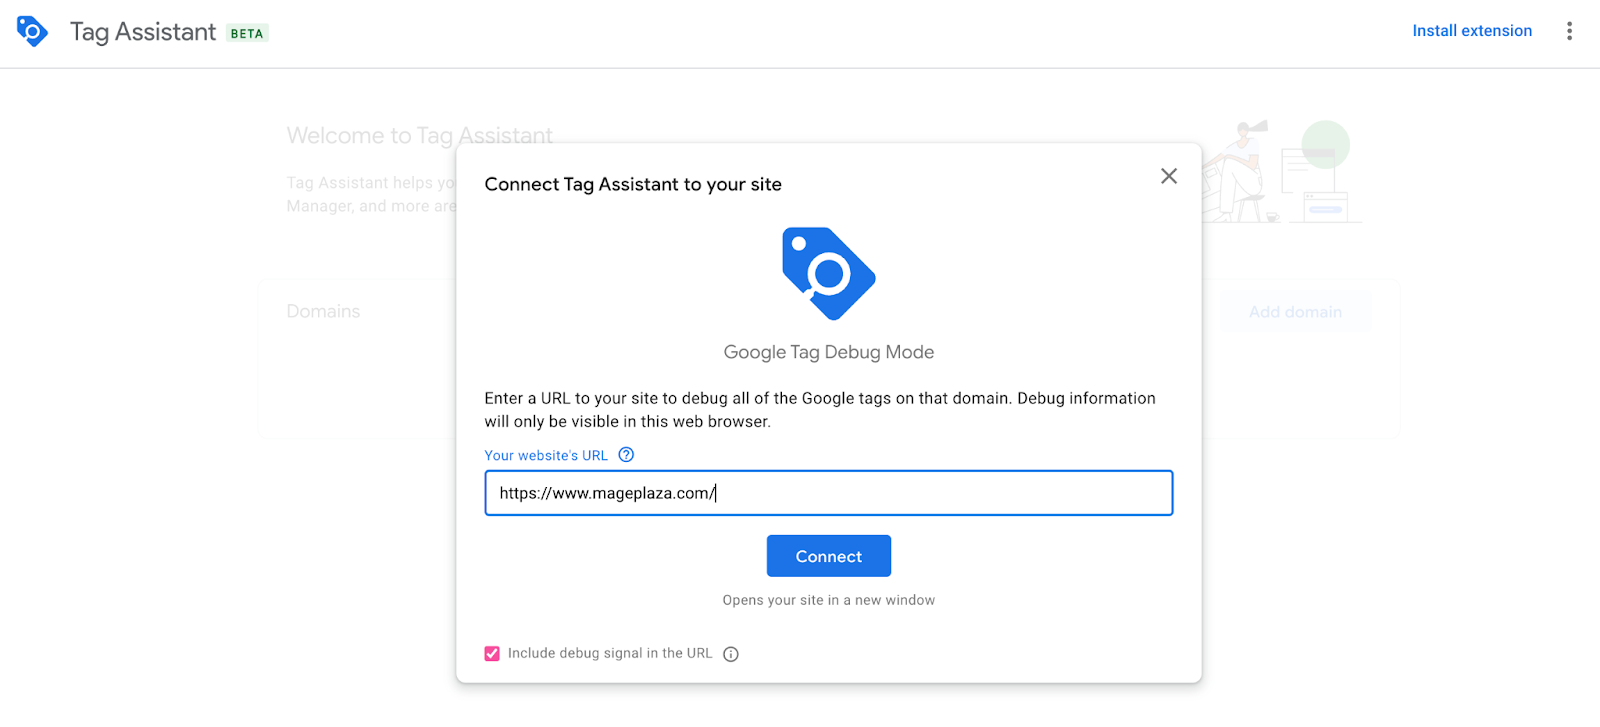
Upon entering your domain, Google will launch a debugging interface featuring your website. Perform the action you wish to test (e.g., simulate a test purchase). Subsequently, assess whether the conversions register. If not, revisit the installation steps and repeat the process.
Incorrect conversion values
In case the conversion values appear inaccurate after manually installing the code, ensure to scrutinize the currency section of the code.
You can manually designate the currency (e.g., USD) or utilize the currency placeholder ‘’ to adopt the currency specified in your Shopify account. Verify that your Shopify store’s currency aligns with the correct denomination, as this can significantly impact the accuracy of conversions.
Delay in conversion data reporting
If there’s a delay in conversion data reporting, understand that it’s a common occurrence. Conversions may take up to 24 hours to manifest in Google Ads. If you notice a prolonged absence of conversions beyond this timeframe, utilize the aforementioned steps to troubleshoot the connection between the platforms.
Optimizing your Google Ads campaigns with conversion tracking data
Now that you have your conversion data integrated into your account, it’s time to leverage it to enhance your Google Ads campaigns. Here’s a brief overview of three ways you can utilize your new conversion data:
Analyzing conversion data within Google Ads
Begin by logging into your Google Ads account and navigating to your campaign data, whether at the campaign, ad group, or ad level. Here, you can review the number of conversions generated and the associated revenue. This allows you to assess your conversion rate and cost per conversion, providing valuable insights into campaign performance.
Adjusting campaign bids and budgets based on conversions
Armed with comprehensive data, you can strategically adjust your campaign bids and budgets to optimize performance:
-
Manual CPC bidding: For campaigns utilizing manual cost-per-click (CPC) bidding, consider increasing bids for keywords driving significant conversions, while reducing or pausing bids for underperforming keywords.
-
Automated bidding: Google Ads offers various automated bidding strategies, such as ‘Target CPA’ and ‘Target ROAS’, which automatically adjust bids based on conversion likelihood and desired cost per action or return on ad spend.
Budget adjustments are equally vital. If a campaign demonstrates strong performance and profitable conversions, you may contemplate increasing its budget to expand reach. Conversely, if a campaign lags behind, reallocating the budget to more successful campaigns can be beneficial.
Identifying high-performing keywords and ad text
One of the greatest advantages of comprehensive tracking is the ability to pinpoint effective keywords and ad content:
-
Keywords: Navigate to the ‘Keywords’ tab within your campaign or ad group to identify top-performing keywords based on conversions. Allocate more budget or increase bids for keywords driving significant conversions.
-
Ads: Explore the ‘Ads & Extensions’ tab to evaluate the performance of each ad in terms of clicks, impressions, click-through rate (CTR), and conversions. By focusing on ads generating high conversions, you can refine your campaigns for improved effectiveness, ultimately boosting conversions and ROI.
Conclusion: The importance of Google Ads conversion tracking on Shopify
Absolutely, effectively tracking conversions on Google Ads is not just good practice; it’s a crucial step in the growth of your Shopify store through successful advertising.
By gaining clear insights into which ads are driving sales, you can optimize your budget allocation, ensuring that every dollar spent contributes effectively to your business goals.
However, it’s essential to remember that conversion tracking is just the beginning. Continuous monitoring and optimization of your Google Ads campaigns are essential, considering the rapidly evolving landscape of marketing and shopping trends.
Every piece of data presents an opportunity for improvement, allowing you to refine your strategies and move closer to your ultimate objective of running a thriving eCommerce store.
Embrace conversion tracking as your secret weapon in eCommerce success, and continually strive for a smarter, data-driven approach that propels your business towards exponential growth.
Related Post

Magento 2.4.8 Official Release: What's Updated?
In this article, we’ll explore the standout new features and enhancements that make the Magento 2.4.8 official version truly special.
Mageplaza Announces Official Separation from Avada Group
Mageplaza is pleased to announce a significant milestone in our journey as we officially separate from the Avada Group to operate as an independent company.
Explore the latest from Mageplaza in January 2025, with new modules and updates designed to enhance your Magento e-commerce experience.
& Maintenance Services
Make sure your store is not only in good shape but also thriving with a professional team yet at an affordable price.
Get Started