Change Store Email Addresses - Mageplaza
How to change default Increment ID, adding prefix and suffix Invoice in Magento 2
Vinh Jacker | 10-12-2018
Stores with matching and customized Increment ID in Invoice, Shipment, and Credit memo can manage orders better, gain advantages in competitions, build customers’ trust and boost sales accordingly. Hence, there is a fact that many store owners wish to change the default format of increment ID used for Order, Invoice and Shipment.
There are various reasons why a custom increment ID is necessary. Firstly, a more sophisticated string of ID can contain more useful information to shop owners but become harder for competitors and customers to understand. Moreover, because the sensitive numbers are hidden, the business data (such as the number of orders) is incomprehensive to competitors, then safely protected. Besides, ruled strings of number can attract and impress the customers that your business is popular and professional. That is why today’s post will show you how to do this in 2 ways: using codes and using our instant solution.
1. How to customize Increment ID, adding prefix and suffix in Magento 2 Default?
This ID modification can be achieved by the direct manual changes in the database by using code and commands. Let’s take a closer look as below :
The first step is opening the PHP Admin database. Then, you will find the table “sale_sequence_profile” and check the data. Here the main values are included: profile_id meta_id, prefix, suffix, start_value, step.
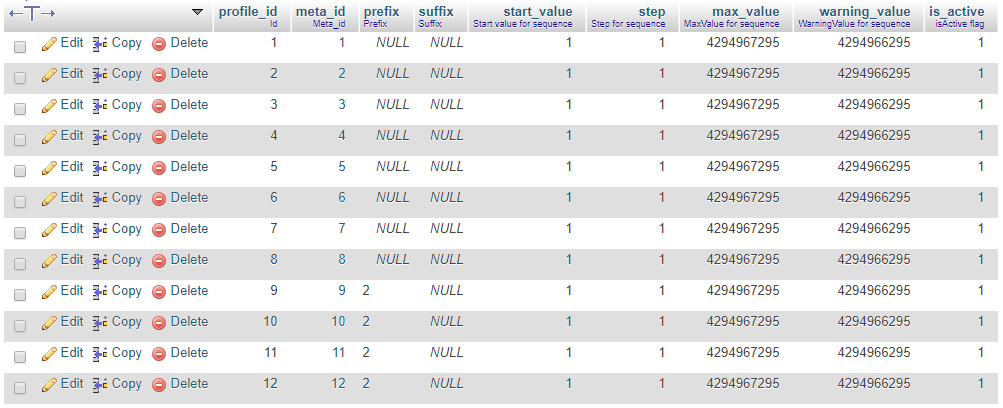
The format of order id is defined by default as the image below
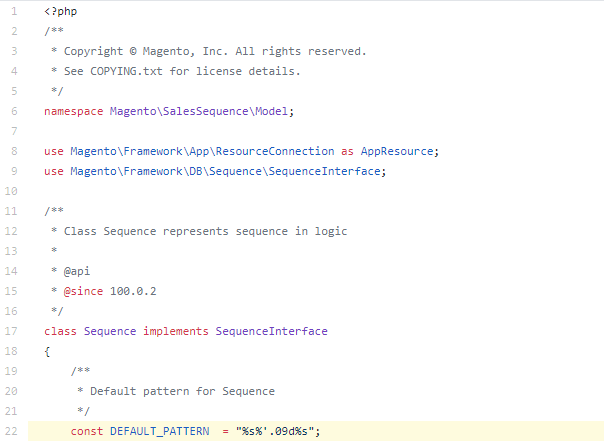
In case you do not want to edit module core, changes can be made by creating etc/di.xml as below:
<?xml version="1.0"?>
<config xmlns:xsi="http://www.w3.org/2001/XMLSchema-instance" xsi:noNamespaceSchemaLocation="urn:magento:framework:ObjectManager/etc/config.xsd">
    <type name="Magento\Framework\DB\Sequence\SequenceInterface">
        <arguments>
            <argument name="pattern" xsi:type="string">%s%'.06d%s</argument>
        </arguments>
    </type>
</config>
The whole process can be expressed as the following mathematical formula:

In Magento Default,
- Sequence_value begins at 1 and increases by 1 for the next order/invoice/shipment.
- Both Start_value and Step are set 1
- Prefix and Suffix are not set available (NULL)
If we put these values into above formula, the initial order increment ID will be:

As you can see, the Increment_id changes depending on various properties insides such as prefix, sequence_value, start_value, step, X digits, suffix. To change these particular properties, relevant commands should be added.
Here are some examples:
How to change the order Prefix?
Add the following commands on the database:
UPDATE sales_sequence_profile SET prefix = X WHERE meta_id = 5;
Replace X with the prefix (for example: ORD) you wish, then run the query. In case, you wish to disable prefix, remove the quotes and set X=NULL
How to change the order Suffix?
Add the following commands on the database:
UPDATE sales_sequence_profile SET suffix= X WHERE meta_id = 5;
Replace X with the suffix you wish, then run the query. In case, you wish to disable suffix, remove the quotes and set X=NULL
How to change steps of continuous order?
Add the following commands on the database:
UPDATE sales_sequence_profile SET step = X WHERE meta_id = 5;
Replace X with the number of steps you wish, then run the query
order_number = prefix + ((sequence_value – start_value) * step + start_value) {padded to X digits} + suffix
An example after making various changes:
Changes include:
step = ‘5’’ , prefix = ‘ORD-’ , suffix = ‘-S1’, start_value = ‘1’ , DEFAULT_PATTERN = “%s%’.03d%s”. And last sequence_value = 2 => next sequence_value = 3
=> New increment ID = ORD + (3-1)*5+1{padded to 3 digits} + S1
Hence, the modified order increment ID is ORD-011-S1
2. How to make modifications to Increment ID more simply?
Unfortunately, using manual codes may do harm to your online websites due to the intervention of the database. For those who do not get on well with commands, this is also problematic.
To ease this concern, Mageplaza has developed a supporting extension named Magento 2 Customer Order Number. This module simplifies every change with increment ID with user-friendly admin backend. Therefore, all your wishes for changes to Order number, Invoice number, shipment number, credit memo are satisfactorily achieved.
Highlight features of Mageplaza Custom Order Number
- Customizing Order Number is simple
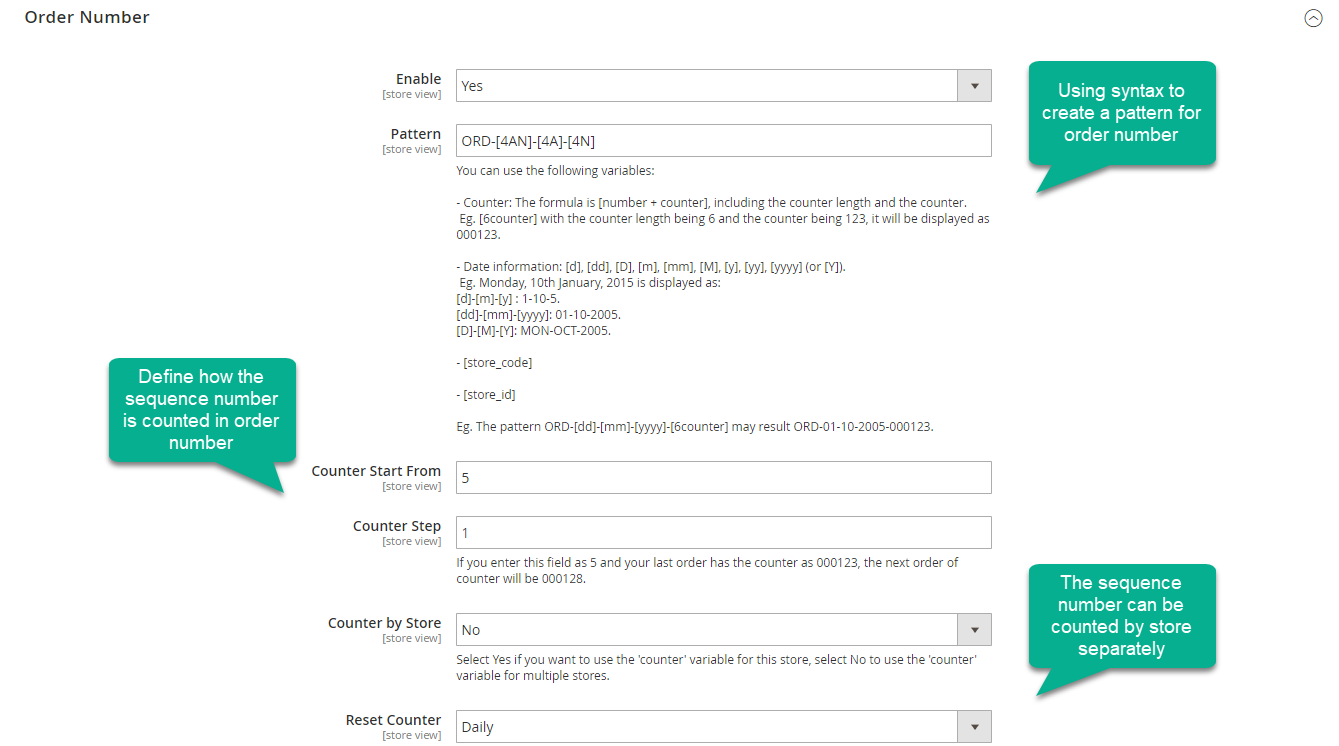
All changes can quickly be made on the backend. The pattern is easily customized by syntax For example: ORD-[5AN]-[5A]-[5N]-[6counter]-[storeCode]-[storeId]-[yy]-[mm]-[dd]-[orderId]. B esides, the initial order ID can be customized by a particular rule, the next order number will be set by a counter step.
Related billing documents including Invoice number, Credit Memo number, and Shipment number can be customized depending on customer order setting.
- Easy to adjust order number pattern
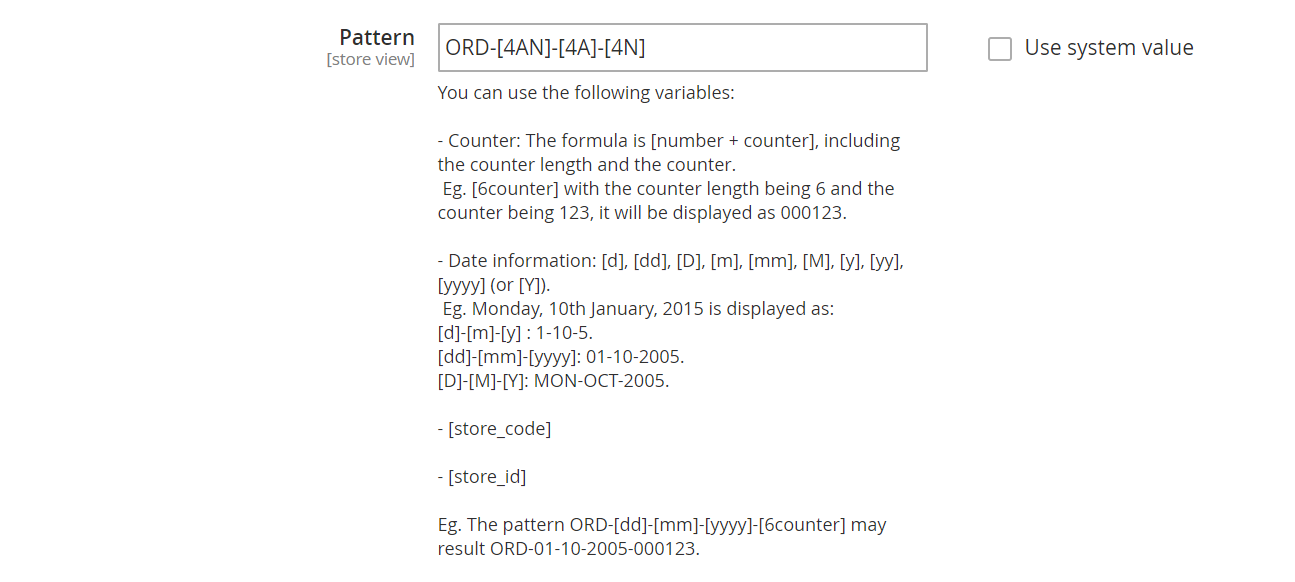
Order number formats are easily build up by syntax, which well supports for tracking the orders. Order number patterns can be sequential, chronological depending on the structure set on the backend. Date can be set format like [yy]-[mm]-[dd], so tracking the order placement date is easy. Also, a sequence number at the end of strings differentiate the order number.
- Create other billing documents depending on order number

From the structure configuration of order number, other billing documents such as invoice, shipment, credit memo number can easily be set up as follows. You just need to change the Prefix of order number with a replaced string for invoice or shipment while the rest of the pattern keeps constant. This function saves a deal of time and helps store owners easily manage the billing system.
- Compatible to PDF Invoice
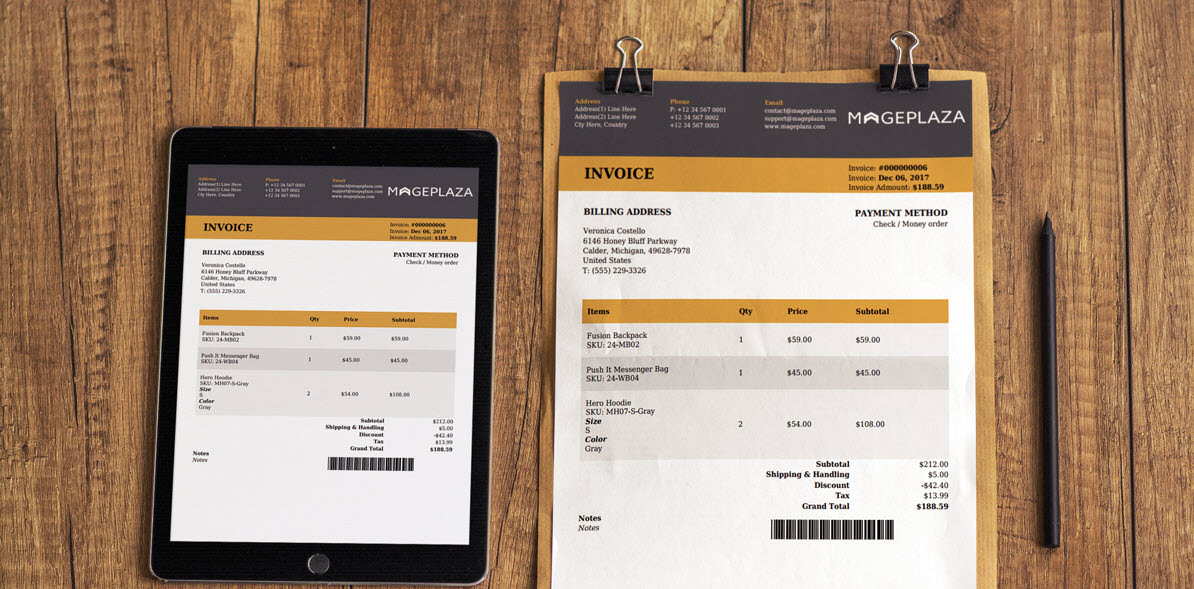
Custom Order Number is fully compatible with Magento 2 PDF Invoice. Order numbers, Invoice numbers, Credit memo numbers and Shipment numbers are displayed accurately.
How to configure this extension in the admin backend?
To configure this extension please go to Login to the Magento Admin, choose Store > Settings > Configuration > Mageplaza Extensions > Customer Order Number.
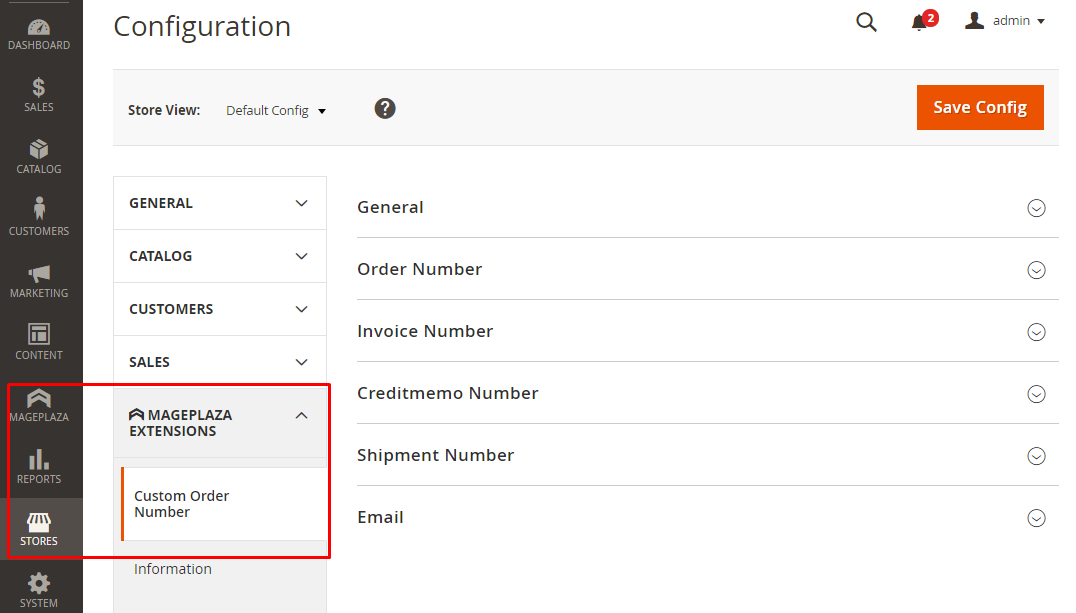
In the General section, choose Yes at Enable box to activate the module.

In the Order Number section, choose Yes at Enable box to activate this function.

Then, you will see some boxes with particular functions as follows:
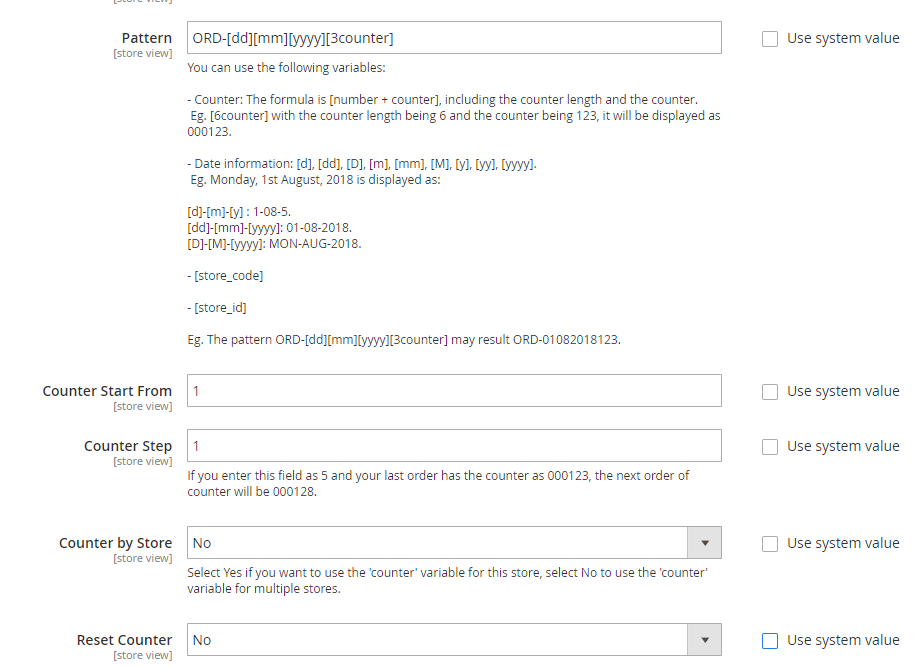
- Pattern: Enter the format for the Order number. For instance, ORD-[store_id]-[yy]-[mm]-[dd]-[2N]-[2counter]. This function only supports some variables as: [store_id], [yy], [mm], [dd], [2N], [2counter], [4AN], [4A], [4N], [store_code], [y], [yyy], [M], [D], [m], [d]
- Counter Start From: Enter the counter using variable [Xdigitscounter]. When the number of digits in this field is less than the number of digits, the ID is automatically added to the number 0 in front. For example, if you enter 11 while the counter variable is set [4counter], the ID will display as 0011.
- Counter by Step: Enter the distance for the number order ID of the next order. For example, if you enter 2, the order ID of next orders will increase by 2 units. If leaving this field blank, the default value is 1 unit.
- Counter by Store: In case you have multiple stores, if you choose Yes, the order ID will be counted separately. For example, store A has an order ID as 20, store B has an order ID as 10. The next order in store B will be 11. If you choose No, the order IDs will be merged and sum up all stores. For example, in the case above, the next order in store B will be 31.
- Reset Counter:
- Reset Counter = Daily: Counter will be reset to the Counter Start From value that is using at 00h daily
- Reset Counter = Weekly: Counter will be reset to the Counter Start From value that is using at 00h the first day of the week
- Reset Counter = Monthly: Counter will be reset to the Counter Start From value that is using at 00h the first day of the month
- Reset Counter = No: Counter will NOT be reset to the Counter Start From value that is using.
- Reset Now Button: Counter will be reset to the Counter Start From value that is using instantly. For example, Counter Start From field is 10000 now, Counter Step is 5. After a long time to order and click on Reset Now, the ID of the next order after resetting will start from Counter Start From + Counter Step values.

Invoice number/ Creditmemo Number/ Shipment number
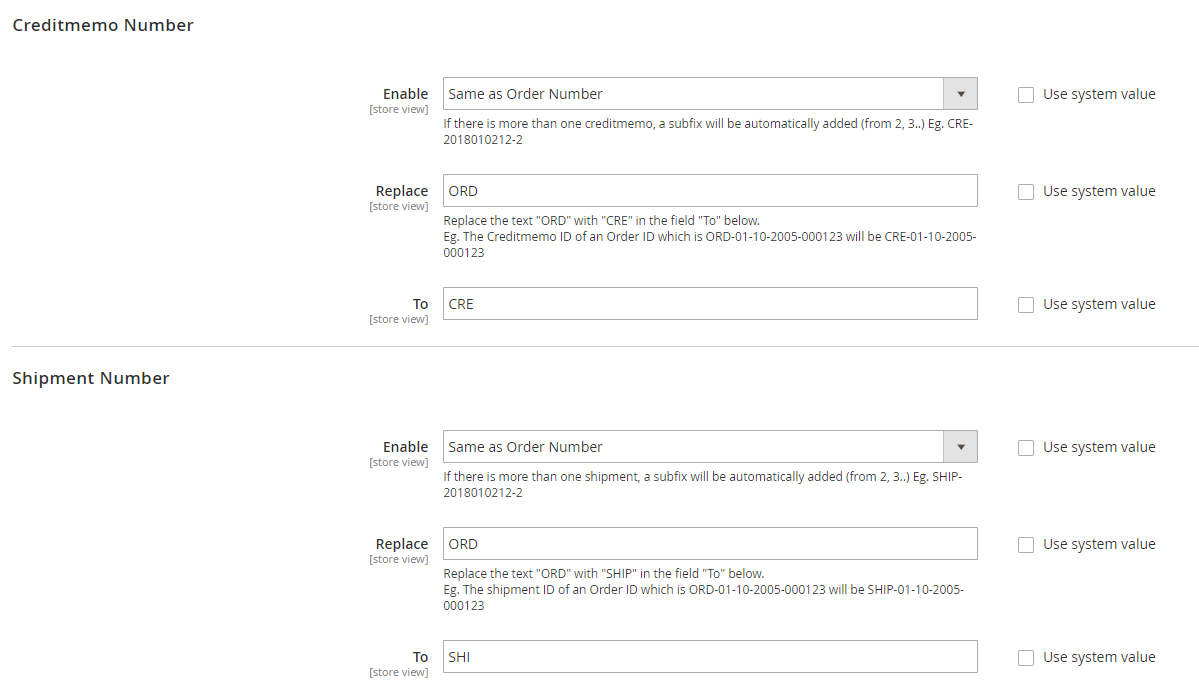
To set up Invoice number/ Creditmemo Number/ Shipment number, you just need to change the prefix of order number formula. An example with an invoice number is as follow:

At the Enable box, please choose option “Same as order number”. At Replace box, type the prefix of order number would be changed. At To box, type the replacement value. For example, Order ID as ORD-01-10-2005-000123 will be the same with Invoice ID as INV-01-10-2005-000123.
The same steps with Shipment and Credit memo number:
How is the frontend displayed after configuration?
After setting the format, the order number will appear in the frontend as below:
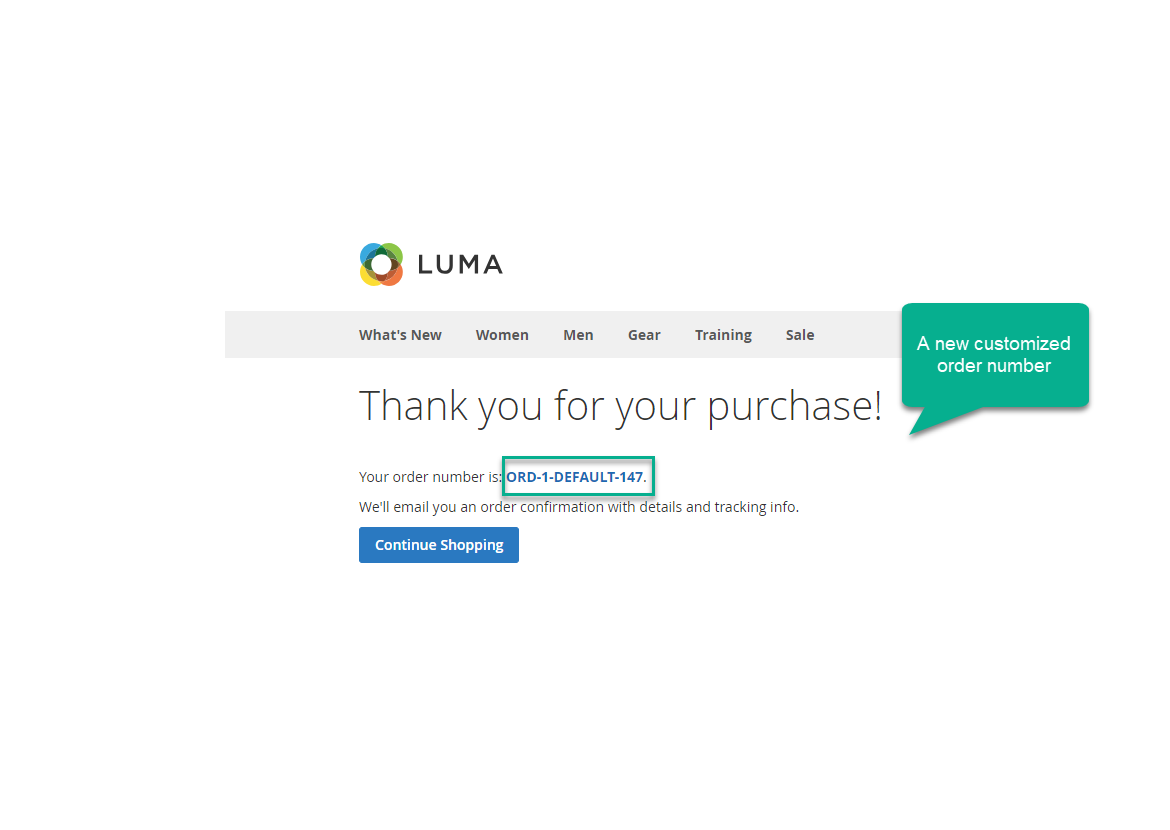
After a purchase is made from your website, the order number ID can be displayed as ORD-1-DEFAULT-147. The rule set by shop owner could be: ORD is the prefix for order number, 1 is store ID, DEFAULT is store code, 147 is the counter.
What is the full-featured list of Custom Order Number?
Now, let’s take a look at all features of this smart extension:
- Enable or disable the extension
- Enable, disable order number, invoice number, credit memo number, and shipment number
- Customize the format of Invoice/Credit Memo/Shipment number using Syntax
- Create the same pattern for Invoice/Credit memo/Shipment number from Order number
- Set the numbering system by using syntax
- Set the counter start
- Set the counter distance and set counter step to run independently by store
- Reset the counter after a configured period
- Reset the counter instantly
- Compatible with Mageplaza PDF Invoice extension
With these amazing features, we believe Mageplaza Custom Order Number will simplify your business management, giving you time to solve current problems and create suitable future strategies.
The bottom line
As a conclusion, customizing increment ID for order number and related billing documents can be done by making modifications in the database, or simply using Magento 2 Custom Order Number by Mageplaza - a simple, effective and safe choice for online store owners. Not only does it save time for you in documents search and order management, but it also builds a more professional image in the customers’ perspective, as well as hides important data. Hence, this is a simple but necessary action for any Magento 2 stores to take. So why not start yours today? We are here to help you during that journey, so please leave a comment or contact us for further support.
Related Topic


