How to create Bundle Products in Magento 2
Vinh Jacker | 03-17-2025

A bundle product indicates customizable product combination that you can build for your own. Each item in the bundle product can be based on one of the product types: Simple Product and Virtual Product, and you can set either dynamic or fixed value for a bundle.
Bundle products enable you to increase sales, clear inventories quickly, and provide customers with more completed solutions. So, why don’t you start creating Bundle Products in Magento 2 today by following this guide?
- What are Bundle Products?
- Differences between Bundle Products and Configurable Products in Magento
- 7 Steps to Create Bundle Product in Magento 2
- A helpful tool to support your Bundle Products in Magento 2
- THINGS TO REMEMBER
- The bottom line
What are Bundle Products?
You can see an example for the bundle product in the following image:
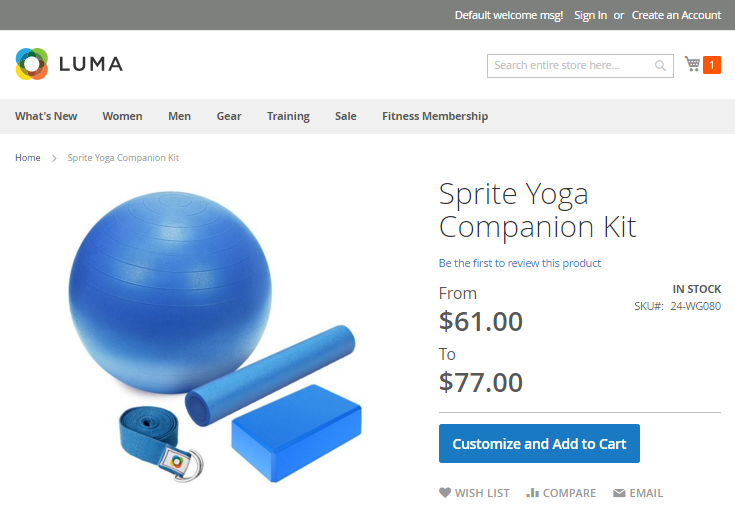
The bundle product is a bit similar to the grouped product in Magento 2 because it is possible to add more items to one product and sell it. However, while your customers cannot choose among many attributes of items in the grouped products according to what they want, they can do it with the bundle products when many options are ready for their choices. Simply put, bundle products are grouped products with build-your-own options.
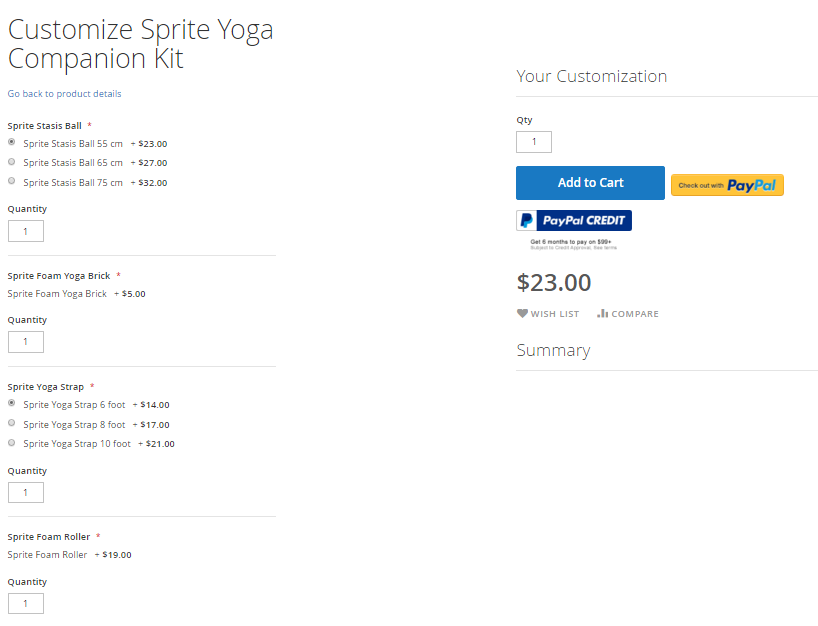
Go to the bundle product detail page, when your shoppers click on “Customize and Add to Cart” button, the selection of options in the bundle will be shown instantly. They can choose only one attribute including SKU, Size, Price or Weight for each option.
Minimum Advertised Price (MAP) is not available for Bundle products with dynamic pricing.
Differences between Bundle Products and Configurable Products in Magento
Bundle products and configurable products are frequently confused due to their shared feature of enabling customer choices, yet they differ in essence.
-
Configurable products: streamline various product versions into a single frontend item, facilitating customer selection without extensive catalog browsing.
-
Bundle products: enable the combination of different items, allowing for diverse levels of customization, including fixed bundles or fully customizable options.
Configurable products suit the sale of variable items like t-shirts and jackets, available in diverse colors and sizes. In contrast, Magento bundle products are ideal for selling assortments, making them ideal for packaged products.
Ex: In the yoga gear market, a customizable product bundle of mats, foam rollers, and gym balls can be created. This allows customers to select their preferred yoga mat design, foam roller style, and gym ball size from preset options before making a purchase.
7 Steps to Create Bundle Product in Magento 2
Creating Bundle Product in Magento 2 as the following steps:
- Step 1: Select the Product Type
- Step 2: Select the Product Template
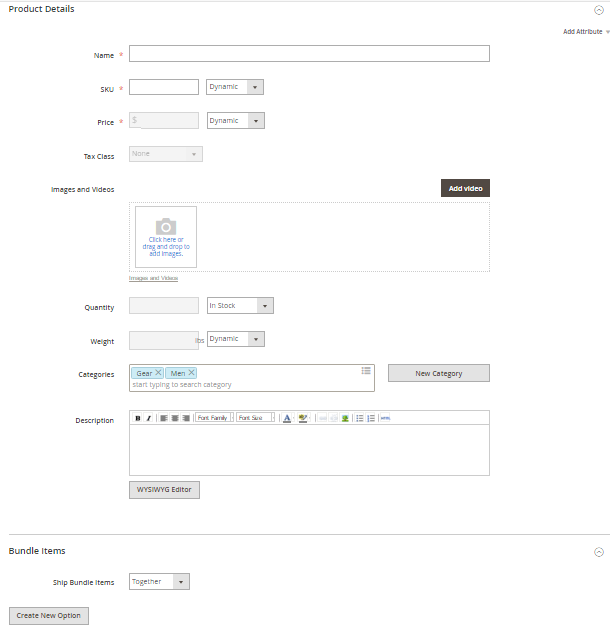
- Step 3: Fill out the Required Fields
- Step 4: Fill out the Remaining Product Details
- Step 5: Add the Bundle Items
- Step 6: Generate the Product
- Step 7: View the Product in Your Store
Step 1: Select the Product Type
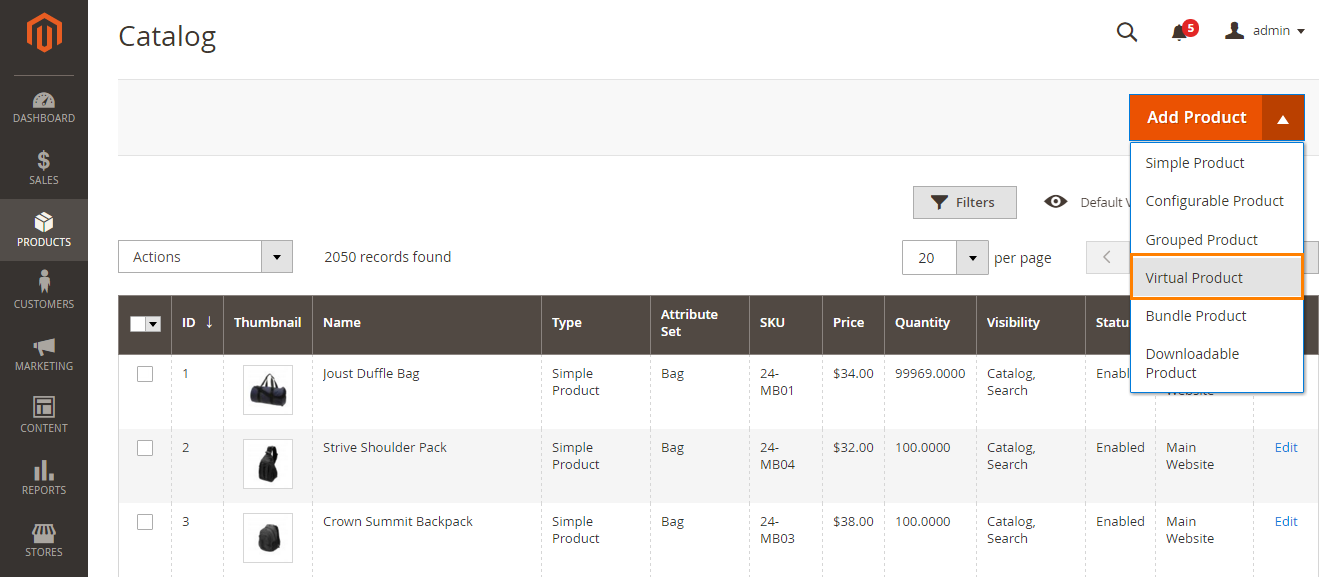
- On the Admin sidebar, click on
Products > Inventory > Catalog. - In the upper-right corner of the
Add Productmenu, selectBundle Product.
Step 2: Select the Product Template
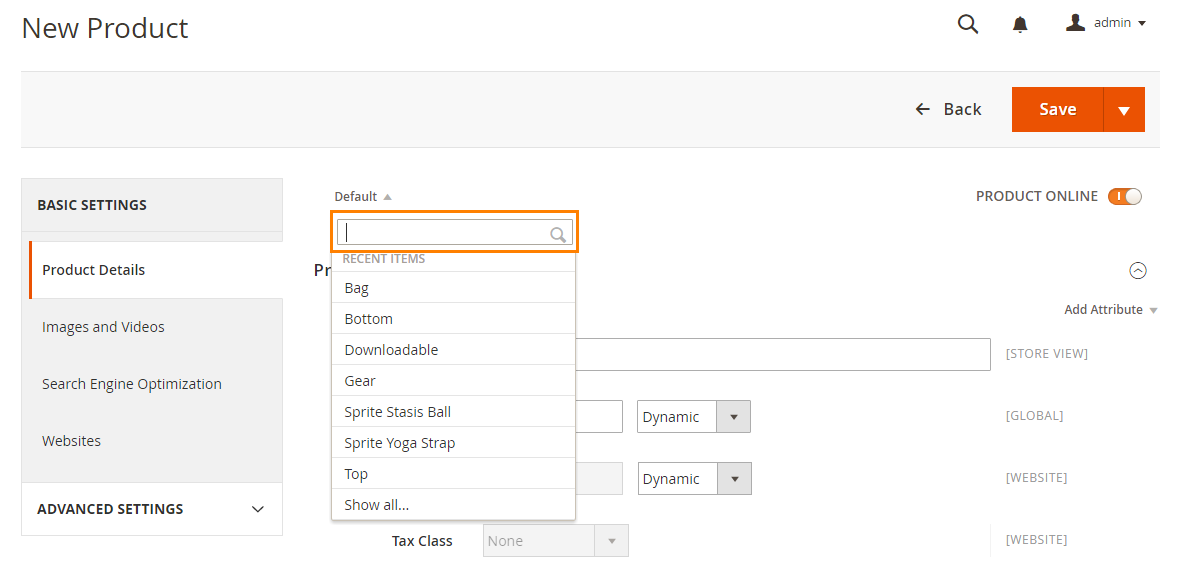
Follow one of two ways to select the product template:
- In the
Searchbox, enter the needed name of the template. - In the list, select one of the templates you want to use
The corresponding form will be shown to configure.
Step 3: Fill out the Require Fields
- In the
Product Detailsection, need to do:- Enter the
Name. - Use the default
SKUfor the product, or offer another value. Then set the type of value to Dynamic or Fixed. - To set the product
Price, need to do:- Choose Dynamic, and leave
Priceblank if you want the price to change according to the options selected. - Choose Fixed, and enter the
Priceif you want to set the price for the bundle.
- Choose Dynamic, and leave
- Enter the

- By now the product has not yet been ready to publish, let switch to the Off for
Product Online. - Click on
Saveto finish this step.
Step 4: Fill out the Remaining Product Details
- To add an image for the product group, follow one of two options:
- Drag and drop an image from your desktop on the
Cameratile in the Images and Videos box. -
In the Images and Video box, click on Camera title and feel free to choose the desired image from the file on your computer.
A placeholder appears until a product image is uploaded.
- Drag and drop an image from your desktop on the
- The
Quantityis unavailable because the product group is made up of the individual product. - To set
Weightfor shipping, follow one of the options:- Choose Dynamic, and leave
Weightblank if you want the price to change according to the options selected. - Choose Fixed, and enter the
Weightif you want to set product weight.
- Choose Dynamic, and leave

- To assign the product to a Category, follow one of the options:
- Type in the
Searchbox to find and select a match. - Click on the
Show Listicon to see the category tree, then click on any available category you want to assign to the product. - Create a new category by entering the
Category Nameand assign to theParent Category, then click onCreate Category.
- Type in the

- Write some product description if you need. Then, click on
Submit. You can also use theWYSIWYG Editorfor additional control.
Step 5: Add the Bundle Items
- In the Bundle Items section, set
Ship Bundle Itemsto Separately or Together. - Click on
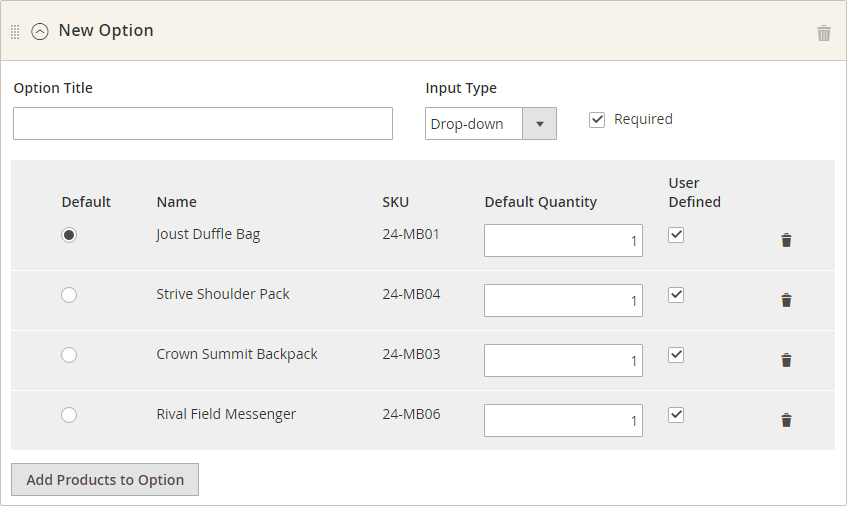
Create New Option, need to do:- Enter an
Option Titleto be used as a field label. - Set Input Type to Drop-down, Radio buttons, Checkbox, or Multiple Select
- To make the field required, mark the
Requiredcheckbox.

- Click on
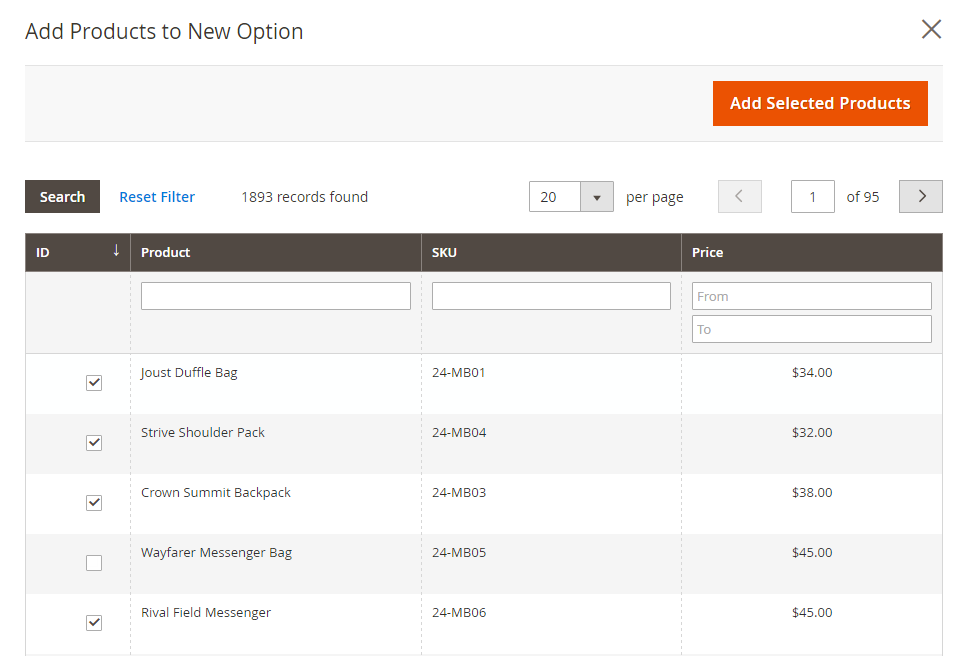
Add Products to Option. Remember to mark the checkbox of each product that you want to include in this option. In case there are many products, apply the list filters and pagination controls to find the needed products.
- Choose one item to be the Default selection.
- In the
Default Quantitycolumn, enter the quantity of each item in the bundle when a customer chooses the item. - You can set the fixed quantity of each item by clearing
Use Definedcheckbox. If you leave it by default, the quantity can be changed.
- Enter an
- Do the same for other items if you want to add more.
- To remove any item from the bundle, click on the
Deleteicon. - Repeat these steps to add as many options as needed in the bundle.
- Click on
Saveto complete.
Step 6: Generate the Product
- Set the Product Online switch to the “On” position whenever you are ready to publish the product in the catalog.
- Then
Save & Closeon theSavemenu.

Step 7: View the Product in Your Store
On the Admin menu, choose Customer View.

A helpful tool to support your Bundle Products in Magento 2
To relieve the decision making pressure, besides the Bundle Products option, shoppers may need extra recommendations to consider. That is why you should help them by presenting suggestions via Frequently Bought Together extension.
- Allow native similar goods to be displayed on the product page
- Allow customers to choose or reject similar products
- Change the characteristics of linked items
- Support Add items to carts or Wish lists
- Works perfectly with Auto Related Products, Who Bought This Also Bought
Frequently Bought Together for M2
Encourage additional purchases by suggesting relevant products often bought together with their chosen items
Check it out!THINGS TO REMEMBER
- Store admins can create a new bundle product by themselves.
- Bundle items can be simple or virtual products without custom options.
- The Price, SKU and Weight of the bundle product can be either “Fixed” or “Dynamic”.
- The Quantity can be a preset or user-defined value.
- The items in the bundle product can be shipped together or separately.
- You can give extra recommendations to customers by using the Frequently Bought Together module by Mageplaza
The bottom line
Creating Bundle Products in Magento 2 can be a great tactic for your online store, as not only does it bring more revenue to you, but it also helps customers release the burden of making purchase decisions. Hopefully now you can complete this setting with ease. If you have any problems, contact us for further support. Other product creation tutorials can be found in the links below.
Creating Products Series in Manage Store:


