How to Enable Flat Catalog in Magento 2
Vinh Jacker | 06-17-2016

For online stores, managing the product catalog is difficult when the database is large. Flat Catalog will help you speed up your product collection instead of managing the catalog data in many tables by the Entity Attribute Value (EAV). When your store applies the Flat Catalog, new tables are generated on the fly and will store all necessary data related to your products or categories.
The flat catalog is updated automatically and quickly every minute or according to your cron job, regardless of whether your catalog contains more than 500,000 SKUs. Apparently, the flat catalog can also speed up the processing of catalog and cart price rules without any difficulties. Thanks to this, customers’ experience will improve, and the bounce rate will be reduced quickly.
In this tutorial, I will guide you on how to enable the flat catalog in an effective way.
2 Steps to Enable Flat Catalog in Magento 2
Step 1: Activate the Flat Catalog
You can activate the flat catalog for categories and products:
- On the Admin Panel,
Stores > Settings > Configurations. - On the left panel, under
Catalog, selectCatalog. - Open the
Storefrontsection,- Choose Yes in the
Use Flat Catalog Categoryfield. - Choose Yes in the
Use Flat Catalog Productfield.
- Choose Yes in the

Save Configto complete.- When you see a system message about the cache update, tap the Cache Management link to flush the cache.

Step 2: Check the Results
Now, let’s check how it is shown on the frontend:
Method 1: Check the Results for a Single Product
- On the Admin Panel,
Products > Inventory > Catalog.- Choose the row in the Inventory list to edit the corresponding product.
- In the
Namefield, insert the text _DEMO to the product name.
- Click on
Save. - Open the home page on the new brower tab, you can check the results:
- Search the item you edited.
- Use the navigation to browse to the product under its assigned category.
To make sure the results are correct, let refresh the page and the change will be displayed with your cron job schedule.
Method 2: Check the Results for Multiple Products
- On the Admin Panel,
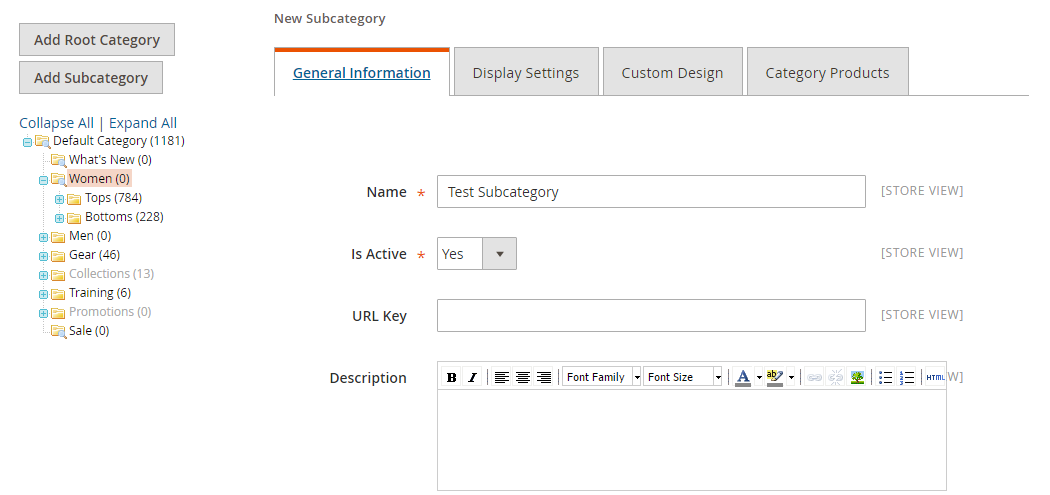
Products > Inventory > Categories. - In the upper-left corner, choose the
Store Viewto display, you can set for all store views or a specific store view as you need. - Choose an existing category from the category tree.
- Click on the
Add Subcategorylink, and do as the following:- Enter the “Test Category” for the
Name. - Choose Yes for
Is Activefield. Save Categoryto save the settings.
- Enter the “Test Category” for the

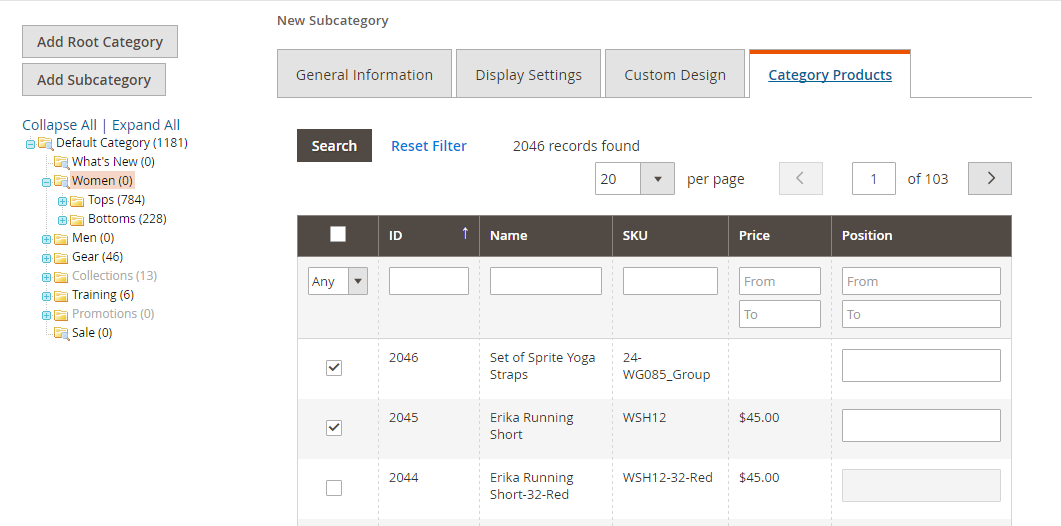
- On the
Category Productstab, clickReset Filterlink to make all products visible. - Mark the checkbox of the products you want to add to the new category, then
Save Category.

- Open the home page on the new browser tab to browse to the category you added by the store navigation.
To make sure the results are correct, refresh the page and the change will be displayed with your cron job schedule.
Final words
That’s how you can Enable Flat Catalog in Magento 2. Storing all information in an additional table can give you an opportunity to improve product catalog loading speed and customer experience. If you want to limit customers’ views and actions on specific catalogs, please refer to the Catalog Permissions extension. You can contact us if you still have any questions, we are always ready to help.


